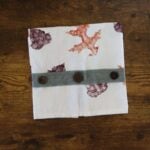
DIY Leaf Stamped Tea Towel

Bring a touch of nature indoors with this DIY leaf stamped tea towel project. It’s an easy, inexpensive way to celebrate the stunning fall colors we all love. Using real leaves and a little paint, you can turn an ordinary tea towel into something beautifully unique — a true piece of handmade seasonal art.
Just like my DIY fabric pumpkin and rag tie fall garland, this project brings those cozy autumn vibes into your home without spending much at all. It’s quick, fun, and a great way to get creative with what you already have on hand.
Let’s talk about this project
This project takes the beauty of fallen leaves and turns them into colorful art for your home. You’ll use real leaves as natural stamps, pressing their delicate details into soft tea towels. The result? A simple, rustic piece you can use in your kitchen, line a bread basket with, or give as a heartfelt handmade gift to someone you love.
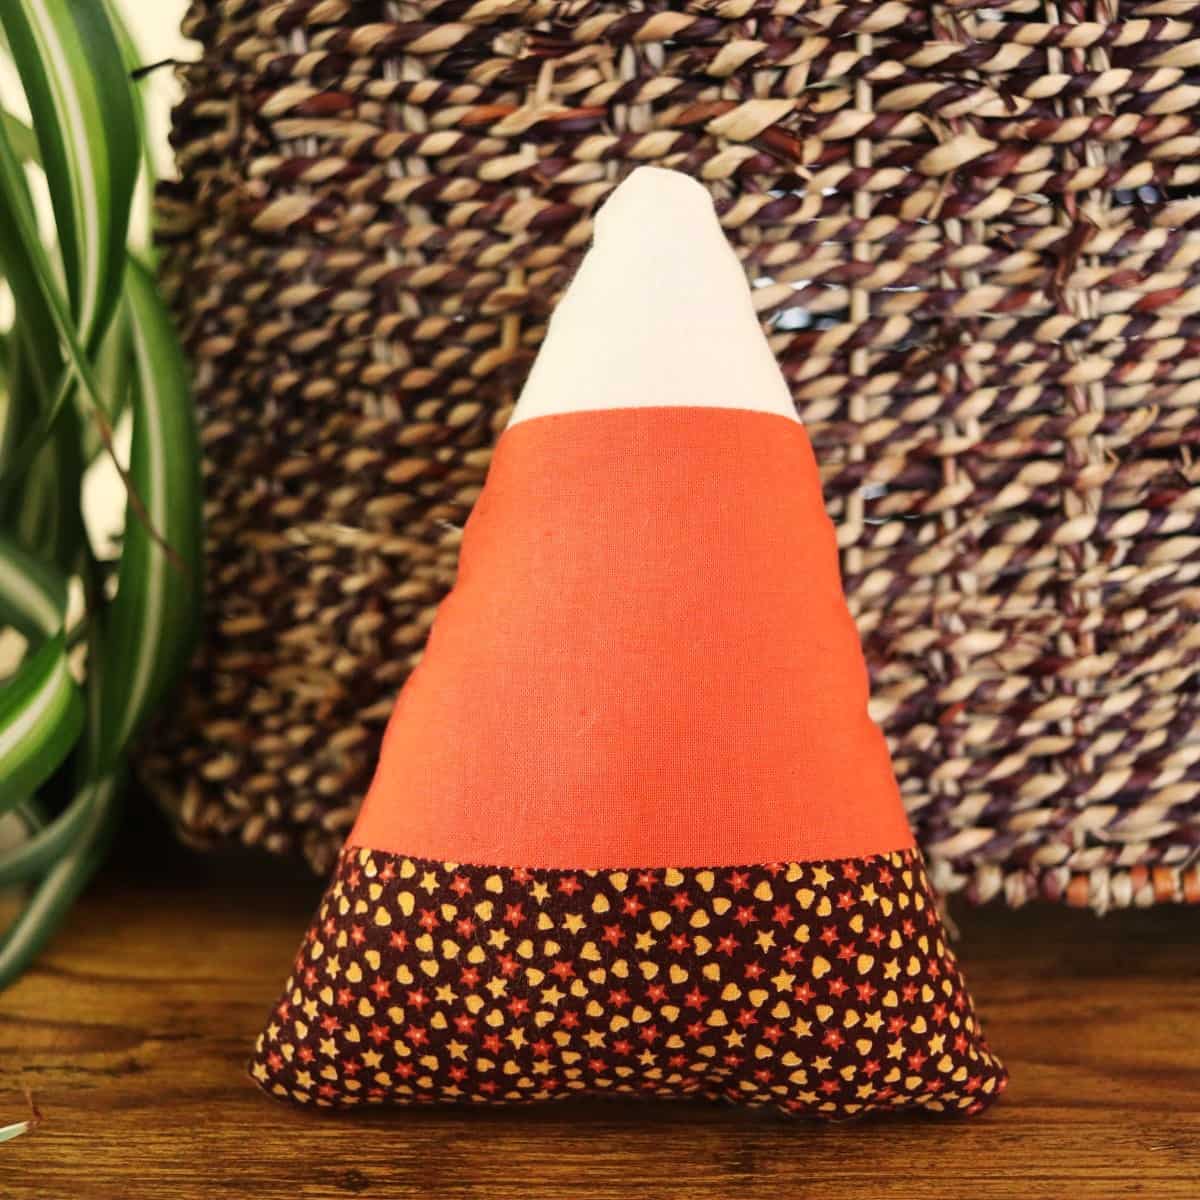
I made these towels to use in my own kitchen, and they turned out so lovely that I’m already planning to make more for gifts. They’re the kind of project that looks charmingly handcrafted, takes very little time, and always reward you with a big smile when you give them to someone — much like my DIY candy corn stuffies.
Materials you’ll need
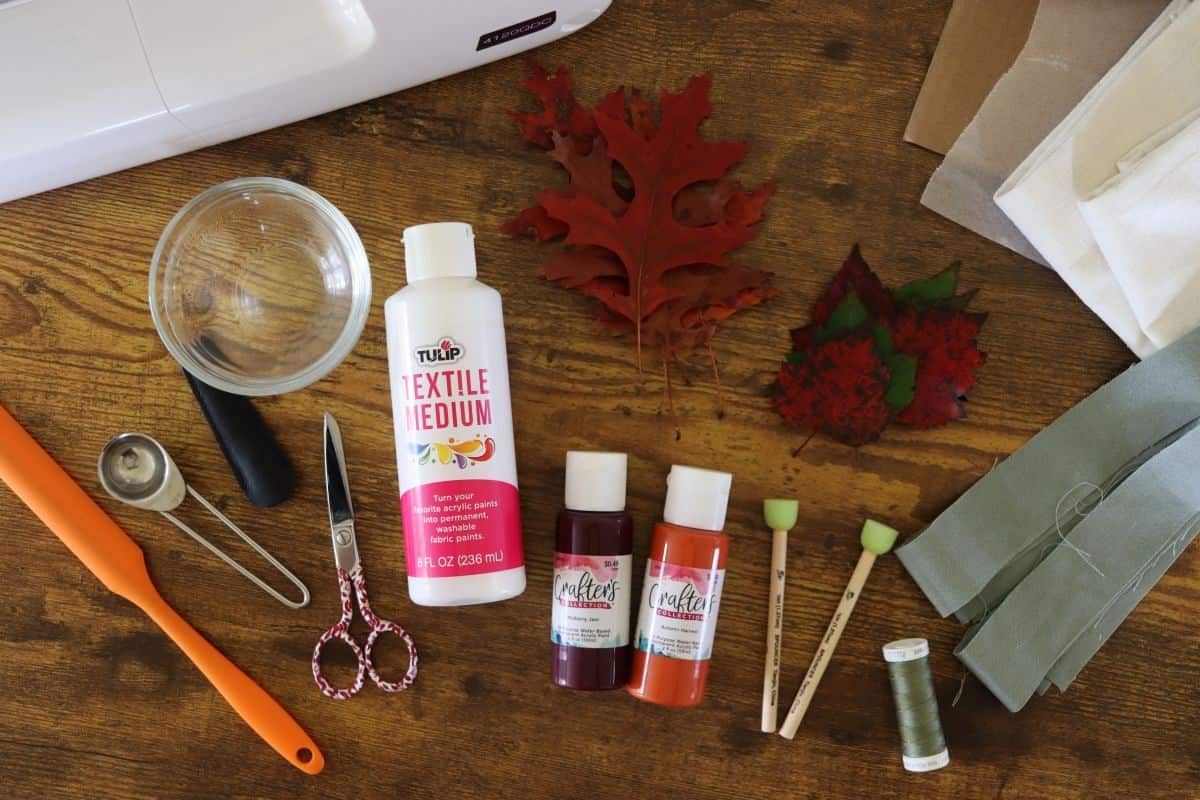
- Leaves: Gather freshly fallen leaves that are the right size for your design. Flat leaves with strong vein patterns work best.
- Craft paint: Inexpensive and easy to find. You’ll need to mix it with fabric medium for durability. Craft paint comes in a wide range of colors, perfect for mimicking the reds, golds, and browns of fall.
- Fabric medium: It helps the paint properly bond to the fabric when you’re using craft paint. You can skip it if you’re using fabric paint instead, but finding the exact colors you want in fabric paint can be a bit tricky.
- Tea towels: Choose a cotton-linen blend for the best print results. This fabric combination absorbs the paint well and holds up beautifully through use and washing.
- Waxed paper: Protects your surface and catches any bleed-through as you press the leaf imprints onto the fabric.
- Cardboard: Adds an extra layer of protection under your workspace.
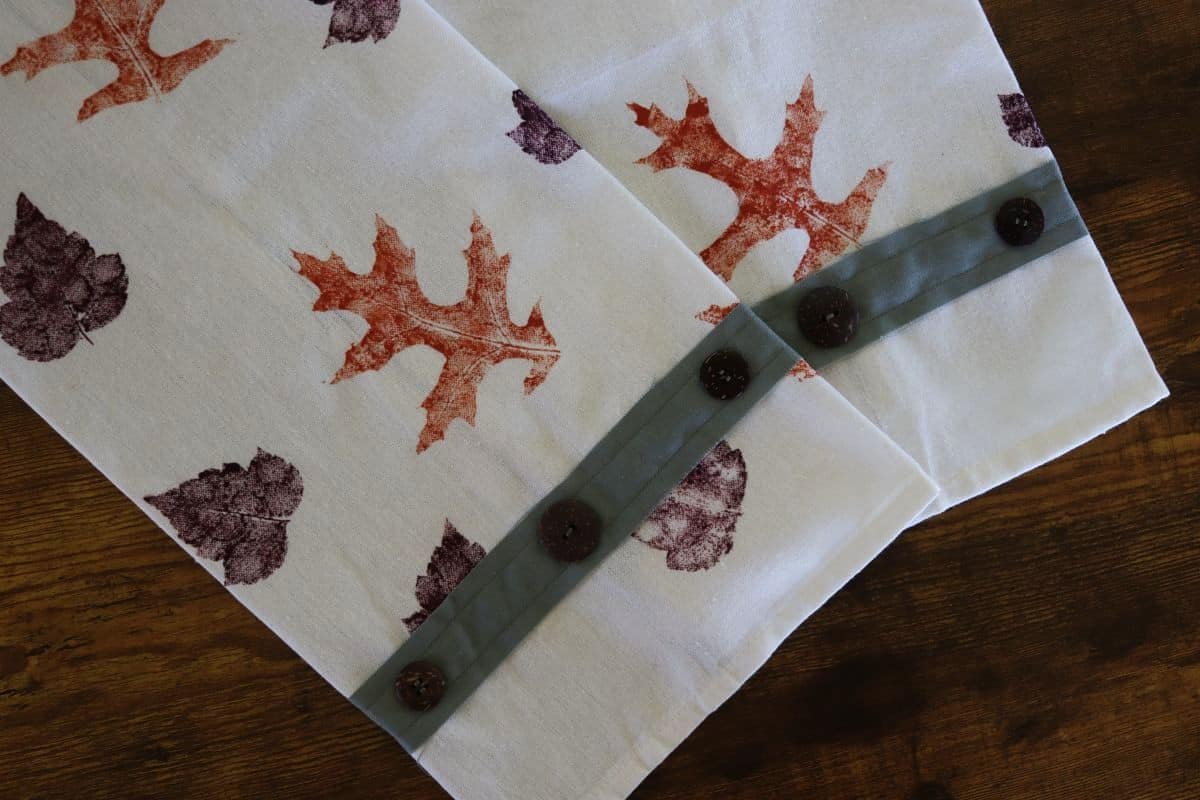
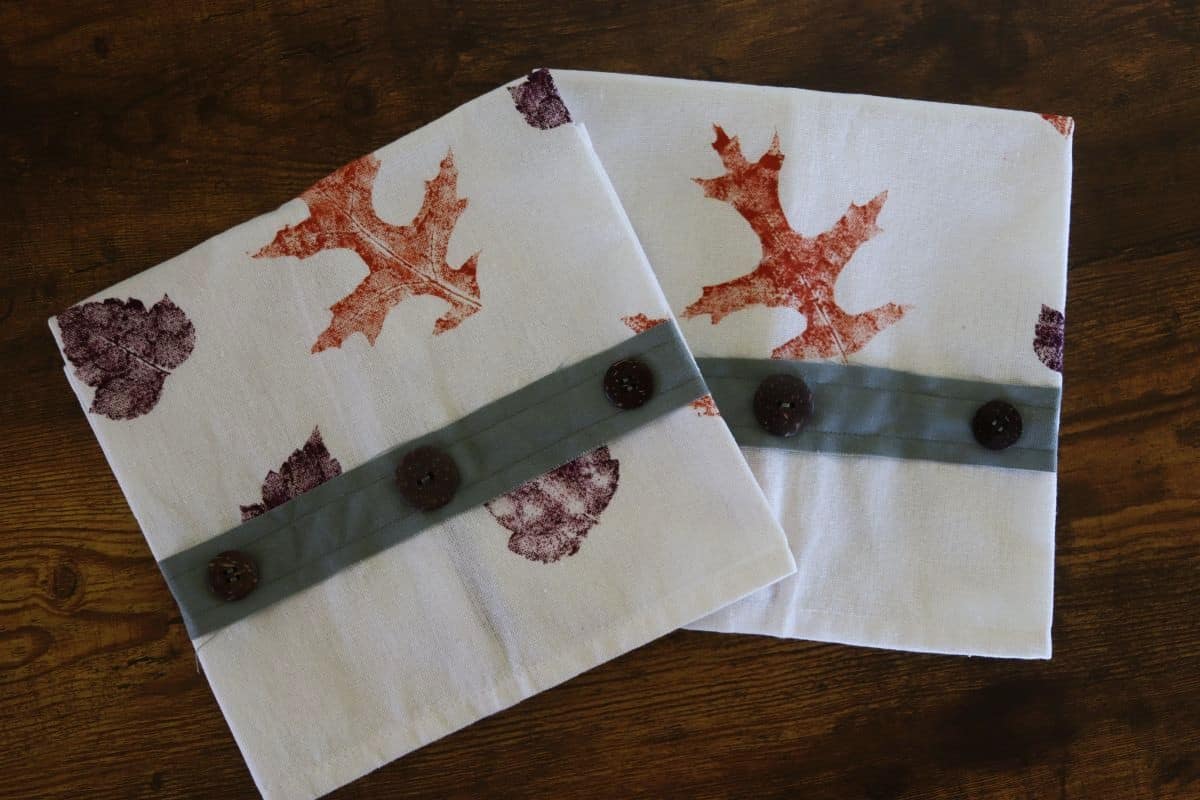
- Decorative trim: Ribbon, lace, or even fabric strips all work beautifully. I chose to use unhemmed fabric strips so they will fray slightly with each wash, giving the trim a rustic, lived-in edge. When I made these towels, I added a few buttons too — just for a touch of extra charm.
- Thread: Match your thread to the trim for a subtle finish, or use a contrasting color like I did when sewing my fabric stuffed bunnies to add a fun accent.
Equipment you’ll need
- Mixing dishes: For combining paint and fabric medium.
- Measuring spoon: Helps you get the ratios of the paint and medium mixture just right.
- Spatula: For scraping and stirring the paint mixture.
- Small foam paint brush: To gently dab paint onto the leaves before pressing.
- Sewing machine: For attaching any decorative trim.
- Scissors: To cut trim or fabric borders.
- Measuring tape: For ensuring trim is even across the towel.
How to make DIY leaf stamped tea towels
There’s something so satisfying about watching those colorful leaf patterns come to life on tea towels. Making them is simple — and the process is every bit as enjoyable as the result.
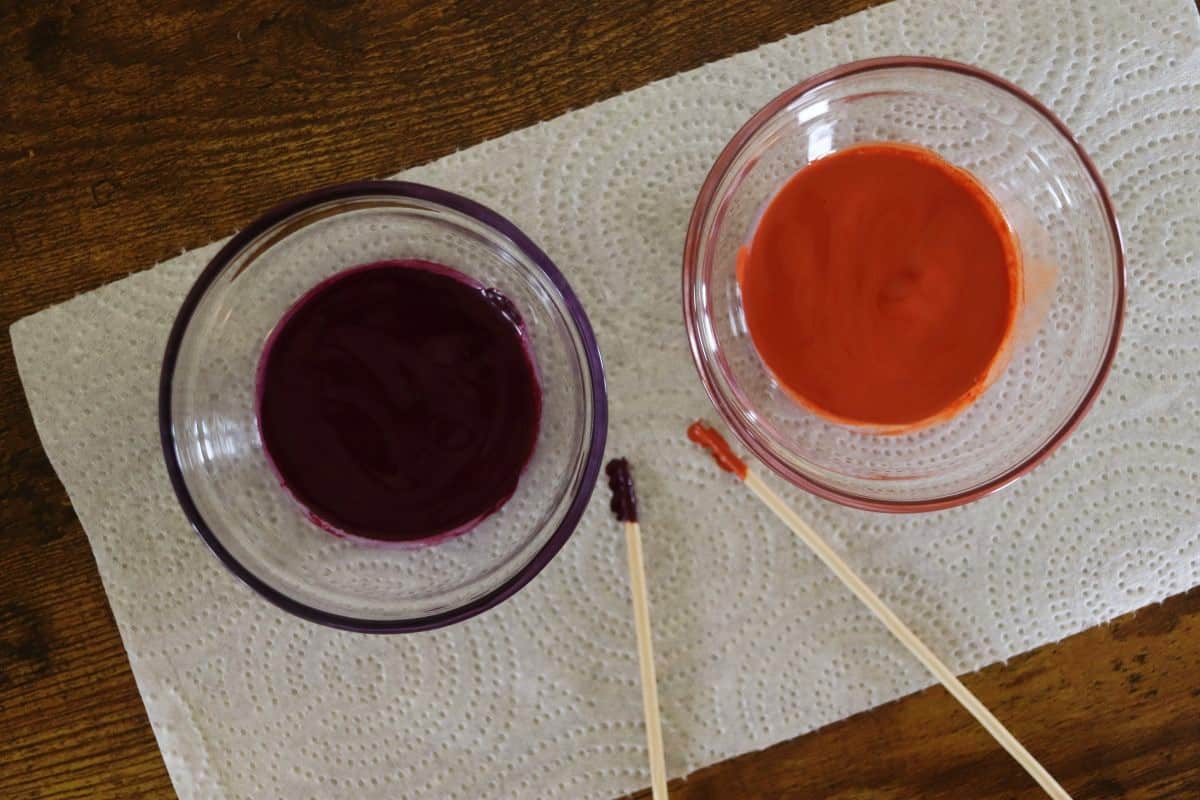
Step 1: Measure and mix the craft paint and fabric medium.
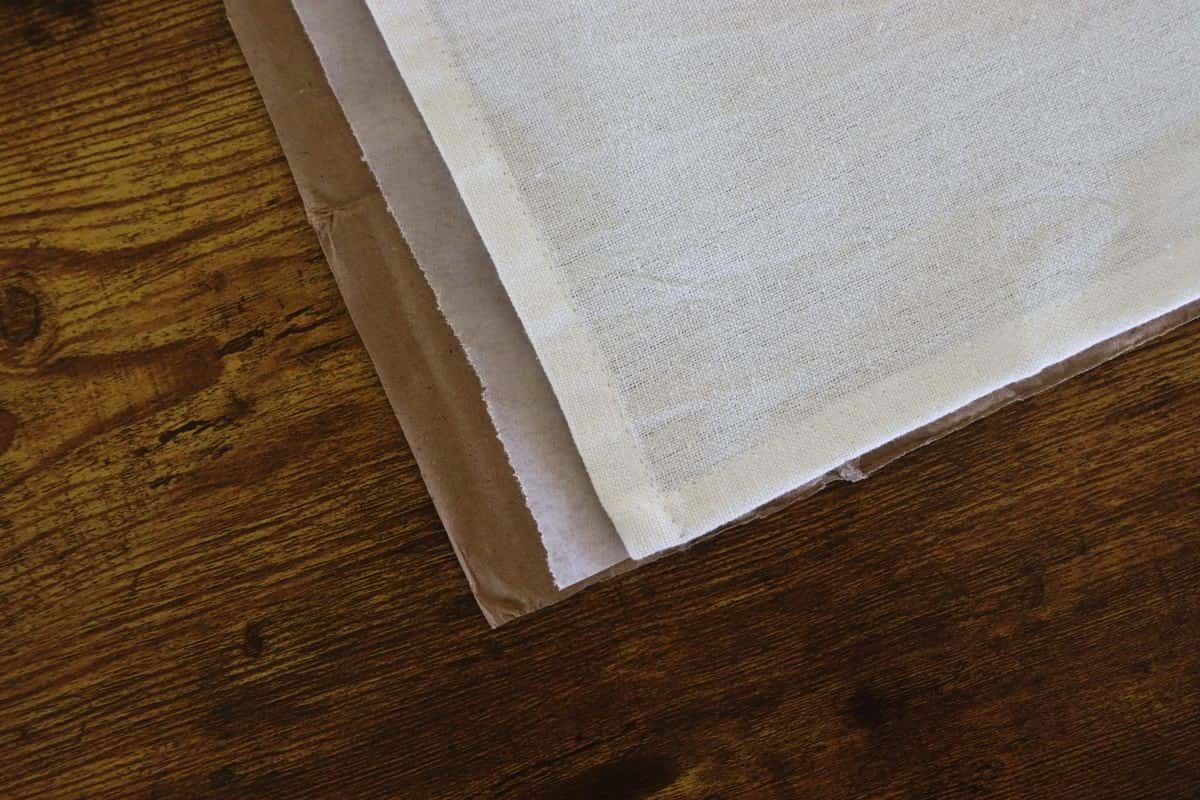
Step 2: Lay cardboard on your work surface, cover it with waxed paper, and then place the tea towel on top.
Would you like to save this post for later?
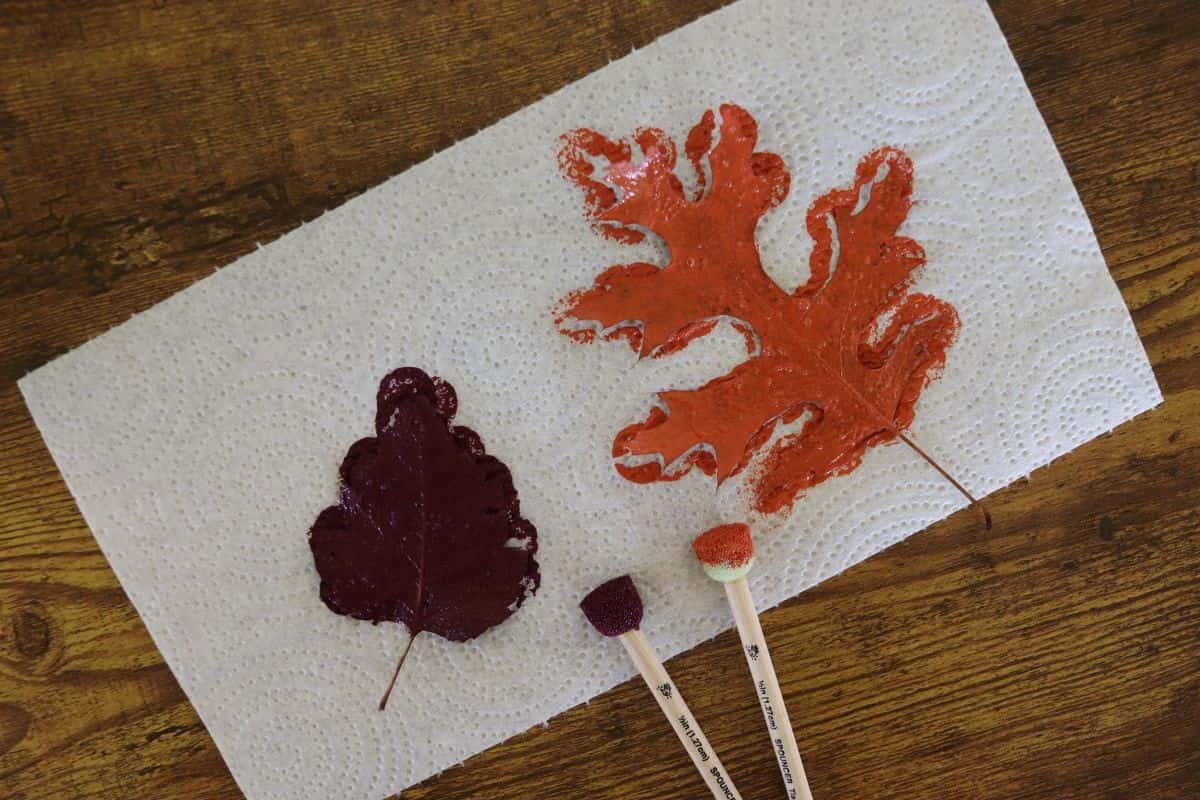

Step 3: Lightly coat the underside of each leaf with the paint mixture.
Step 4: Position painted side down on the towel, cover with waxed paper, and gently press with your fingers.

Step 5: Carefully lift the leaf — you can reuse it for another print.
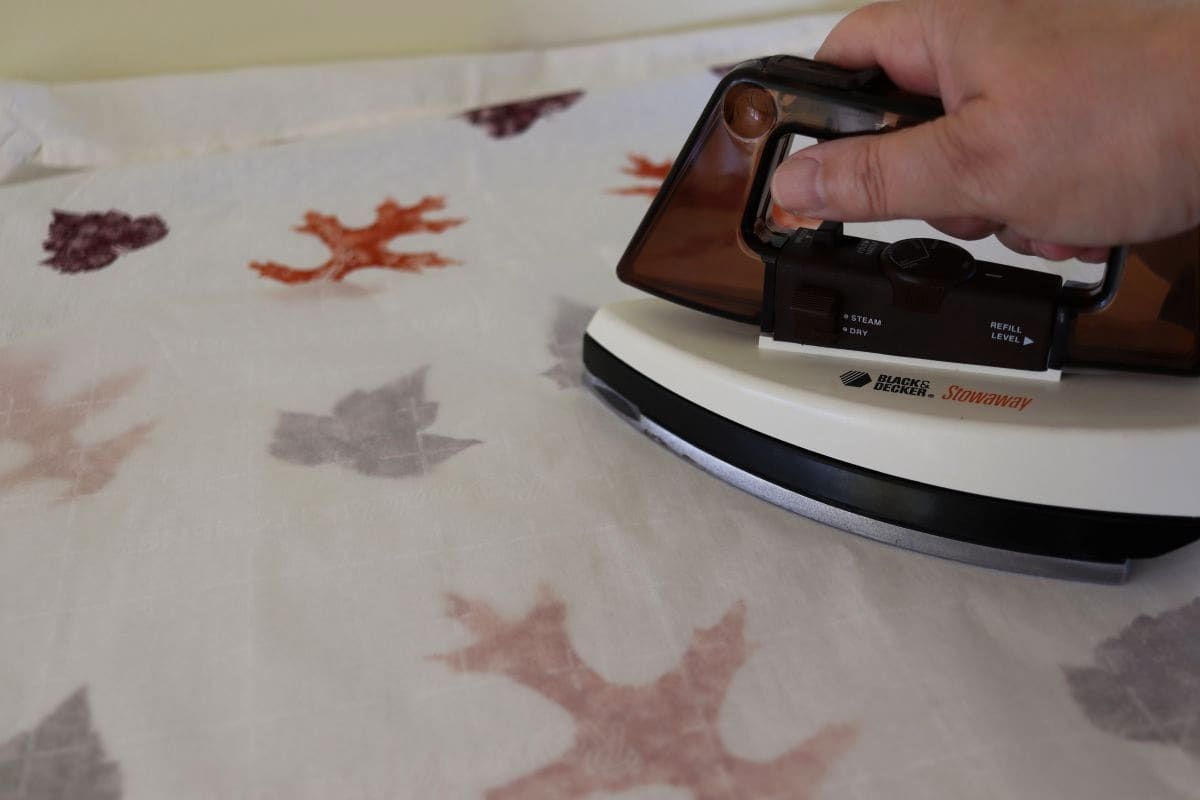
Step 6: Let dry for 24 hours, then heat set according to the fabric medium’s instructions.
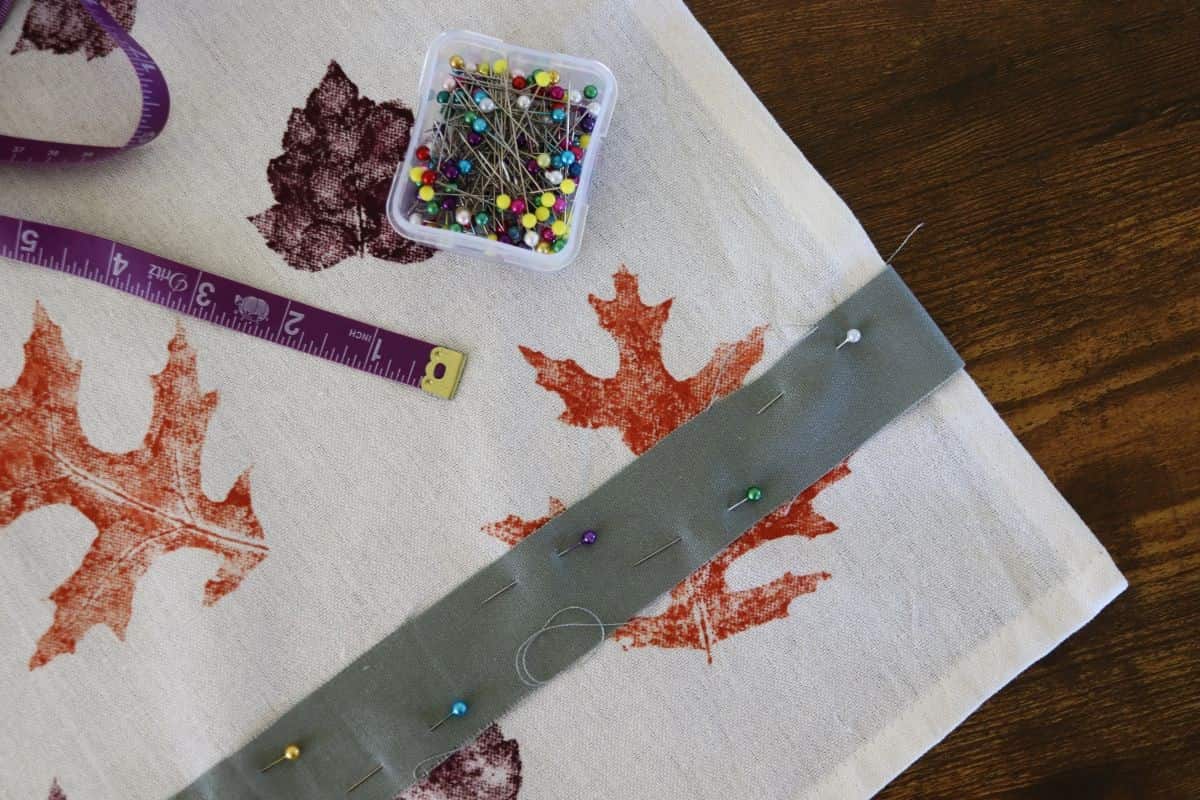

Step 7: Pin the decorative trim to the bottom edge of the towel.
Step 8: Sew the trim in place.
You’ll find more detailed step-by-step instructions in the how-to card below, which you can also print for your convenience if you’d like.
Diane Gail’s tips for success
- Prewash your towel: Wash and dry the towel before stamping so the prints won’t shrink or become distorted later.
- Iron before stamping: Smooth fabric is essential for clean, even leaf imprints — just like it’s important, to ensure that the front and back align neatly, when making my DIY Halloween flag banner.
- Paint the underside of the leaves: The veins are more defined there, giving a clearer and more detailed leaf impression when pressed onto the fabric.
- Avoid curled leaves: If they start to curl, soak them overnight in water and pat them dry before using the next day.
- Measure carefully for trim: Measure from the towel’s bottom edge, all the way across, to ensure the trim runs perfectly straight across the piece.


DIY Leaf Stamped Tea Towels
Equipment
- small mixing dishes
- measuring spoon
- Spatula
- small foam paint brush
- Scissors
- Measuring tape
- Sewing machine
Materials
- freshly fallen leaves
- craft paint color(s) of your choice
- fabric medium
- tea towel cotton-linen blend
- waxed paper
- cardboard
- decorative trim ribbon, lace, or fabric strips
- thread to match trim
Instructions
- Measure and mix paint and fabric medium: Combine craft paint and fabric medium according to the instructions on the medium's bottle, stir until smooth and fully blended.
- Prepare your workspace: Lay a piece of cardboard on your work surface, cover it with waxed paper, and place the tea towel on top of it to prevent paint bleed-through as you stamp the leaves on it.
- Paint the leaves: Lightly coat the underside of each leaf with the paint mixture, placing a paper towel beneath to catch any excess paint.
- Transfer the leaf print: Carefully place the painted side of the leaf onto the towel, cover it with waxed paper, and gently press with your fingertip without shifting.
- Reveal your print: Peel the leaf away slowly to reveal the stamped impression. Each leaf can be reused several times before discarding it.
- Let the paint dry: Allow the towel to dry for 24 hours, then heat-set the paint following the instructions on your fabric medium bottle.
- Add decorative trim: Sew on ribbon, lace, or fabric strips for a rustic finish, adding buttons or other details for extra charm.
- Display or gift: Use the finished towel in your own home, or wrap one up as a handmade gift for someone special.
Notes
- Pre-wash and dry: Wash and dry the tea towel before stamping to prevent shrinkage after the design is set.
- Iron first: Smooth fabric ensures crisp, even leaf imprints — just like when aligning the front and back pieces of my DIY Halloween flag banner.
- Use the underside of the leaf: The veins leave a stronger, more detailed impression on the towel surface.
- Avoid curled leaves: If leaves dry before use, soak them in water overnight and pat dry completely before painting.
- Measure for trim placement: When adding decorative trim, measure from the towel’s bottom edge for even placement across the full width.


I absolutely love this project — it’s such a relaxing way to spend a little time and bring a touch of autumn color indoors. The finished towels make me (and my kitchen) feel warm and cozy every time I see them hanging up!
~ Diane Gail