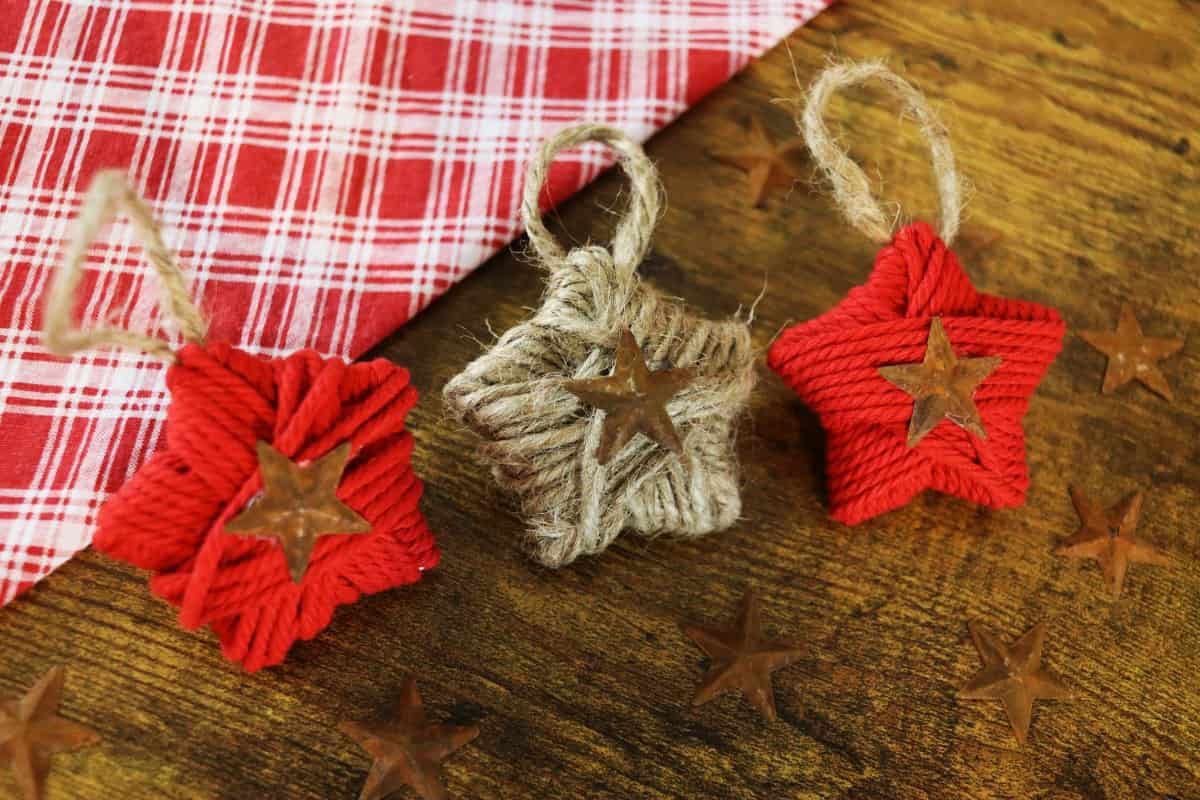
Twine Wrapped Star Ornament Tutorial

This twine wrapped star ornament tutorial walks you through a simple, rustic holiday craft you can make in just minutes. With a bit of cord, a cardboard star, and some glue, you can create a charming handmade ornament that fits beautifully into any Christmas décor.
If you’re looking for more great Christmas ornaments to adorn your tree or top your gifts, give my tree-shaped twine ornament, simple cookie cutter ornament, DIY felt bird ornament, or gingerbread salt dough ornament a try next.
Let’s talk about this project
This is one of those relaxing little projects that comes together quickly, yet still gives you that warm, handmade look we all love for the holidays. The process is simple — just wrapping cord around a sturdy cardboard star — but the finished ornament has a surprisingly polished look once all the wraps fall into place. It’s the kind of piece that fits beautifully into your collection of winter crafts and adds the sweetest touch to seasonal décor too.
What makes this twine wrapped star ornament especially satisfying is how neatly the shape comes together as you work. With a well-cut template and a steady hand, the cord naturally settles into each point of the star, creating crisp edges without much effort on your part. It’s an easy craft for older kids who can safely handle a glue gun, and it offers a peaceful moment for anyone who wants to slow down and enjoy making something meaningful for their Christmas celebration.
Materials you’ll need
- Cardboard: Provides a sturdy base for the star shape. Choose a sturdy piece that will hold up well as the cord is wrapped around each point.
- Twine or cord: Wraps neatly around the star and creates the soft, rustic look that makes this ornament so appealing.
- Hot glue sticks: Secures all starting and ending points so the wraps stay tight over time.
- Small metal star or wooden button: A simple embellishment that adds a finished look to the ornament and gives it that handcrafted charm.
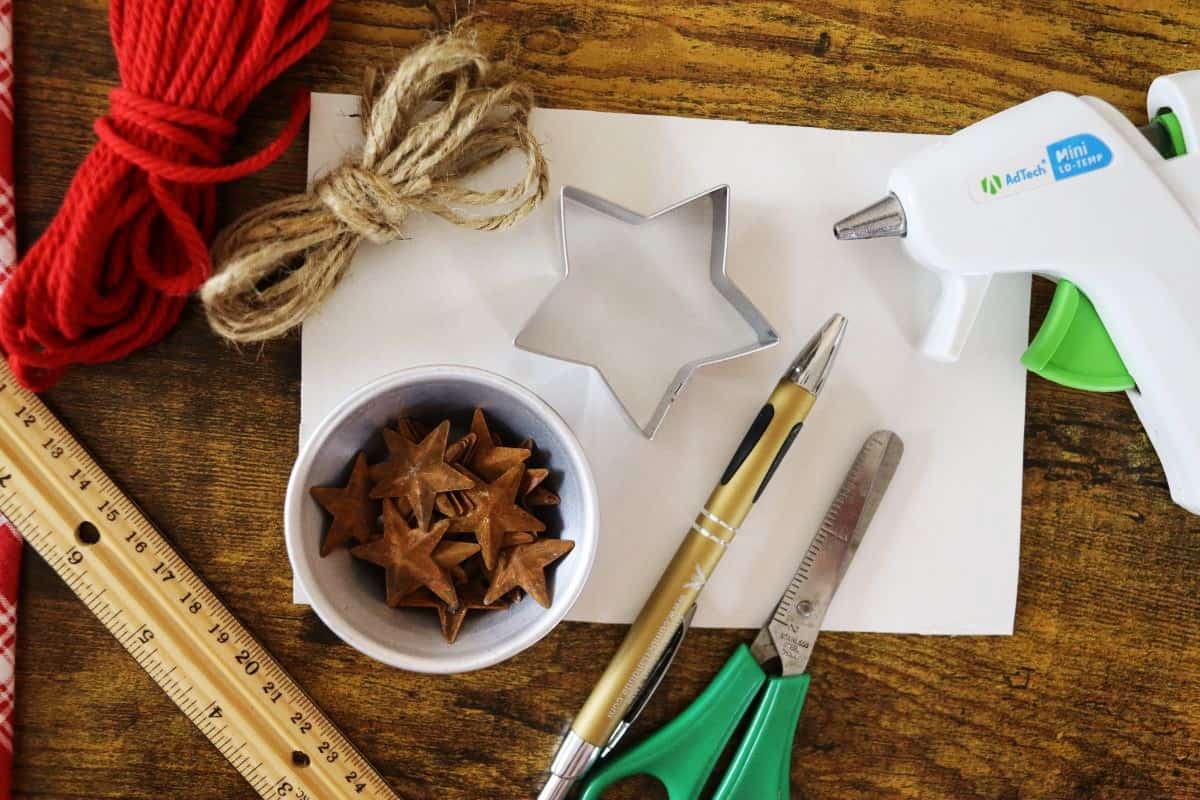
Equipment you’ll need
- Star-shaped cookie cutter (optional): Makes it easy to trace consistent star shapes quickly, especially if you’re making multiple ornaments.
- Pen or pencil: Used to trace the star outline onto the cardboard before cutting.
- Craft scissors: Cuts the cardboard cleanly so the edges and points of the star stay crisp.
- Ruler: Helps you measure the hanger and keep your proportions even from one ornament to the next.
- Hot glue gun: Secures the cord, hanger, and embellishment so everything stays firmly in place.
How to make a twine wrapped star ornament
This little project comes together quickly, but it’s worth working through each step with a steady, relaxed pace. As you wrap, you’ll see the star shape tighten and smooth itself into a lovely handmade ornament.
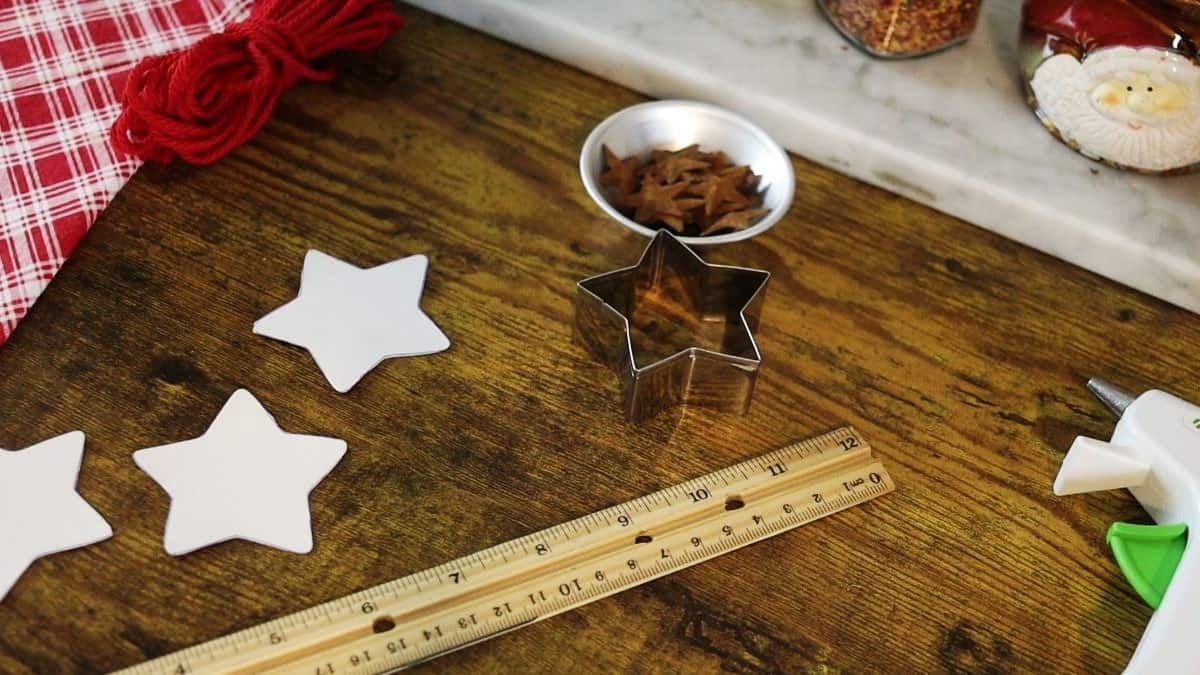

Step 1: Create the star template.
Trace a star shape onto cardboard using a cookie cutter, or draw it by hand, then cut out one star for each ornament you plan to make.
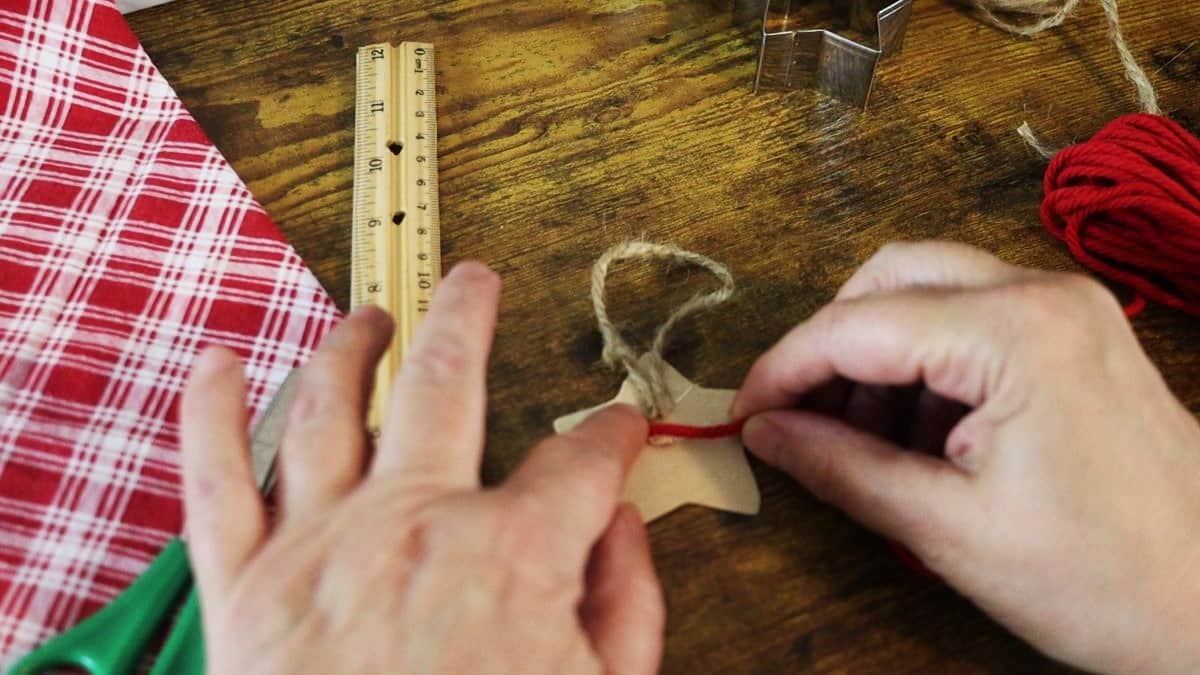
Step 2: Add the hanging loop.
Cut a piece of cord, form a loop, and glue both ends to the back of the star to create the hanger.
Would you like to save this post for later?

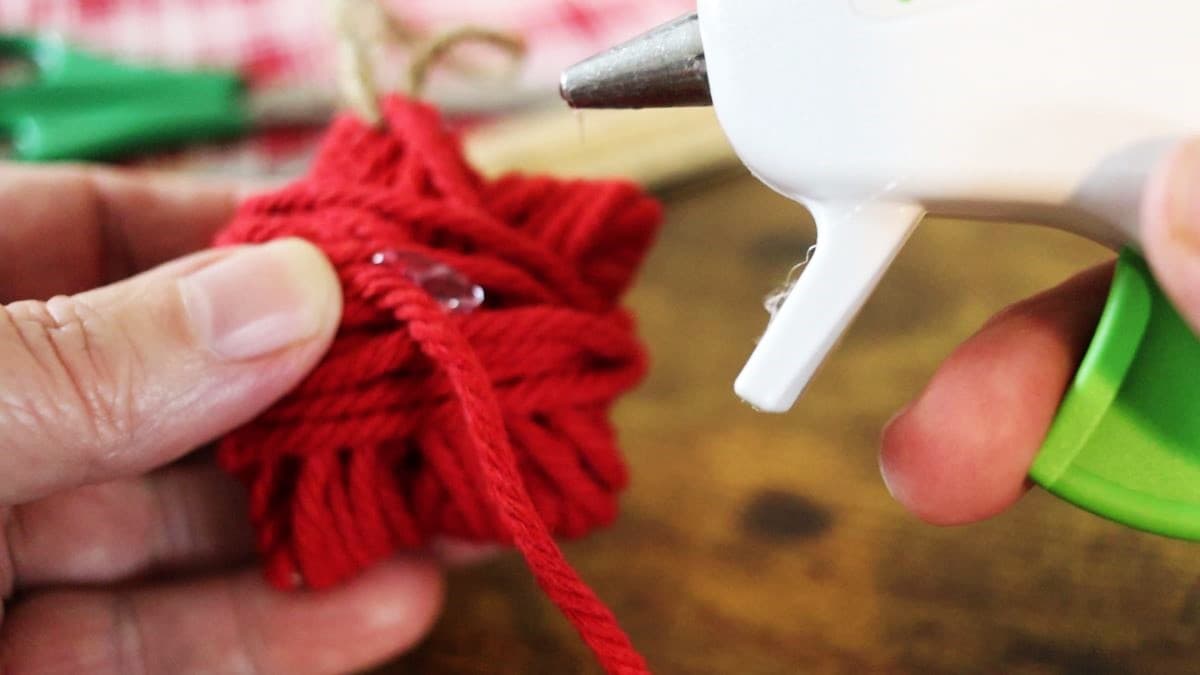
Step 3: Attach the wrapping cord.
Glue the end of your cord to the back of the star, to anchor it before you begin wrapping.
Step 4: Wrap the star.
Guide the cord around the entire shape, keeping tension even and covering all edges and points as you go.

Step 5: Secure the end.
Glue the finishing end of the cord firmly to the back of the ornament so it stays in place.
Step 6: Add the topper.
Glue a small metal star or wooden button to the front of the ornament and allow the glue to cool before handling.

Diane Gail’s tips for success
Use sturdy cardboard: Choose a piece that’s thick enough that it won’t bend as you wrap the cord around the points of the star.
Keep the cord snug: Wrap with gentle tension so the cord sits flush without pulling the shape out of alignment.
Shape the points carefully: Slow down around each point of the star to keep the silhouette crisp and prevent gaps.
Choose your cord intentionally: Different cords give different textures — macrame cord for softness, jute for rustic charm, baker’s twine for a rustic look.
Secure glue points well: Anchor both starting and ending points generously so the wraps stay tight and the ornament lasts for years.


Twine Wrapped Star Ornament Tutorial
Equipment
- star-shaped cookie cutter optional
- pen or pencil
- Craft scissors
- Ruler
- hot glue gun
Materials
- cardboard
- twine or cord
- hot glue sticks
- small metal star or wooden button
Instructions
- Trace and cut the shape: Use a cookie cutter, or draw a star, onto cardboard to create the base.
- Cut the template: Follow your outline carefully to keep the points clean and well-defined.
- Add a hanging loop: Cut a small length of cord, loop it, and glue both ends to the back of the star.
- Start the wrap: Glue the end of your wrapping cord to the back of the star to anchor the first wrap.
- Wrap the shape: Guide the cord around the entire star, covering the surface and edges as you go.
- Secure the end: Glue the final wrap to the back of the star so it stays firmly in place.
- Add the topper: Glue a small star or button to the front of the ornament as the finishing touch.
Video
Notes
- Use sturdy cardboard: Choose a thicker piece so the star keeps its shape as you wrap the cord around each point.
- Use steady tension: Keep the cord snug so the wraps sit evenly without shifting.
- Work slowly around points: Pause at each tip to guide the cord cleanly for a crisp star shape.
- Anchor glue well: Give each glue point a moment to cool to ensure long-lasting hold.
- Storage tip: Keep in a cool, dry spot between tissue paper layers to protect its shape.


This twine-wrapped star ornament is a beautiful, rustic addition to any tree or holiday decor. It’s an easy and satisfying project that adds a natural touch. If you make one, I’d love to hear how it turns out in the comments. Wishing you a wonderful crafting experience!