Fabric Pumpkin Sewing Pattern

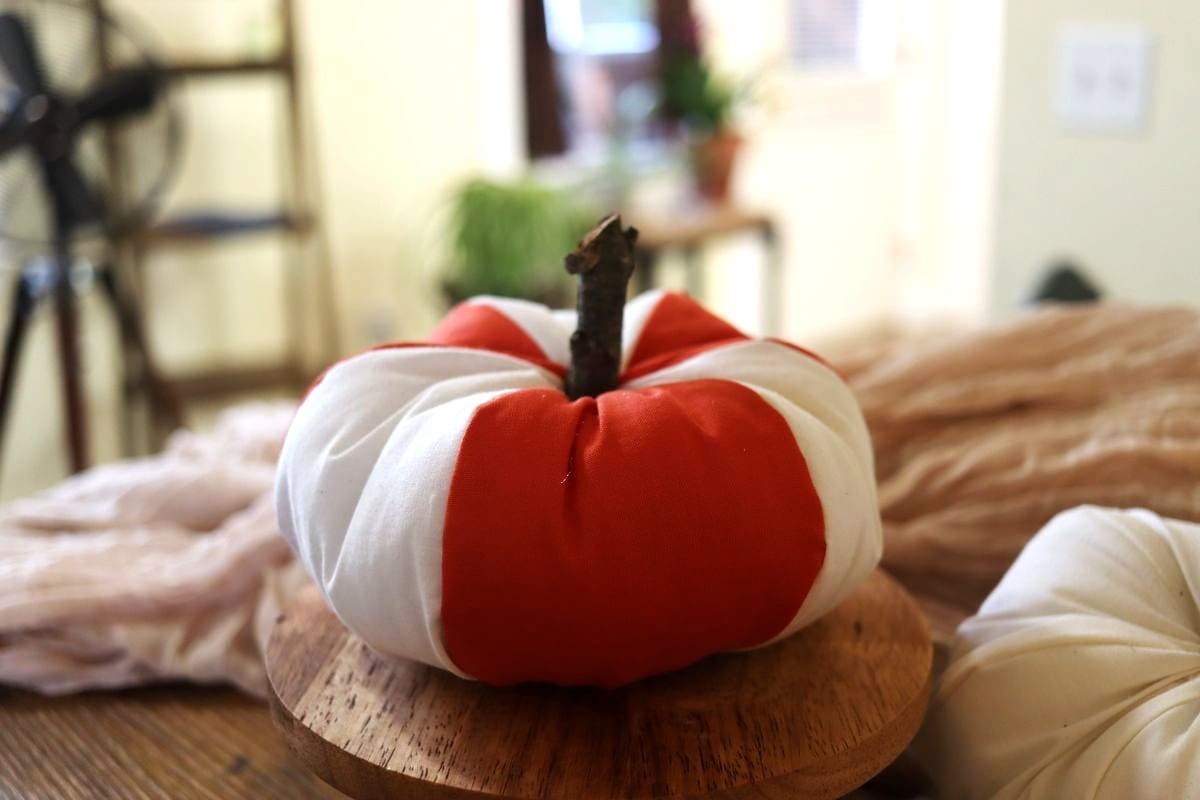
Rustic charm, festive flair, and a touch of handmade coziness — this fabric pumpkin sewing pattern is the perfect addition to your fall décor. It’s quick, easy, and can be made entirely from fabric scraps you already have on hand.
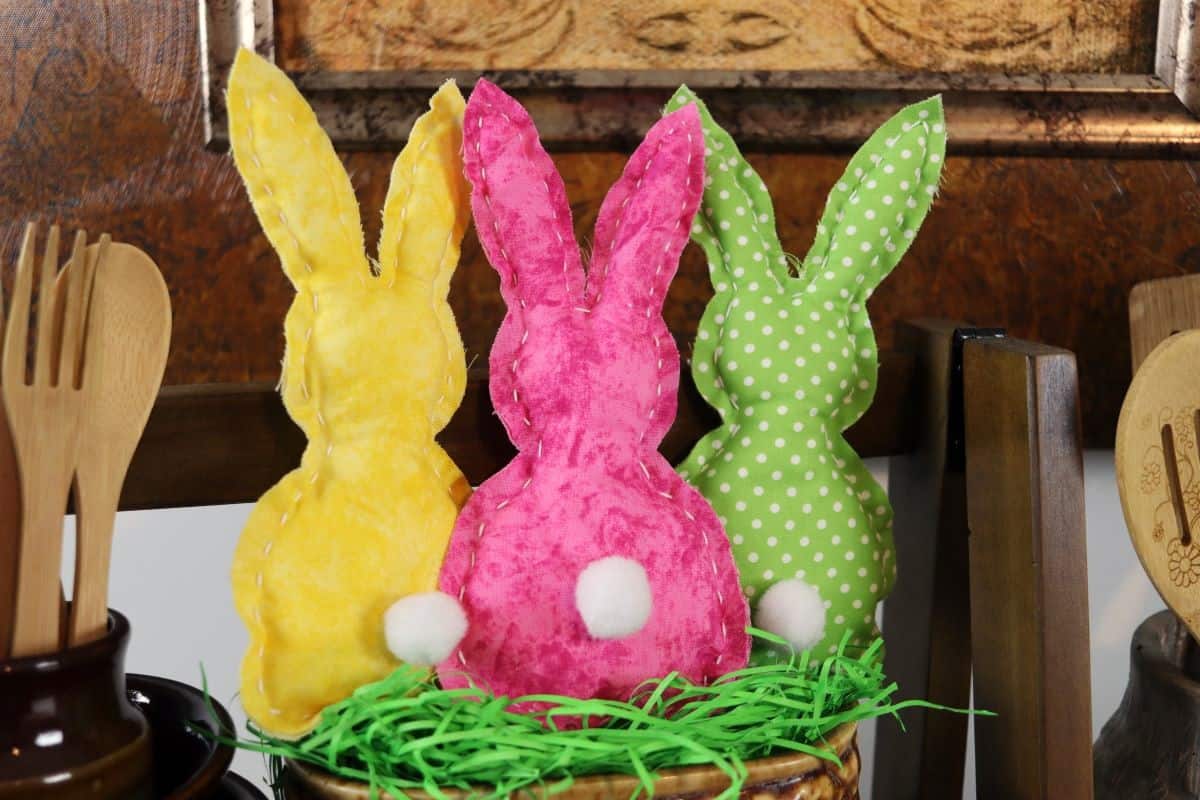
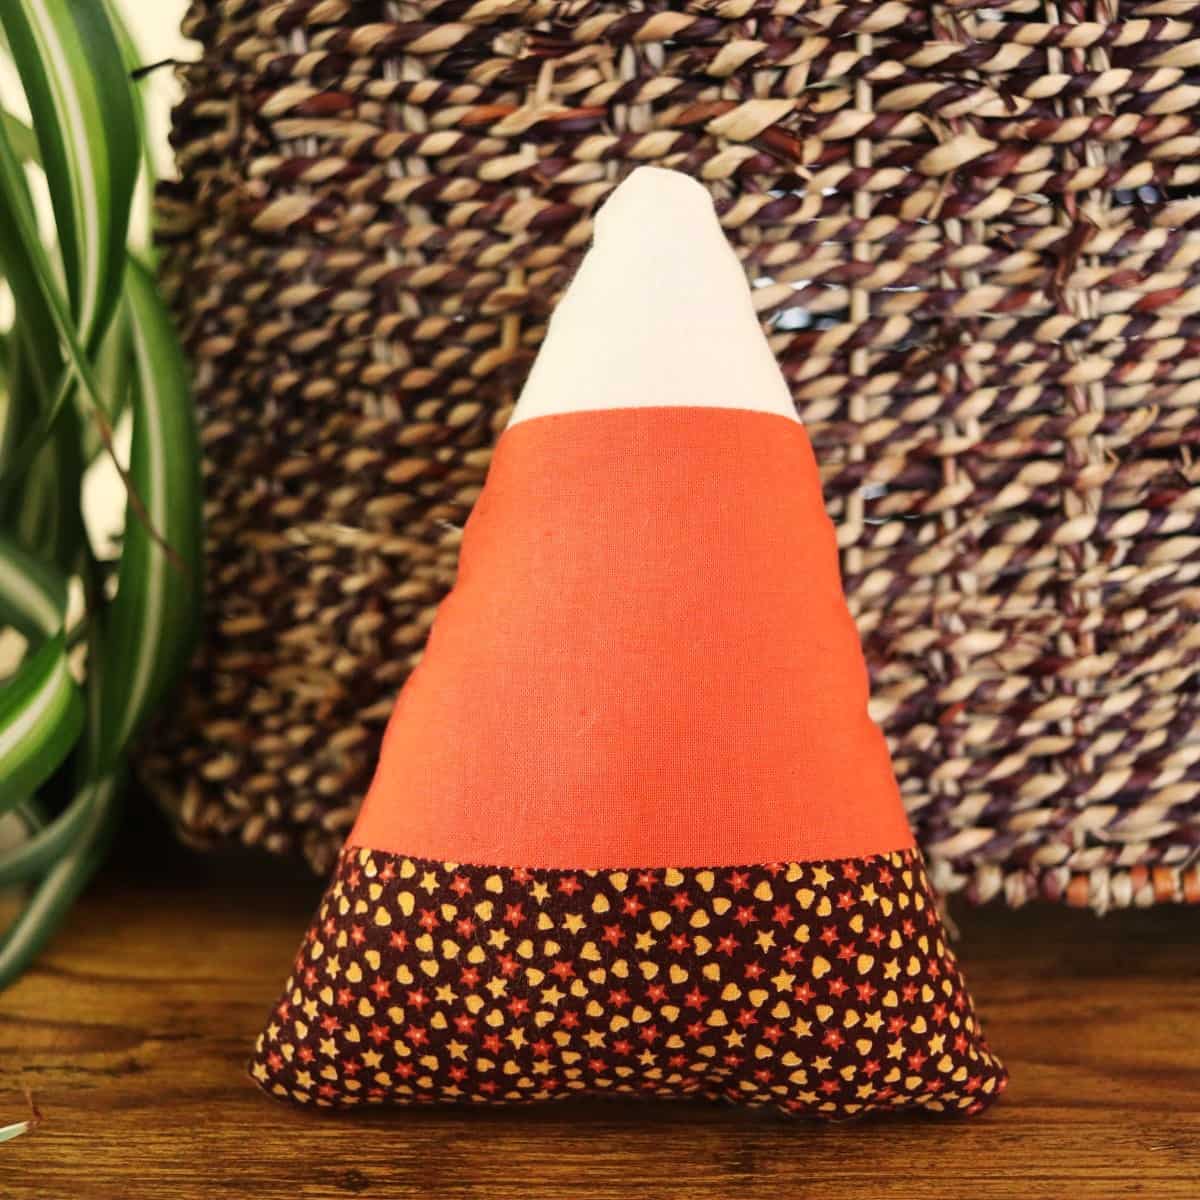
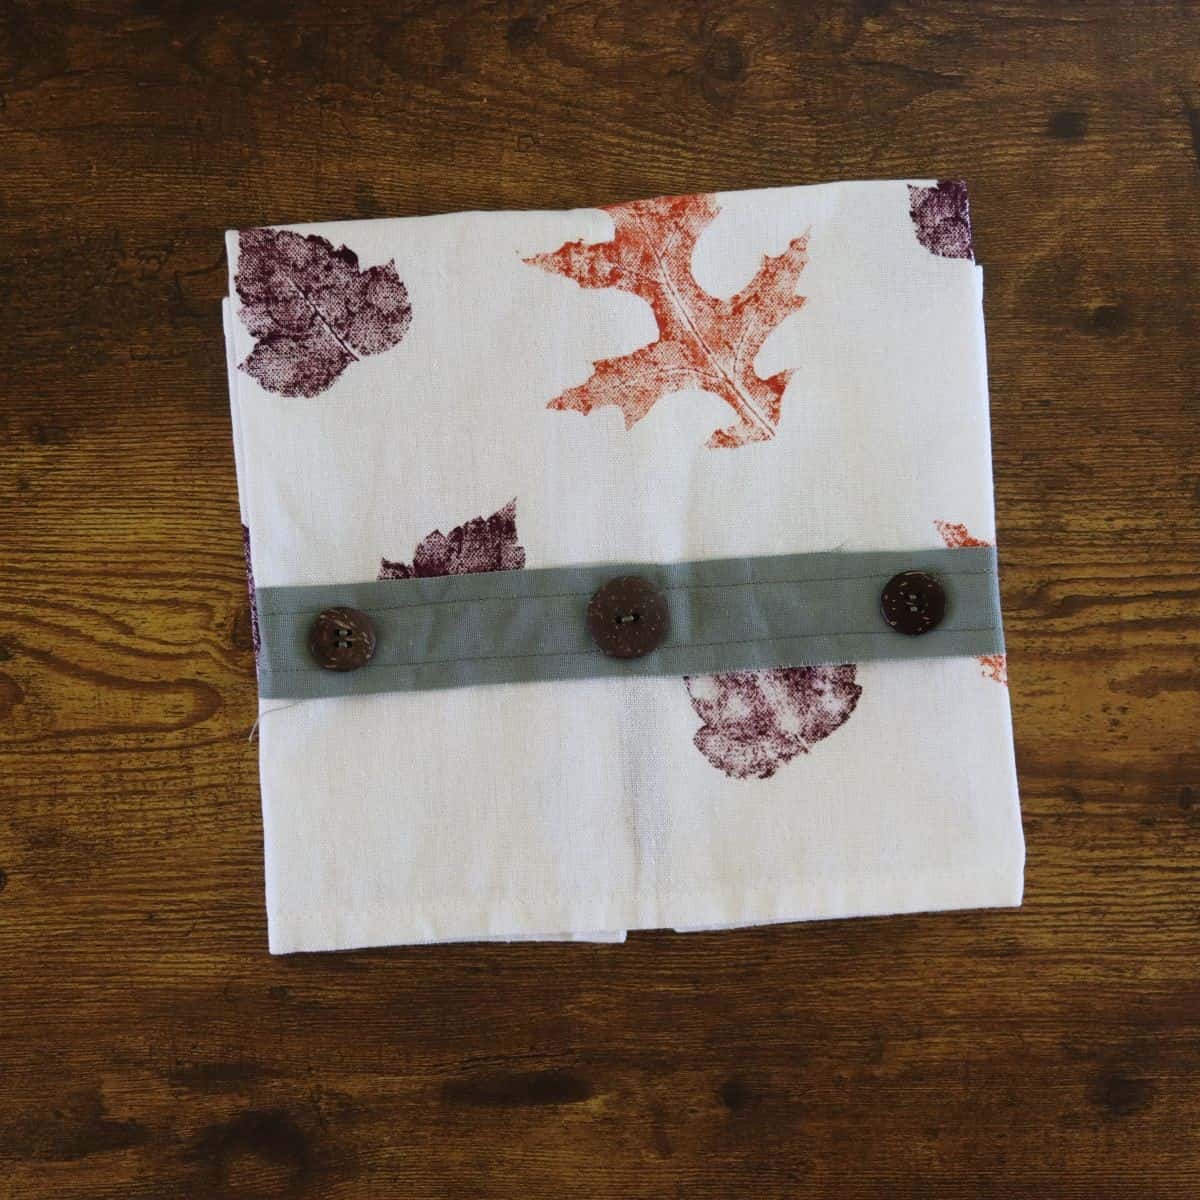
If you enjoy simple, homespun projects, you’ll also love my DIY candy corn stuffie and my DIY leaf stamped tea towels —other fast and festive crafts that fit beautifully into any handmade holiday display.
Let’s talk about this project
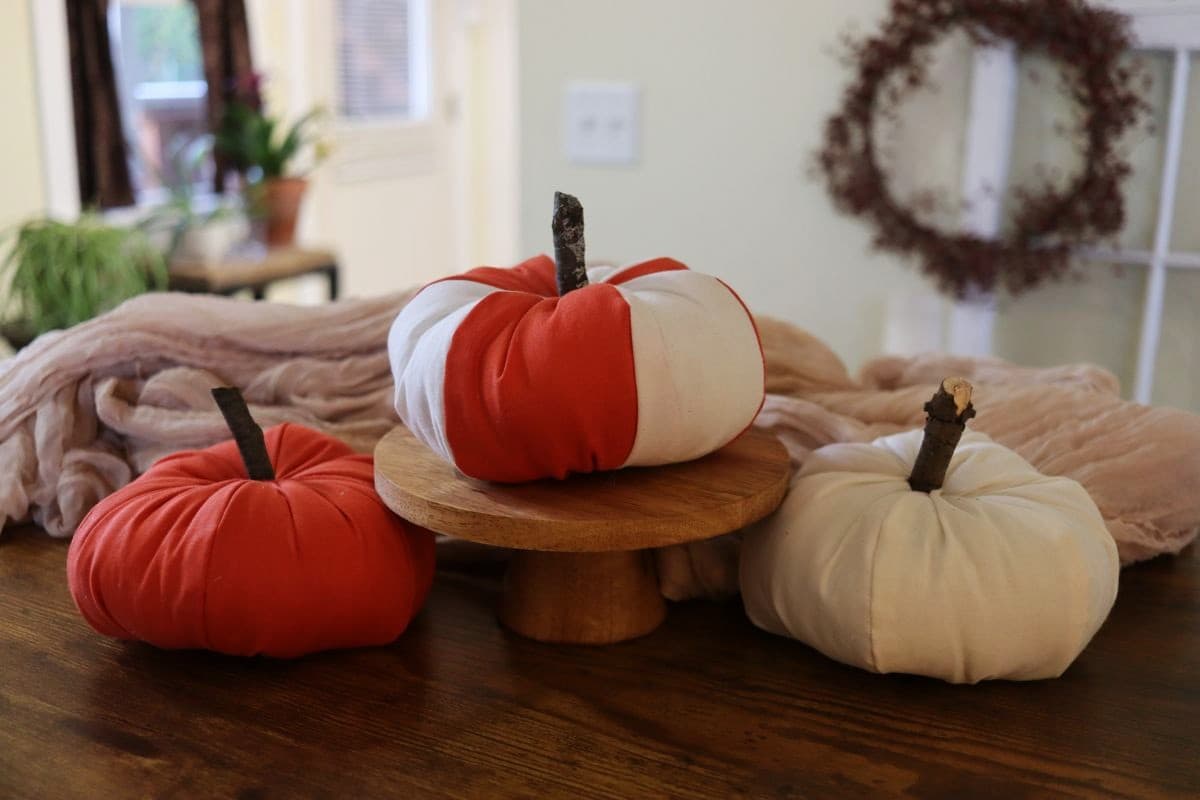
These fabric pumpkins are one of those satisfying little sewing projects that come together quickly but still make a big impact on your holiday décor. They’re perfect for using up leftover bits of fabric from other creations, making it easy to coordinate them with the rest of the seasonal touches around your house.
Add them to a centerpiece, tuck them onto a shelf for a pop of color, or gather a few in a basket on the porch — the possibilities are endless. They also make wonderful handmade gifts. You can sew a whole batch in a single evening and share a bit of homemade cheer with all your friends and family over the holiday season. If you love simple projects like this, you’ll also enjoy my fall rag tie garland — another quick and budget-friendly way to add cozy charm to your home.
Materials you’ll need
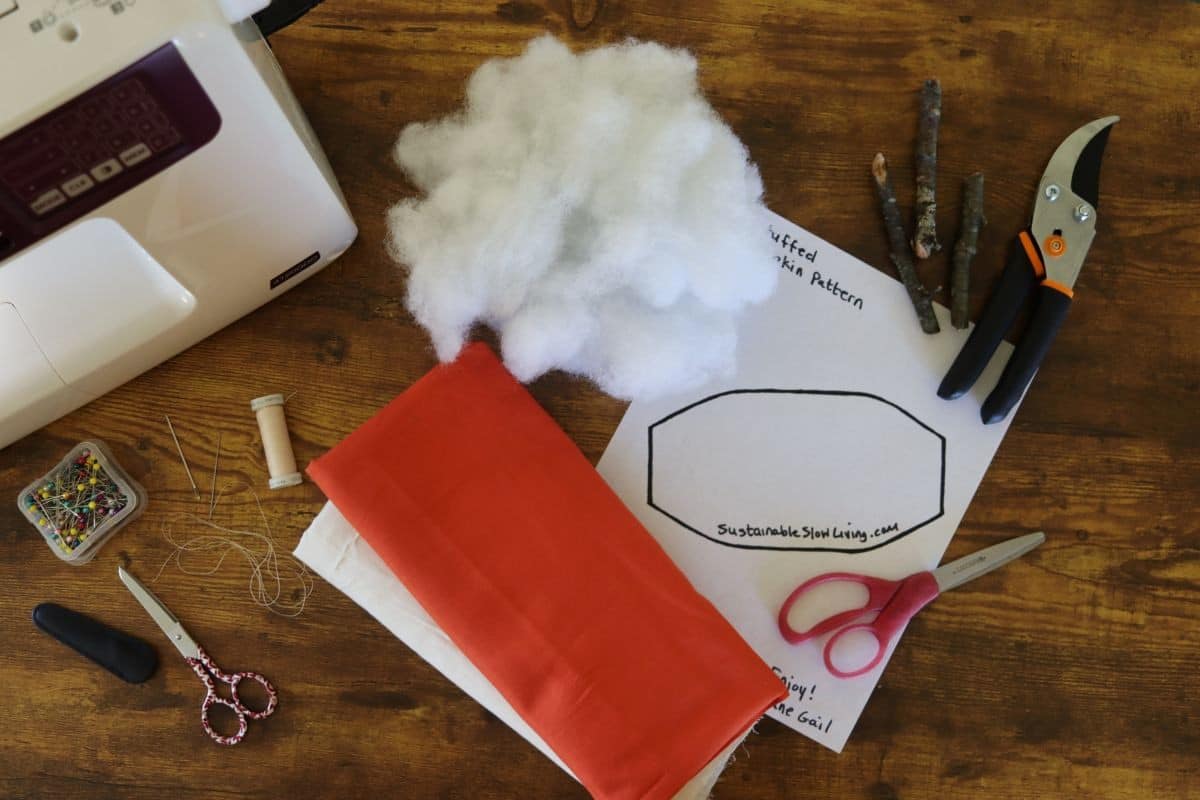
- Free pattern: Download my FREE fabric pumpkin sewing pattern to get started.
- Cotton fabric: Solid or patterned fabrics both work beautifully for this project. If you decide to mix patterns, choose ones that are similar in size — it helps the finished pumpkin look balanced and cohesive.
- Thread: Match the color of your fabric for a clean, seamless finish.
- Fiber fill: Use this to stuff your pumpkin so it’s soft, full, and holds its shape nicely.
- Stick: A stick about the width of your pointer finger works perfectly — it adds charm with rustic eye-appeal. A cinnamon stick or a small wooden dowel makes a lovely alternative, depending on the look you’re going for.
Equipment you’ll need
- Sewing pins: Use these to pin your pattern pieces in place and keep your fabric layers from shifting while you sew.
- Craft scissors: Perfect for cutting out your paper pattern without dulling your fabric scissors.
- Fabric scissors: Sharp fabric scissors will give you smooth, even cuts on your fabric pieces.
- Sewing machine: Makes stitching your pumpkin together quick and sturdy — a real time-saver.
- Sewing needle: Used for hand-stitching the top and bottom openings closed once your pumpkin is stuffed.
- Large sewing needle: This one’s key for pulling the thread through the center to create that tufted, pumpkin-like shape.
- Pruning shears: Handy for cutting your stick to the perfect size before tucking it into the top.
How to sew a fabric pumpkin
This project comes together quickly and easily — even if you’re new to sewing. With just a few basic steps, you’ll have a beautiful handmade pumpkin ready to display or gift in no time at all.
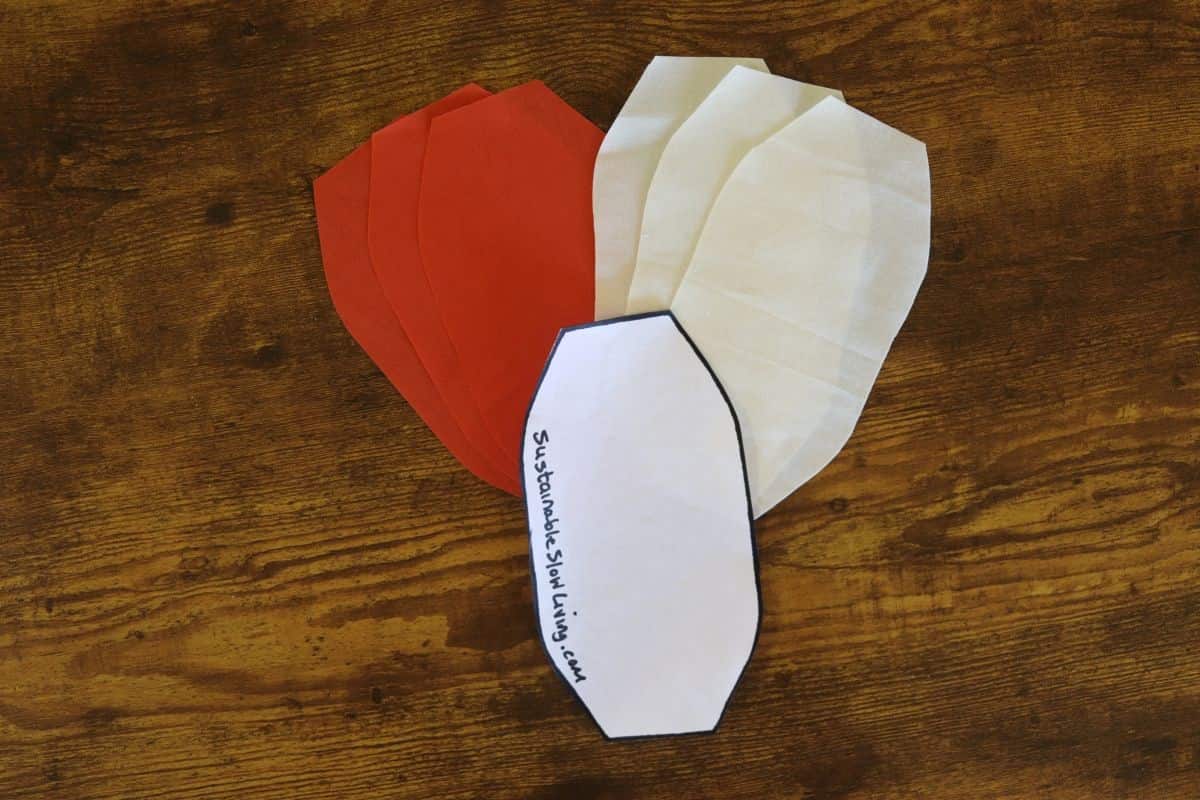
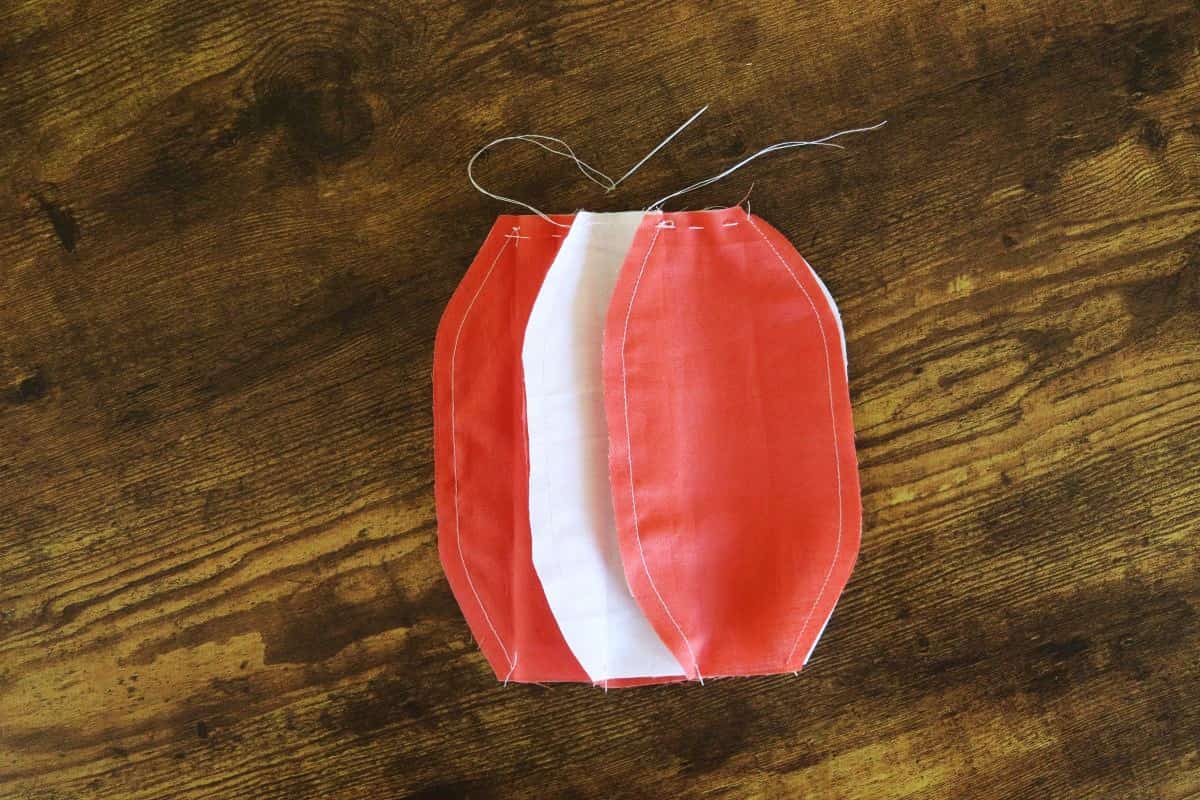
Step 1: Use the pattern to cut 6 fabric panels for the pumpkin.
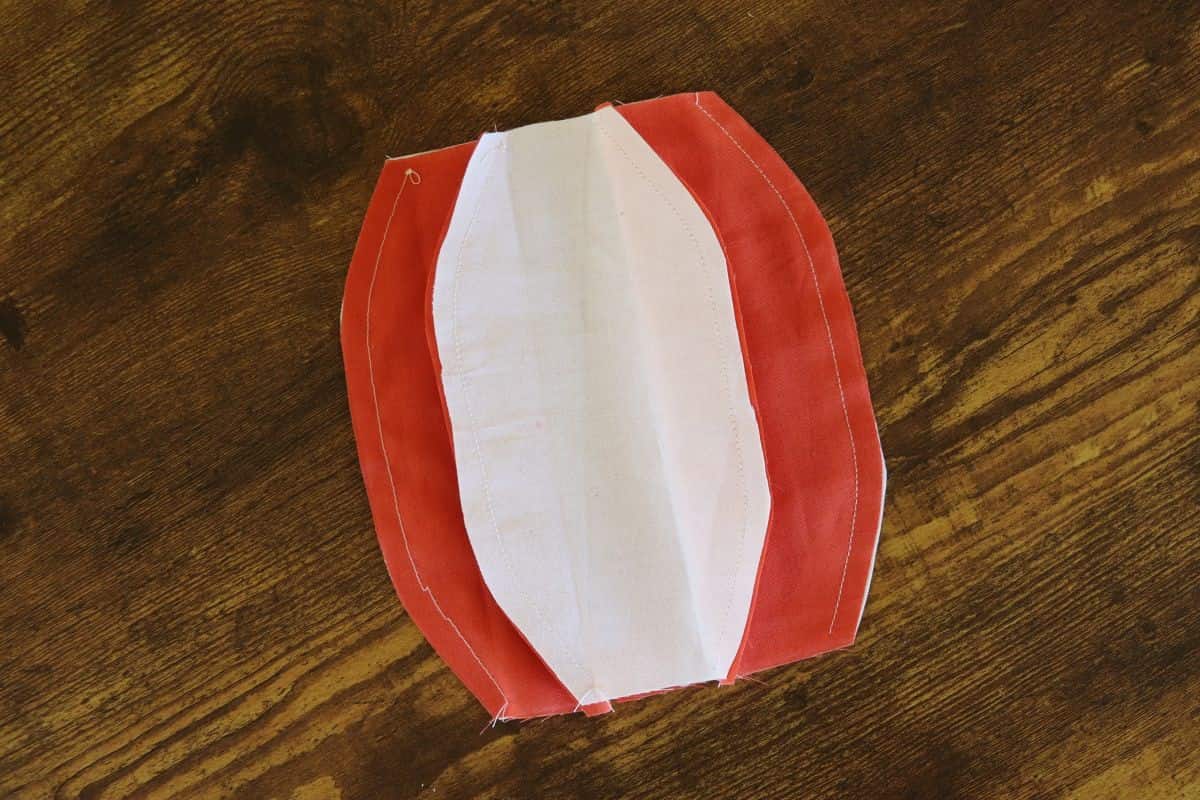
Step 2: Stitch the fabric panels together, then close the circle to form your pumpkin base.
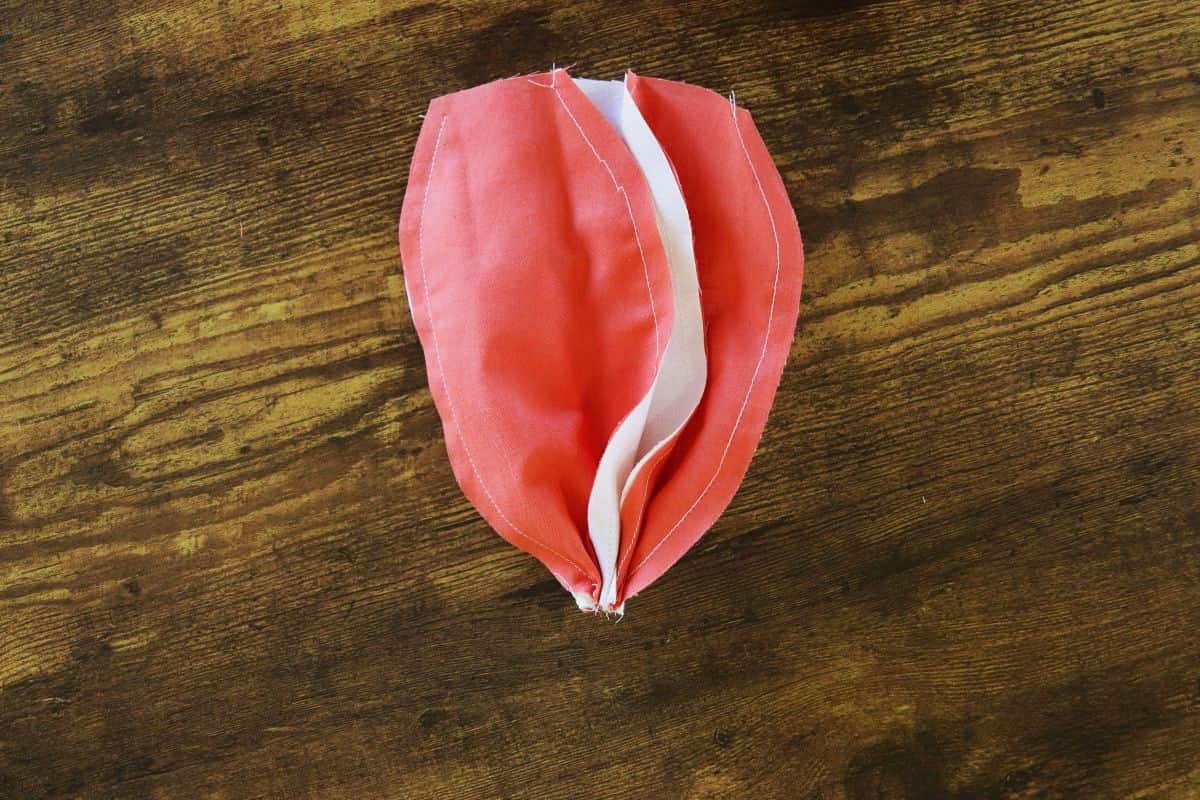
Step 3: Sew a baste stitch ¼ inch from the bottom edge.
Step 4: Gather the baste stitches tightly to close the bottom and tie off securely.
Would you like to save this post for later?
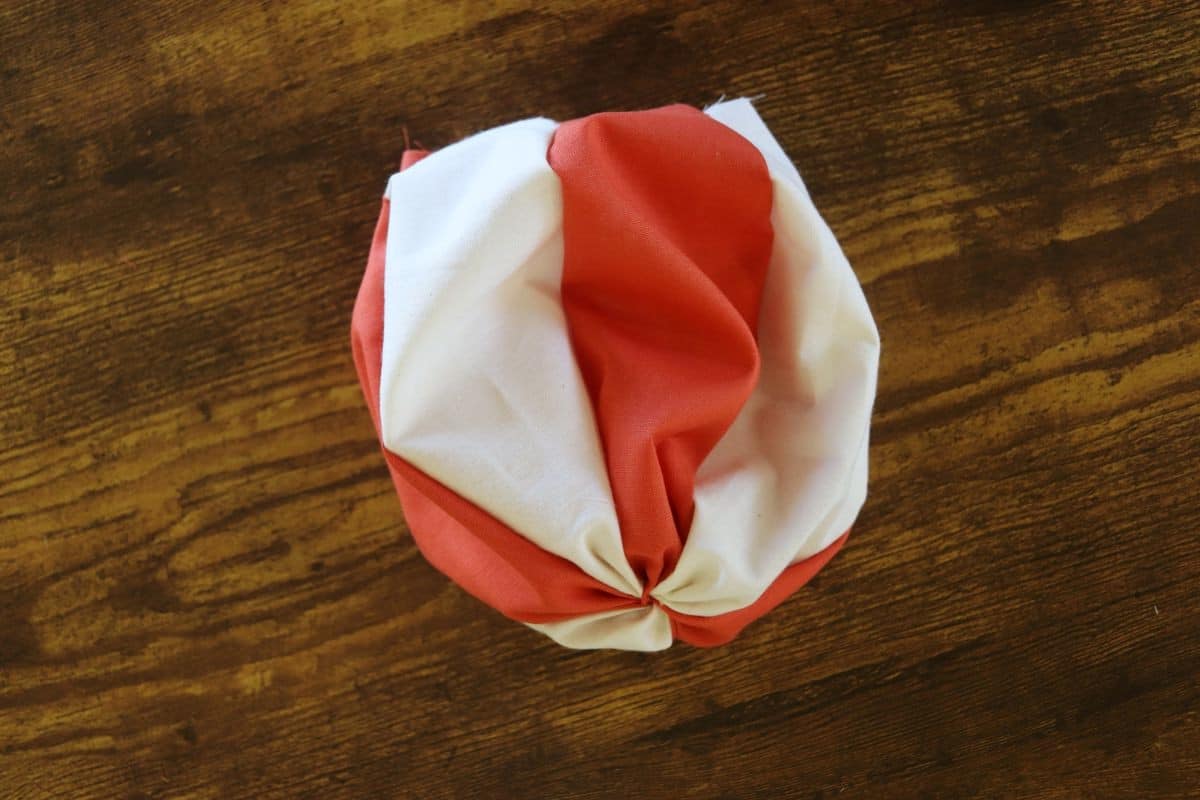
Step 5: Flip your pumpkin so the seams are inside.
Step 6: Fill evenly with fiber fill until it’s plump but not overstuffed.

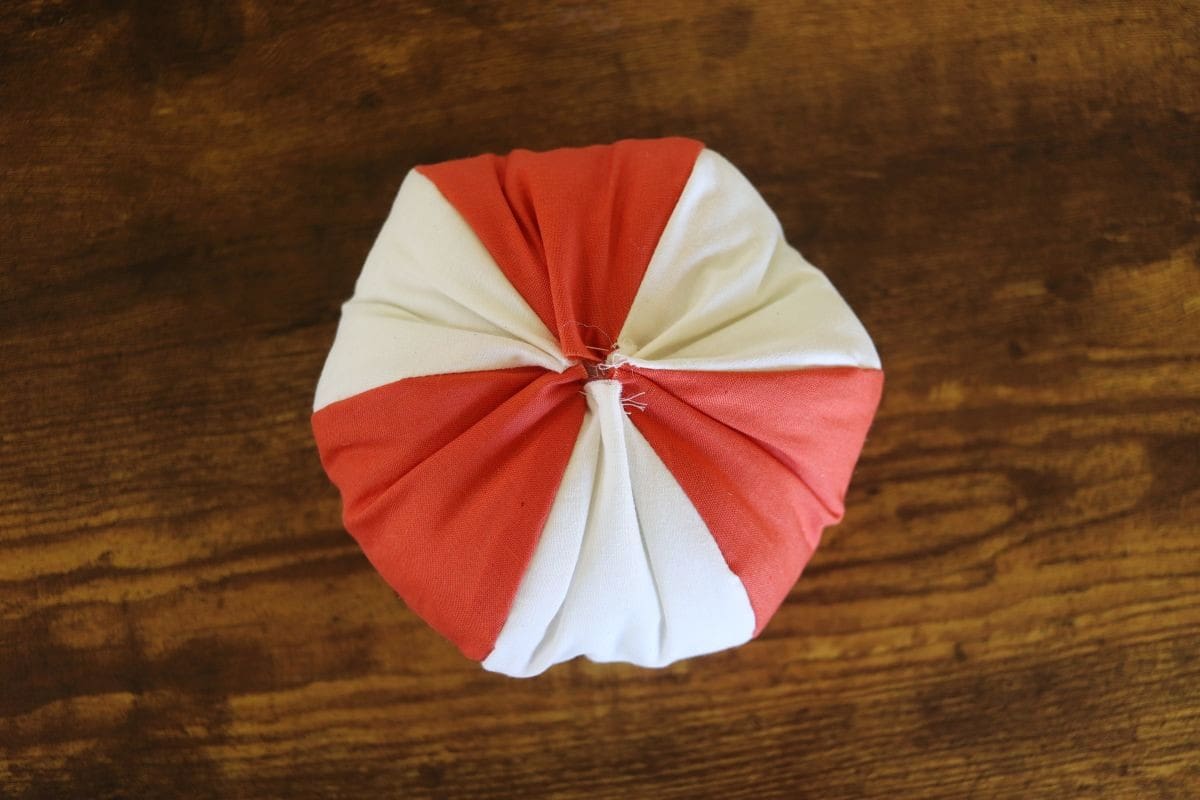
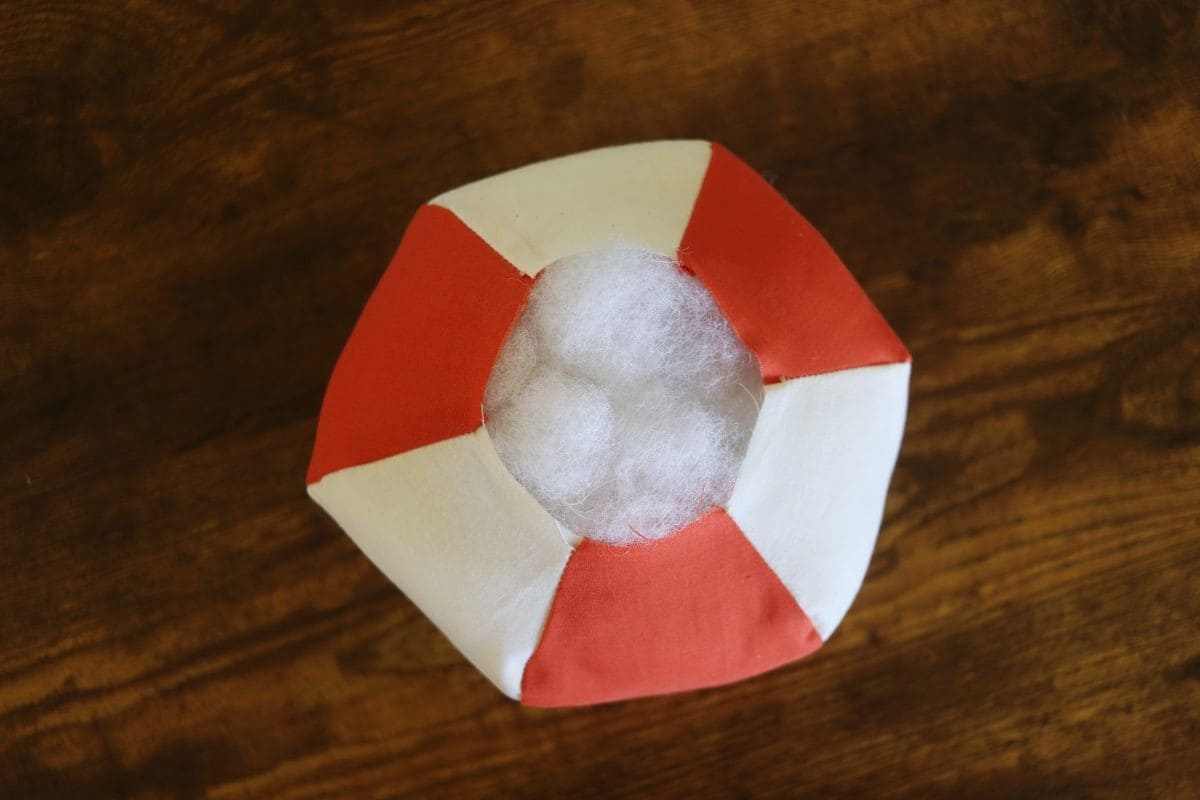
Step 7: Sew a baste stitch at least ¼ inch in from the top edge.
Step 8: Tighten the stitches while tucking the edges inward, then tie off to close.

Step 9: Using a large needle, stitch through the center twice, pulling tight to create a tufted pumpkin shape.
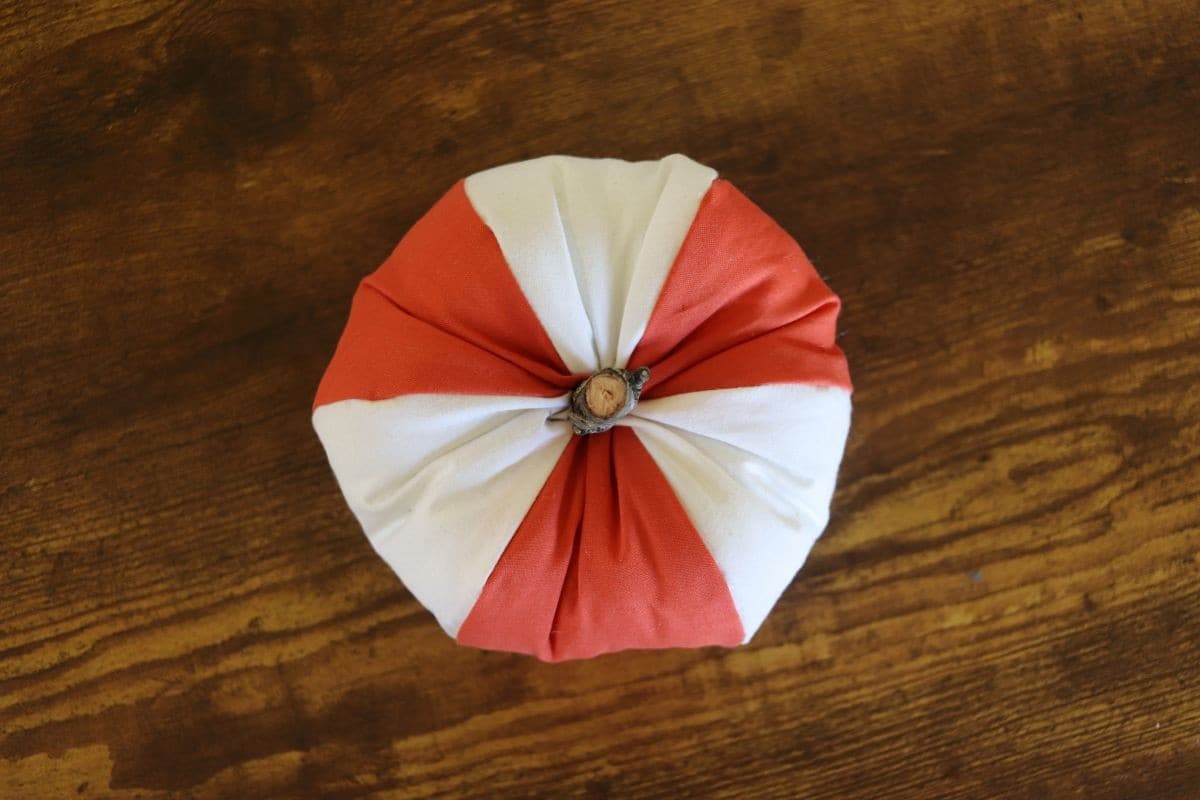
Step 10: Cut your stick to size and press it firmly into the top center to complete your pumpkin.
You’ll find more detailed step-by-step instructions in the how-to card below, which you can also print for your convenience if you’d like.
Diane Gail’s tips for success
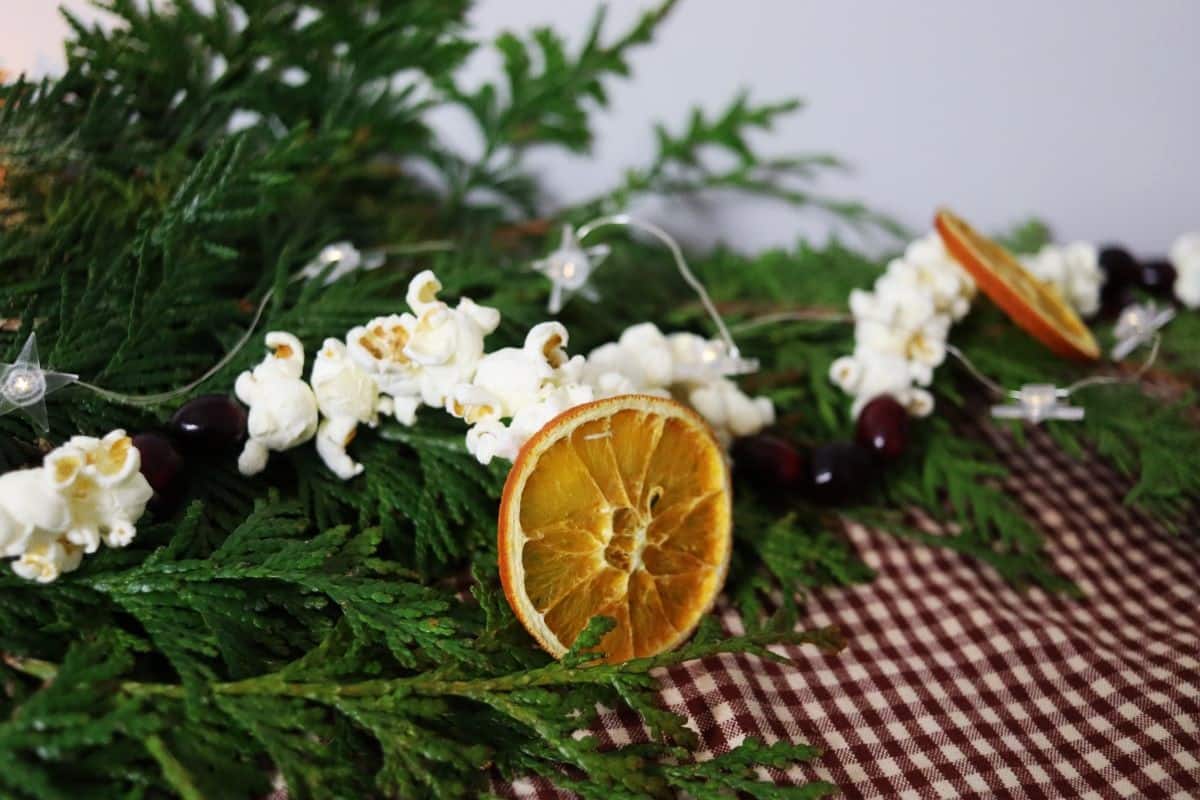
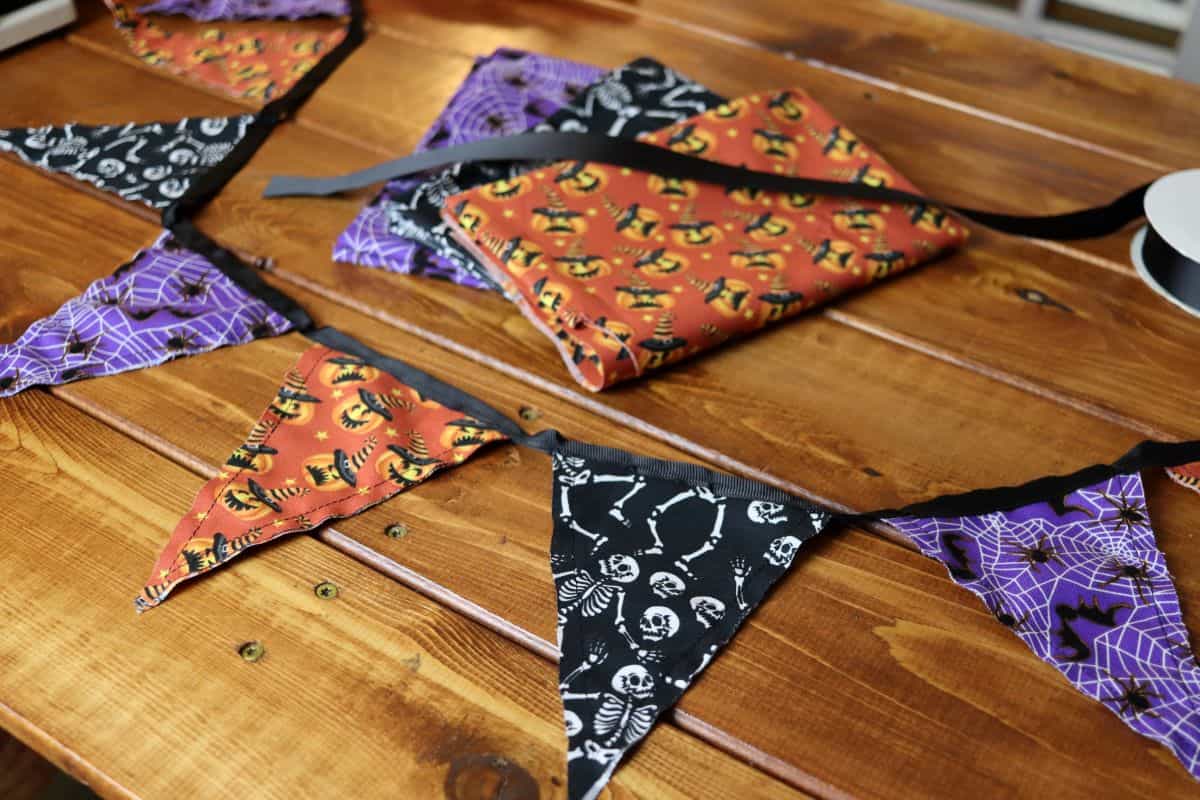
- Choose fabrics that complement each other: When mixing patterns, select similar pattern sizes for balance and cohesion — just like in my DIY Halloween flag banner, where pattern harmony makes all the difference.
- Baste carefully: Keep your stitches at least ¼ inch from the edge so the ends tuck in neatly when gathered.
- Use a large needle for the tuft: A larger needle is better suited to push through the bulk of the center of the pumpkin with ease.
- Cut the stem with stability in mind: Make it long enough to tuck into the pumpkin for a secure fit.
- Avoid overstuffing: Adding too much fiber fill makes the top difficult to close and puts unnecessary strain on the closing stitches.
Other projects you’ll love


Sew A Fabric Pumpkin
Equipment
- Sewing pins to stabilize fabric while cutting and sewing
- Craft scissors to cut pattern
- Fabric scissors to cut fabric
- Sewing machine to sew fabric panels together
- Sewing needle to close pumpkin ends
- large sewing needle to tuft pumpkin ends
- Pruning shears to cut stick
Materials
- FREE pattern linked in instructions below
- cotton fabric solid or patterned
- thread to match fabric
- fiber fill to stuff pumpkin
- stick the size of your pointer finger
Instructions
- Cut the fabric: Use the free pumpkin sewing pattern to cut six identical fabric pieces. Mix and match coordinating fabrics if you’d like a multi-colored look.
- Sew pieces together: Stitch the fabric pieces together, right sides facing, to form a ring. Sew the last edges together to close the circle completely.
- Baste the bottom: Sew a loose baste stitch about ¼ inch from the bottom edge.
- Tighten and tie: Gently pull the basting thread to gather the fabric at the bottom. Tie it off securely.
- Turn right side out: Flip the pumpkin so the seams are inside and the right side of the fabric shows.
- Stuff the pumpkin: Fill the pumpkin with fiber fill until it’s softly rounded.
- Baste the top: Stitch another loose baste stitch ¼ inch from the top edge.
- Close the top: Pull the stitches tight as you tuck the fabric edges inward, then tie off securely.
- Create the tufted center: Thread a large needle and sew down through the center of the pumpkin, then back up through the bottom. Pull gently to create a tufted shape, and tie off. Repeat this step twice for a firm center.
- Add the stem: Cut a small stick with pruning shears and press it firmly into the top center of the pumpkin to finish.
Notes
- Coordinate fabrics thoughtfully: When mixing patterns, choose prints of similar size for a cohesive, balanced look.
- Mind your seam allowance: Keep baste stitches at least ¼ inch from the edge of the fabric so the edges don’t come untucked.
- Use the right tools: A large sewing needle makes it easier to create the tufted center.
- Secure your stem: Cut your stick long enough to anchor it deeply into the pumpkin so it stays stable.
- Keep the fill light: Avoid overstuffing — too much fiber fill makes the top hard to close.
There’s just something so cozy about handmade fall décor, and these fabric pumpkins are really the perfect touch to my home décor in the fall season! I love how simple they are to make — and they look absolutely charming no matter where I place them.