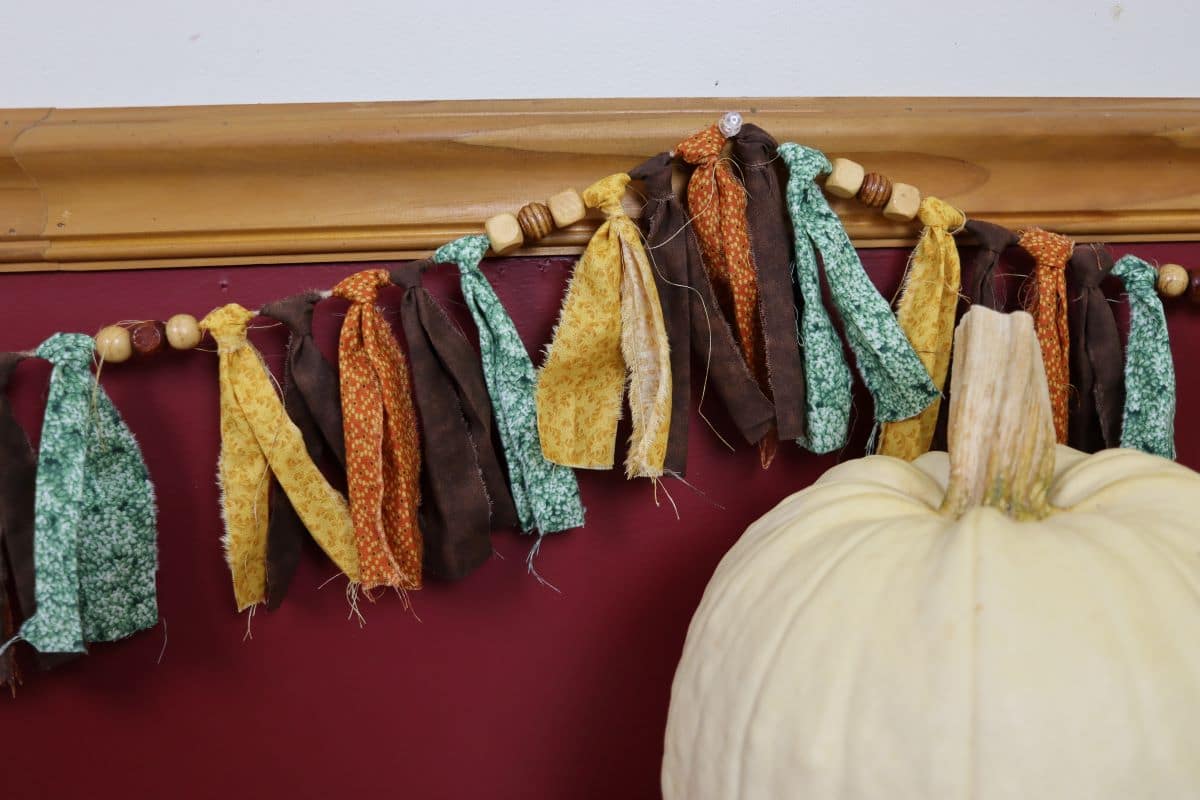
Fall Rag Tie Garland Tutorial

This fall rag tie garland tutorial walks you through one of my favorite ways to decorate for the autumn season — it’s easy, fun, and filled with handmade charm. With just a few simple materials, you can create a rustic garland that instantly makes your home feel warm and cozy.
If you love fall-inspired DIY décor, be sure to check out my fabric pumpkin sewing pattern and DIY leaf stamped tea towels too. They’re perfect companion projects to pair with this handmade garland for a beautifully coordinated autumn look.
Introduction
There’s something so cozy about crafting your own décor for the season, and this fall rag tie garland is one of the simplest ways to do it. The mix of frayed fabric, vibrant color, and texture adds a touch of rustic charm that brings instant warmth to any space.
Once you’ve made one, you might just find yourself hooked on fabric garlands. If you love this kind of handmade seasonal décor, try my DIY Halloween flag banner next — it’s a fun way to bring that creative, fabric-based decorating spirit into spooky season at home.
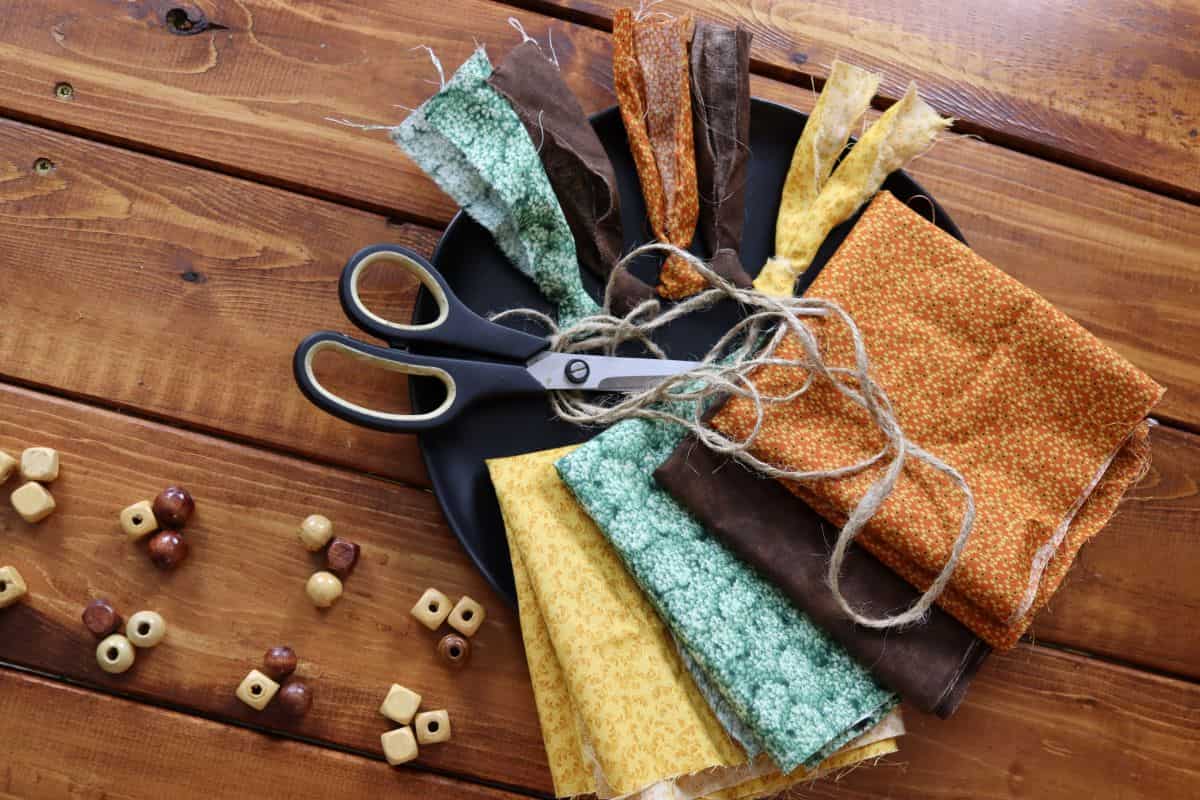
Materials Needed For This Project
- Cotton fabric: Choose a mix of fall colors and patterns that suit your style. I used lightweight cotton for its soft texture and easy fray. It’s the same kind of fabric I use for my DIY candy corn stuffies, which also celebrate the season with warm, autumn hues.
- Wooden beads: Use beads large enough to thread onto jute twine. Natural or stained wood adds a nice, earthy touch.
- Jute twine: This serves as the garland base. It’s strong, inexpensive, and gives the project that rustic farmhouse look.
- Scotch tape: A small piece at the end of your twine helps prevent fraying and makes threading the beads onto the twine easier.
Equipment Needed For This Project
- Scissors
- Soft measuring tape or ruler
- Pencil or fabric marker
Would you like to save this post for later?
How To Make A Fall Rag Tie Garland
Making this garland is a relaxing project — it’s the perfect way to spend for a fall afternoon with a cup of tea and a good movie playing in the background.


Step 1: Cut each piece of fabric into a 12-inch-wide strip, then mark the back in 1½-inch segments.
Step 2: Make a small cut at each mark with a pair of scissors.
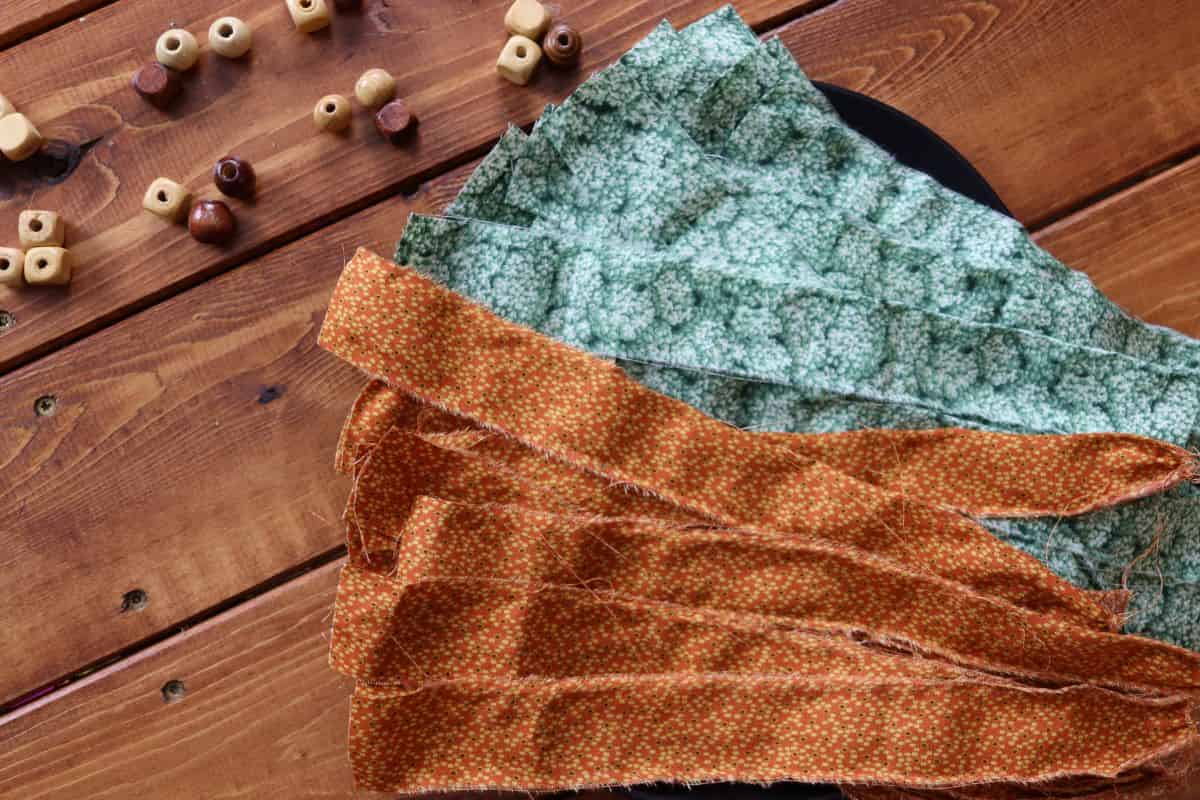

Step 3: Rip the fabric into strips using the cut marks as a starting point for the tear.
Step 4: Cut a piece of jute twine about a foot longer than your desired finished garland length, then tie a loop at one end.


Step 5: Fold each strip in half and place it over the twine, loop-side up.
Step 6: Bring the two tails up behind the twine and through the loop then pull gently to secure without tightening.


Step 7: Move the strip to the looped end of the twine and then pull the tails to tighten.
Step 8: Repeat steps 5-7 for the first 5 strips of fabric.


Step 9: Wrap scotch tape tightly around the opposite twine end. Add 3 beads and slide them down next to the fabric strips.
Step 10: Repeat the 5 strips + 3 beads pattern to 6″ from the end of the twine. Tie a loop with that twine and trim any stray long strings hanging from the garland.
You’ll find measurements, and more detailed step-by-step instructions, in the recipe card below, which you can also print for your convenience if you’d like.
Expert Tips
- Rip, don’t cut, the fabric: Ripping gives your garland that perfectly frayed, rustic look that scissors just can’t match.
- Mix textures for depth: Combine solids and subtle prints in similar hues to make the garland look full and layered.
- Work in sections: Tie fabric and add beads in small groups to keep spacing even and the pattern balanced.
- Hang before trimming: Let the garland drape naturally in place before you snip stray ends or uneven pieces.
- Reuse and restyle: The base design of this project can be adapted for any season — just swap out fabrics for winter, spring, or holiday themes. My felt Christmas ornaments are easily adapted to the seasons in the same way — simply swap out the felt and fabric for the appropriate color themes.


Fall Rag Tie Garland
Equipment
- Scissors
- Measuring tape
- Pencil
Materials
- 5 half yard pieces of fall themed lightweight cotton material
- 63 chunky wooden beads
- 13 foot piece of jute twine
- scotch tape
Instructions
- Cut fabric into strips: Trim each fabric piece into a 12" wide strip.
- Mark increments: On the back lower edge, mark 1 1/2" intervals with a pencil.
- Snip fabric: Use scissors to cut 1/2"–3/4" slices at each pencil mark.
- Tear fabric strips: Tear 20 strips from each color using the cut marks as guides.
- Arrange materials: Sort fabric and beads in the order you want to use them.
- Prep the twine: Cut a 13' piece of jute twine and tie a 6" loop at one end.
- Fold first fabric strip: Fold it lengthwise, crease lightly with your finger.
- Position strip on twine: Fold it widthwise and place over the twine, loop side up.
- Attach strip: Bring the two tails up behind the twine and through the loop, then pull gently to secure without tightening.
- Slide and tighten: Move the strip to the looped end and then pull to tighten securely.
- Add more strips: Repeat steps 7–10 for the first 5 fabric strips.
- Stiffen twine end: Wrap scotch tape tightly around the opposite twine end.
- Thread beads: Add 3 beads and slide them down next to the fabric strips.
- Continue alternating: Repeat the 5 strips + 3 beads pattern to the end.
- Finish the twine: Remove scotch tape and tie a loop at the end.
- Trim and style: Hang the garland, then trim overly long strings while keeping the shaggy look.
Video
Notes
-
- Reuse materials: Scraps from other fall projects work beautifully for this DIY.
- Rip fabric instead of cutting: It saves time and gives a natural, frayed finish.
- Layer colors thoughtfully: Alternating tones creates depth and a cohesive fall palette.
- Use lightweight cotton: It ties easily and drapes nicely without weighing down the garland.
- Hang before trimming: This helps you shape the garland naturally before snipping ends.


My sister in law is very much into banners and gave us one for birthdays. My wife on the other hand is all about ‘urban homesteading’ and this sounds very much her style
You’ll have to share the post with your wife so she can make a fall themed banner for your home 😉
This is a lovely doable project with craft materials I already have on hand. Looking forward to adding this great idea to my list of DIY fall projects.
Hope you have fun with it! It’s a great way to spend a few hours 😉
This is so simple and fun! I love your style.
Thanks Julie! I think it’s simplicity is what makes it so lovely 😉
This simple fall rag tie garland is a cozy and rustic way to bring the spirit of autumn into your home. It’s easy to make and adds a warm touch to any space. If you make one, I’d love to hear how it turns out in the comments. Happy crafting!