A Reversible Bento Bread Bag Is Easy To Make || Make One This Afternoon

A reversible bento bread bag is an eco-friendly way to store homemade bread. It’s made with breathable material, that allows sufficient airflow to keep your bread fresh and delicious.
It has a simple, timeless, utilitarian design that carries a rustic charm. And you’re going to love having one in your kitchen.
Which is great, because bread that is made with love should be stored with love as well. So make a few for yourself, and then make a few extras to give away.
Bake some fresh, delicious homemade bread, wrap it up in a handmade bento bag, and give it to someone you appreciate.
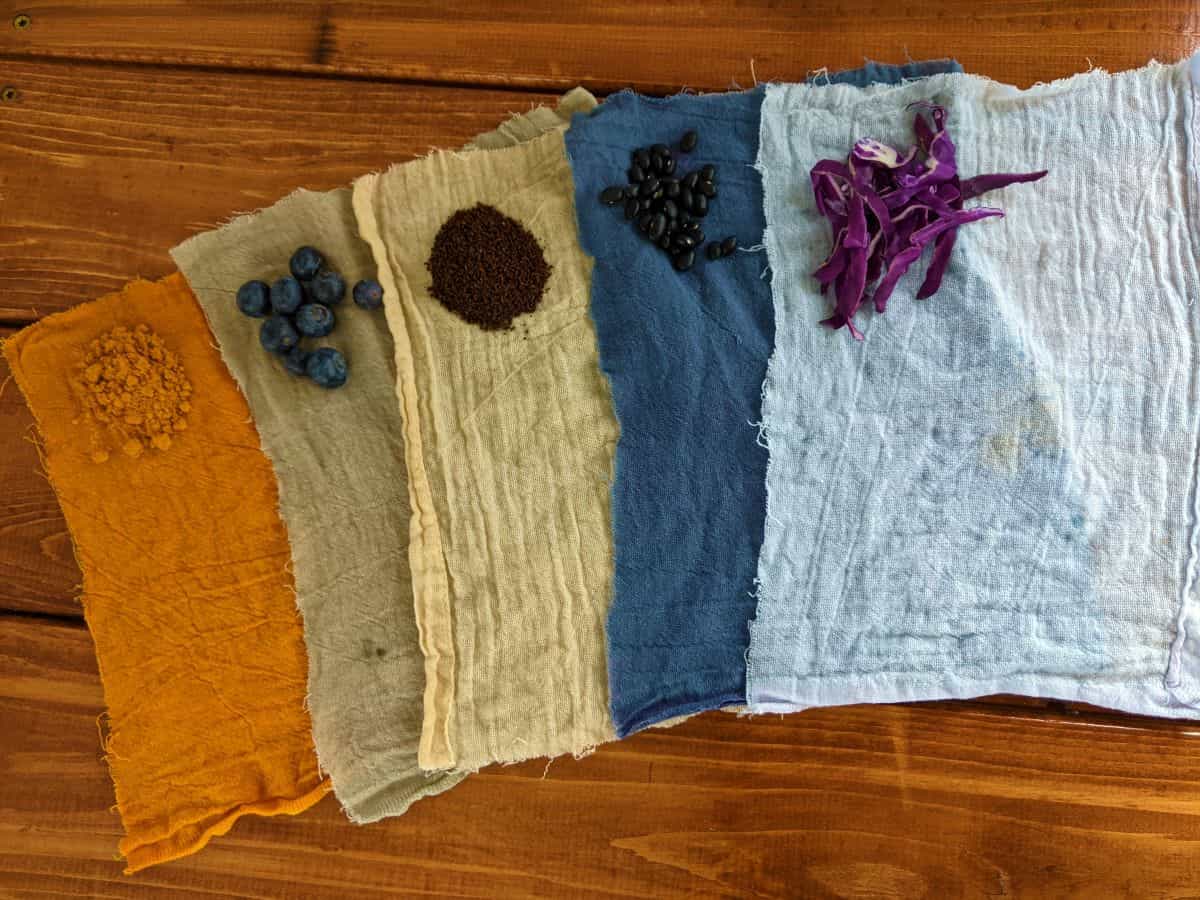
Bonus points if you give it to a baker, or present it with a jar of homemade jelly, fruit spread, or pesto. Go the extra mile and make a batch of garlic butter medallions to go with it. or dye the material you make it with using all-natural dye made from food in your own kitchen when you really want to impress.
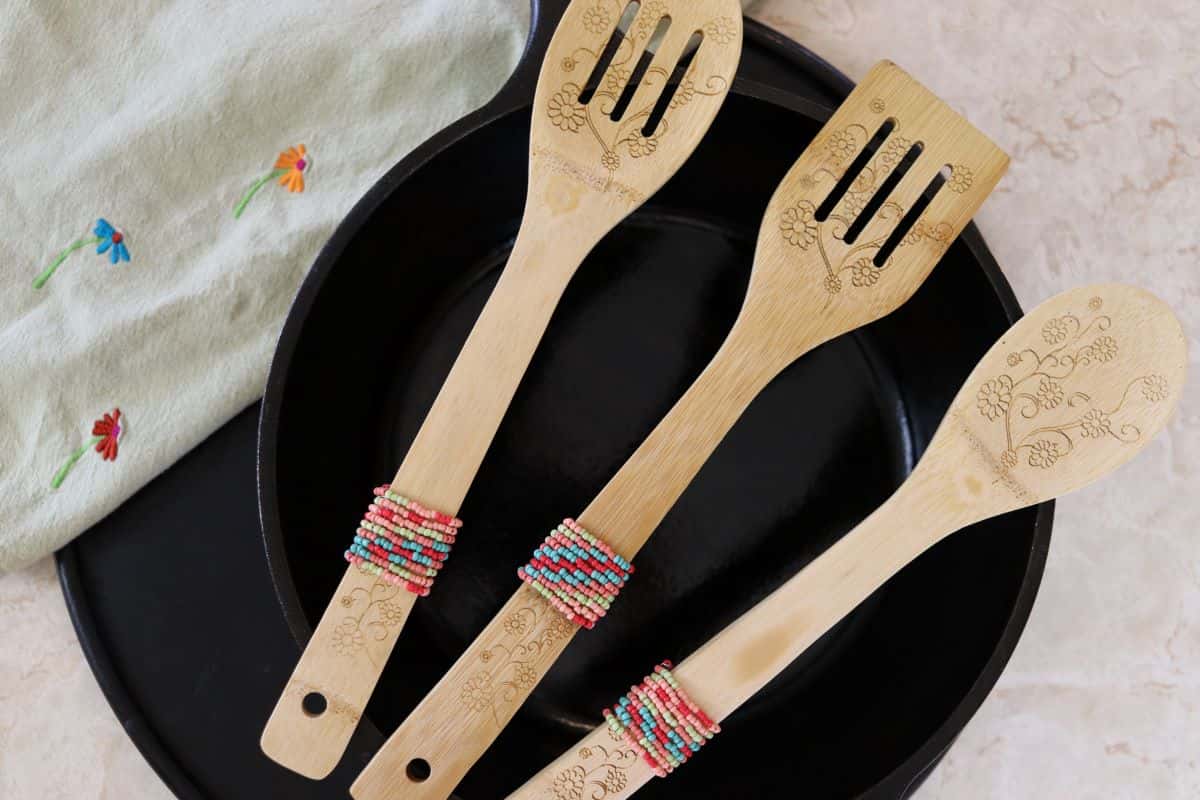
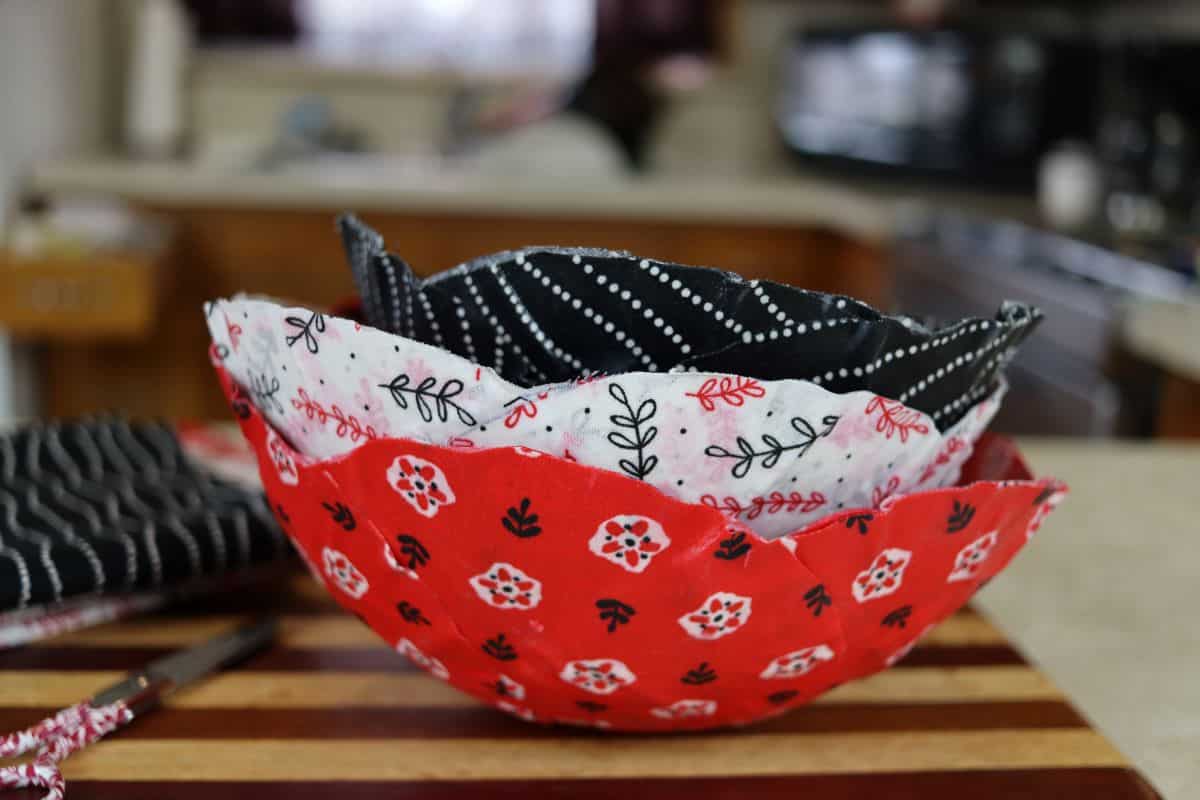
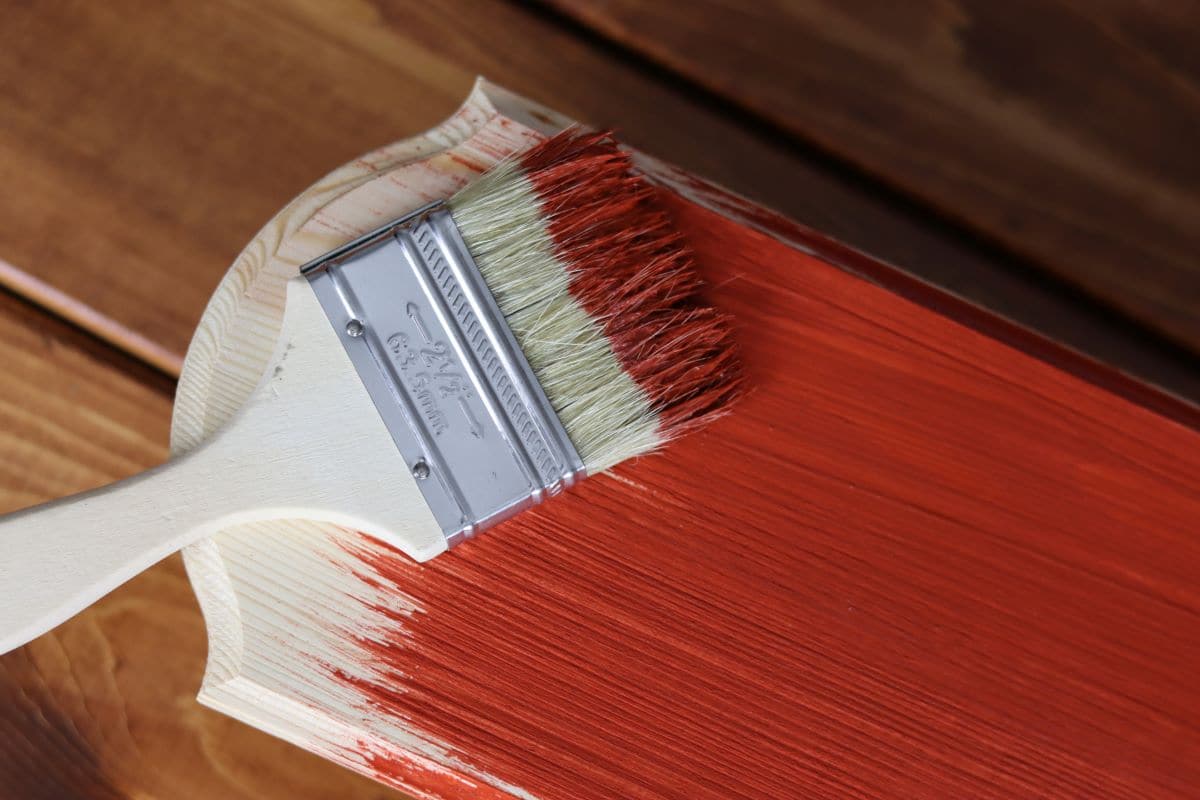
And if you’re looking for more simple DIY household projects, give my fabric mache bowls, primitive-style garden markers, basic wooden herb box, upcycled cork garland, or non-toxic milk paint a try too.
WHY YOU NEED A REVERSIBLE BENTO BREAD BAG
A reversible bento bread bag is going to keep your homemade bread fresh much longer than the options you likely have in your kitchen right now.
You will never have to deal with trying to stuff your bread in a plastic bag, trying to tear the right size plastic wrap or tinfoil, or looking for a tupperware container that fits your loaf again.
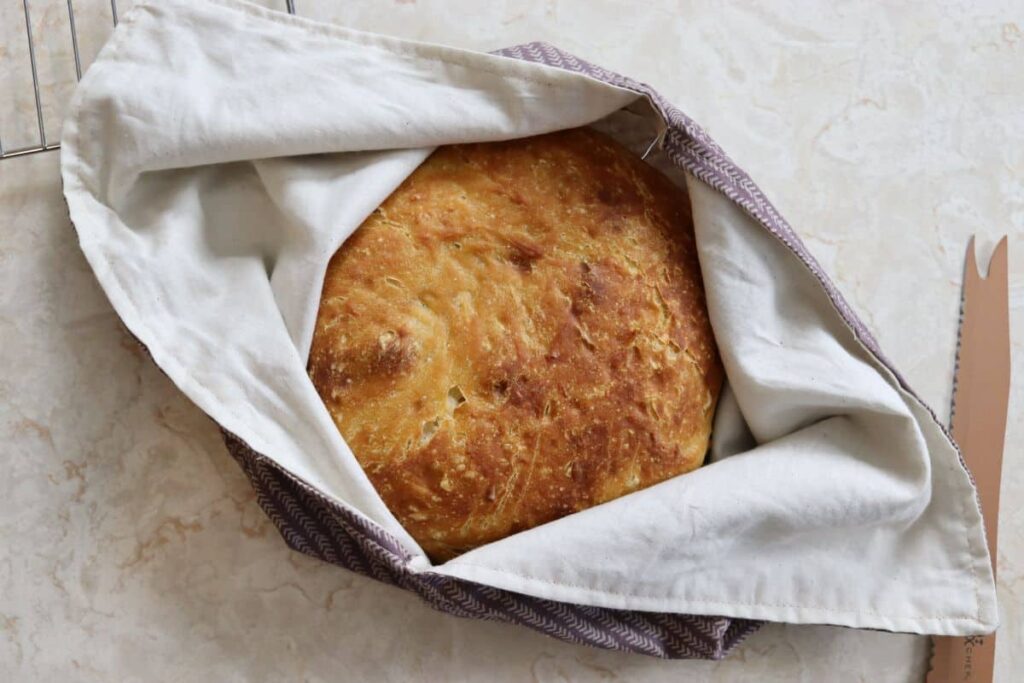
You’ll be happier, and so will the environment. Besides, this bag will keep your bread crusty on the outside and delightfully soft on the inside. Just as homemade bread should be.
A fresh baked loaf should last about 3 or 4 days in this bag, compared to 2 days without it. If your house is anything like mine you won’t even have a loaf around that long.
TOOLS AND MATERIALS NEEDED FOR THIS PROJECT
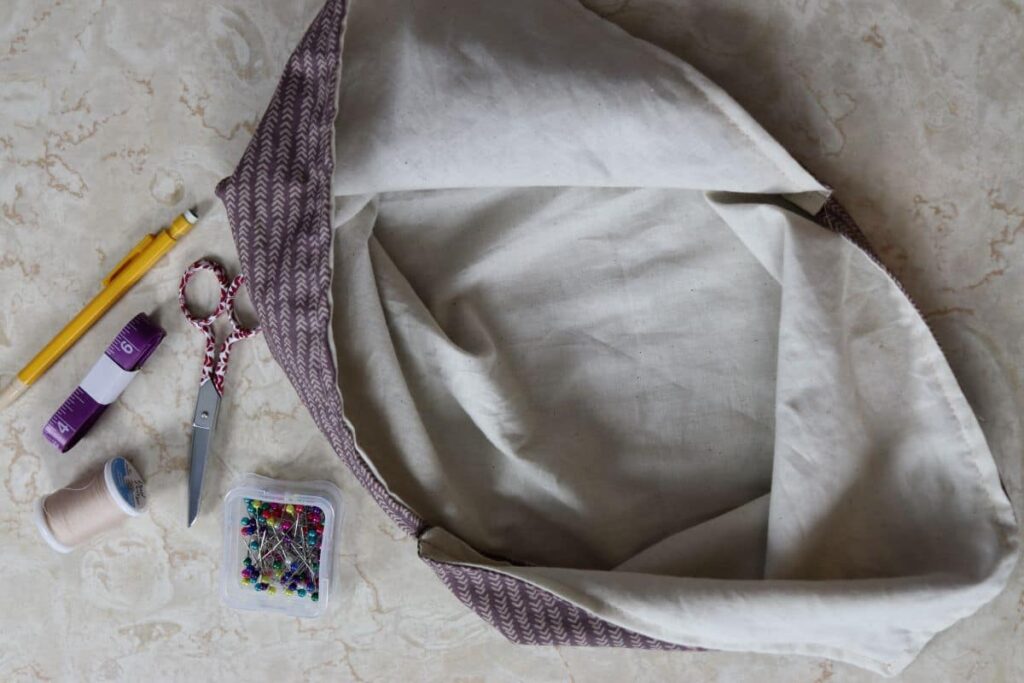
The tools that you’ll need to make this reversible bento bread bag are very basic sewing supplies. You probably already have them at home.
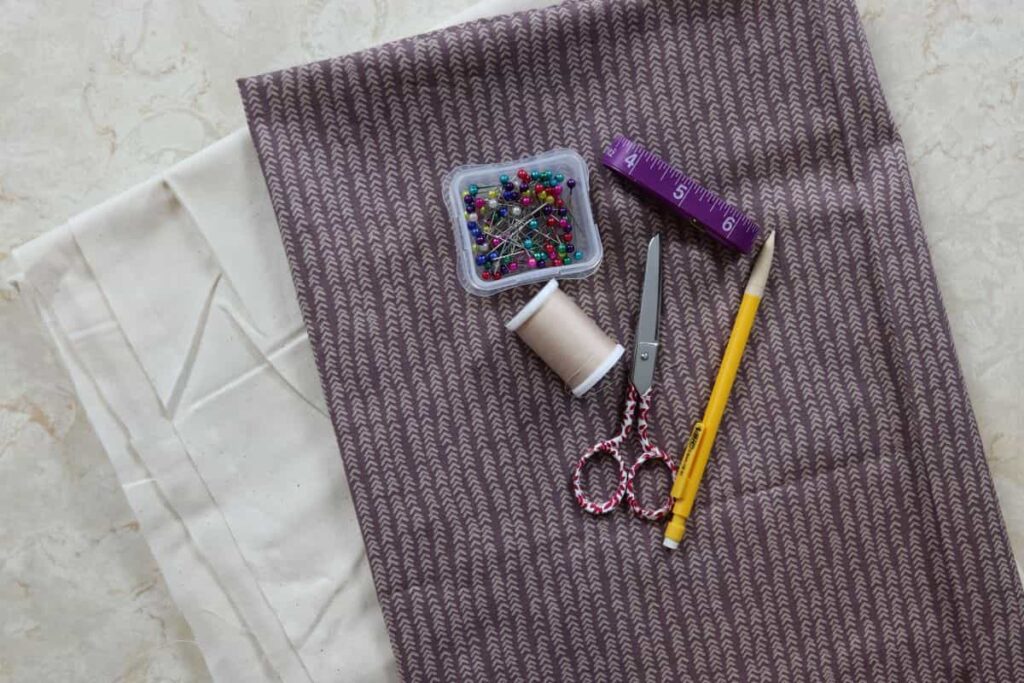
TOOLS NEEDED FOR THIS PROJECT:
- Iron and ironing board
- Measuring tape
- Fabric pencil
- Yard stick
- Fabric scissors
- Sewing pins
The materials you’ll need to make this bag are also very basic. They can be found at any craft store that carries fabric. You can even find them in some discount stores and at walmart.
MATERIALS NEEDED FOR THIS PROJECT:
- 2 yards fabric – linen, cotton, or muslin
- linen, muslin, or cotton
- 1 yard each of complimentary prints or solids
- Coordinating thread
CHOOSING MATERIAL FOR YOUR BAG
It is my understanding that linen is the best material to use when making a reversible bento bread bag. I have never made one from linen, as I’ve never been able to purchase it in my area.
I could order it online, but I’ve chosen not to do that. Perhaps one day I will, as I do really want to give a linen bag a try.
It is my understanding that linen naturally absorbs moisture. And that property helps prevent the bread stored in the bag from molding.
However, cotton is the second most recommended fabric for making bread storage bags. And, it too, is highly absorbent. It is also considerably less expensive.
Muslin comes in third for recommended fabric for this project. It is not highly absorbent, but it does have great breathability.
And breathability is another important property to have in a bread storage bag. A loaf will stay fresh longer when it has sufficient airflow.
I am using cotton fabric for one side of the bag in this project. And muslin for the other.
HOW TO MAKE THIS BAG
It’s best to wash the material you’re going to use to make your reversible bento bread bag before you begin this project.
Both cotton and muslin are woven from natural plant fibers. These fibers are prone to shrinking the first time you wash them. So, if you don’t wash the fabric before you construct the bag, you may end up with a misshapen bag in the long run.
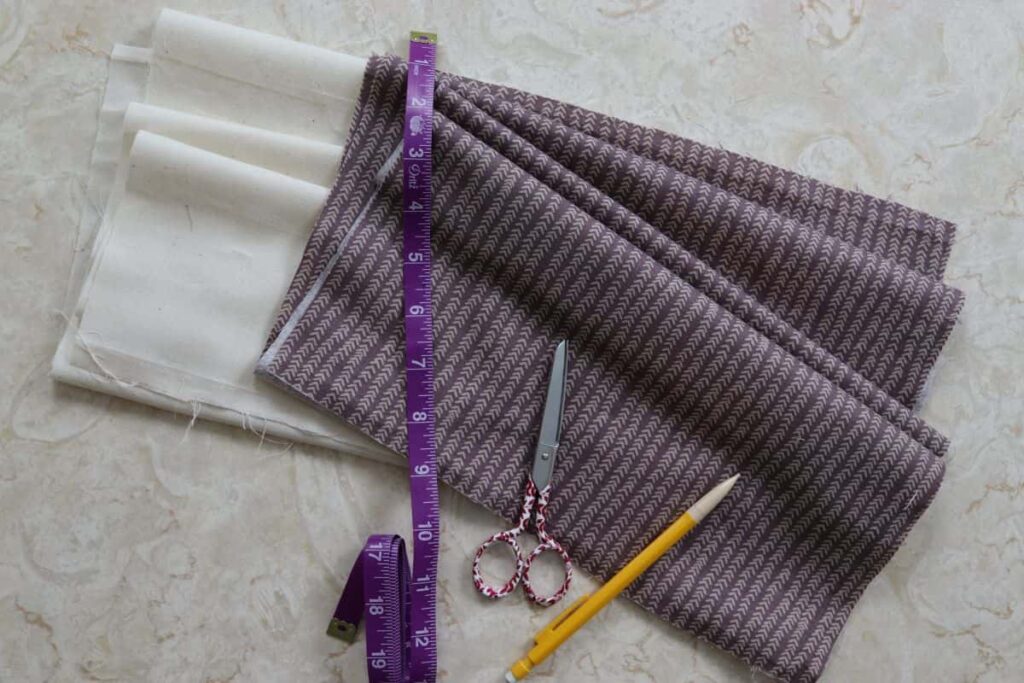
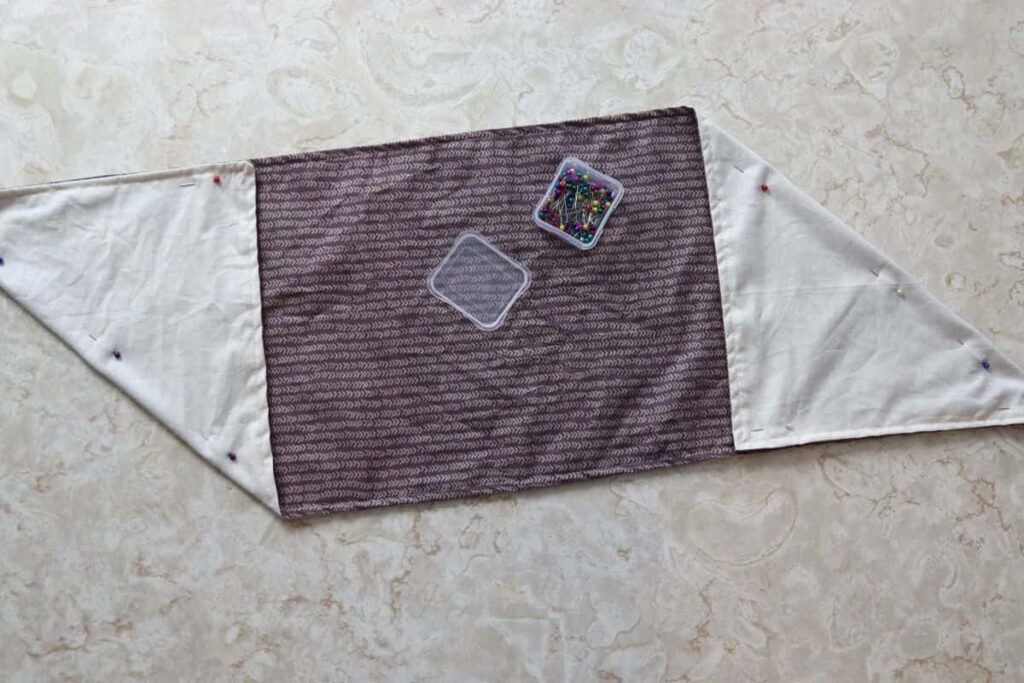
After washing the fabric, be sure to iron it so that your pieces are not irregular sizes when you cut them. Then cut a rectangle from the fabric. The rectangle needs to have a 1:3 ratio for measurements. The bag I made for this tutorial was cut at 12″x36″.
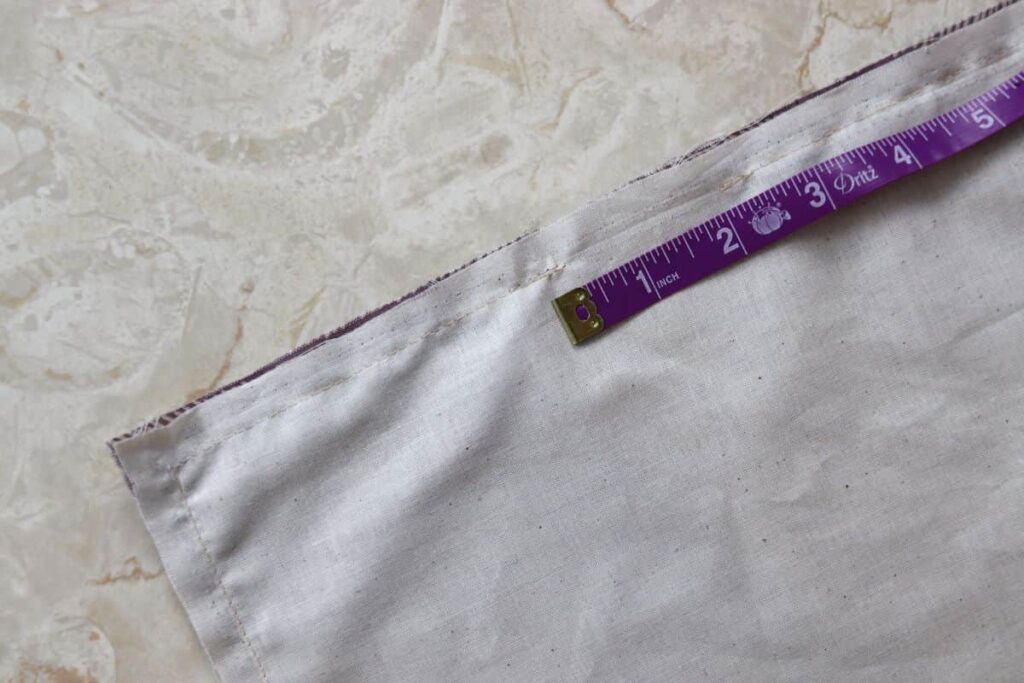
Pin the two pieces of fabric together, with right sides facing one another. And attach them with a 1/2″ seam.
Leave a 2″ gap in the seam, so that you can turn the bag inside right. Be sure to tack the seam at both sides of the gap, or it will rip open while you’re turning the bag.
Turn the bag inside right.
Would you like to save this post for later?
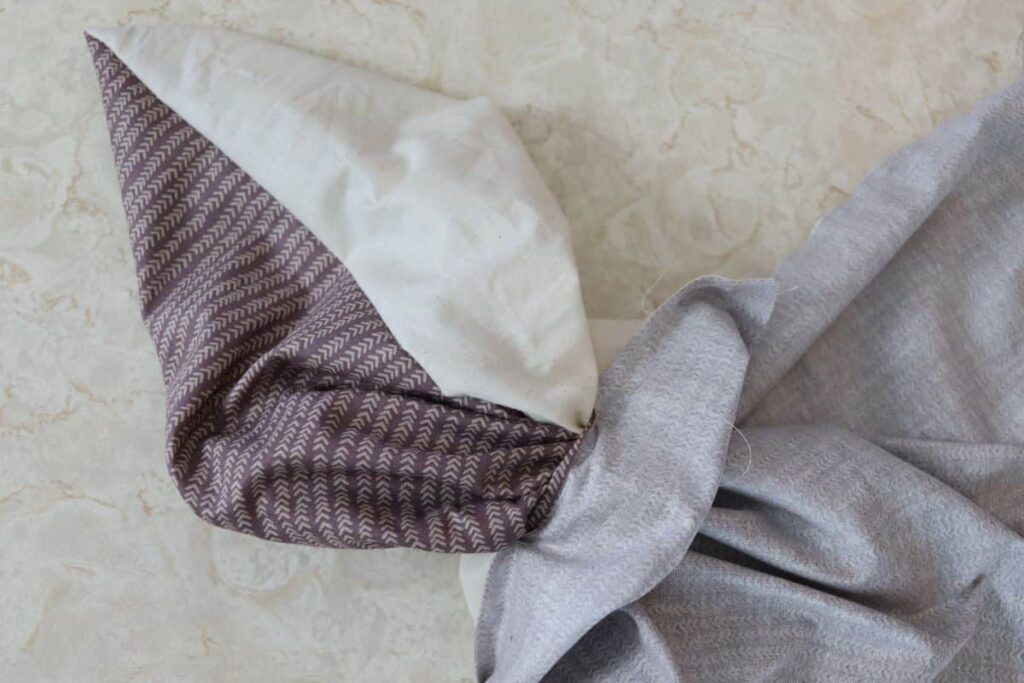
Reach inside the bag with a pointed, but blunt, object and carefully form the corners. Be sure not to push the object through the corners.
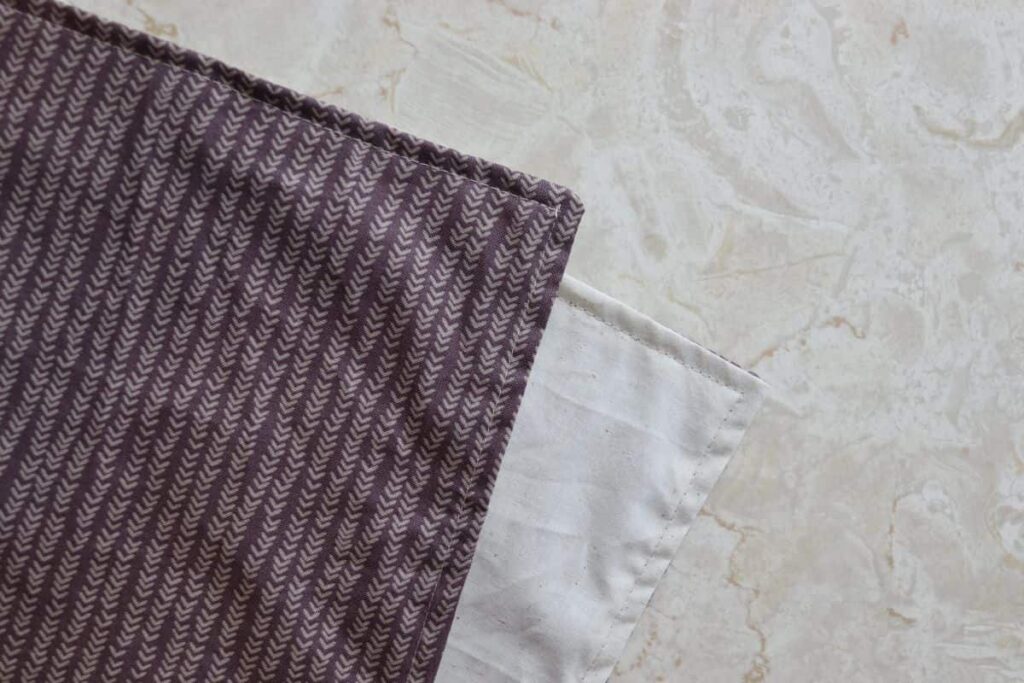
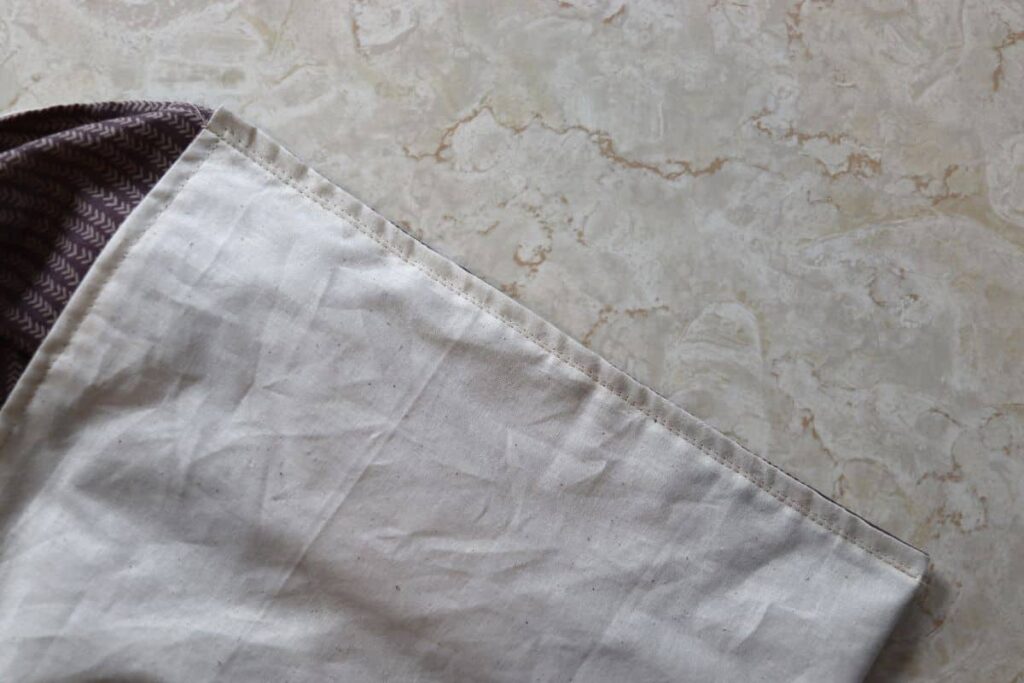
Top stitch around the bag to give it a finished look. Stitch as close to the edge as you can, and make sure to catch the material at the gap you left for turning. Also, lightly tack the material at the start and the finish of the top stitch, enough to hold the stitch without leaving a noticeable tack.
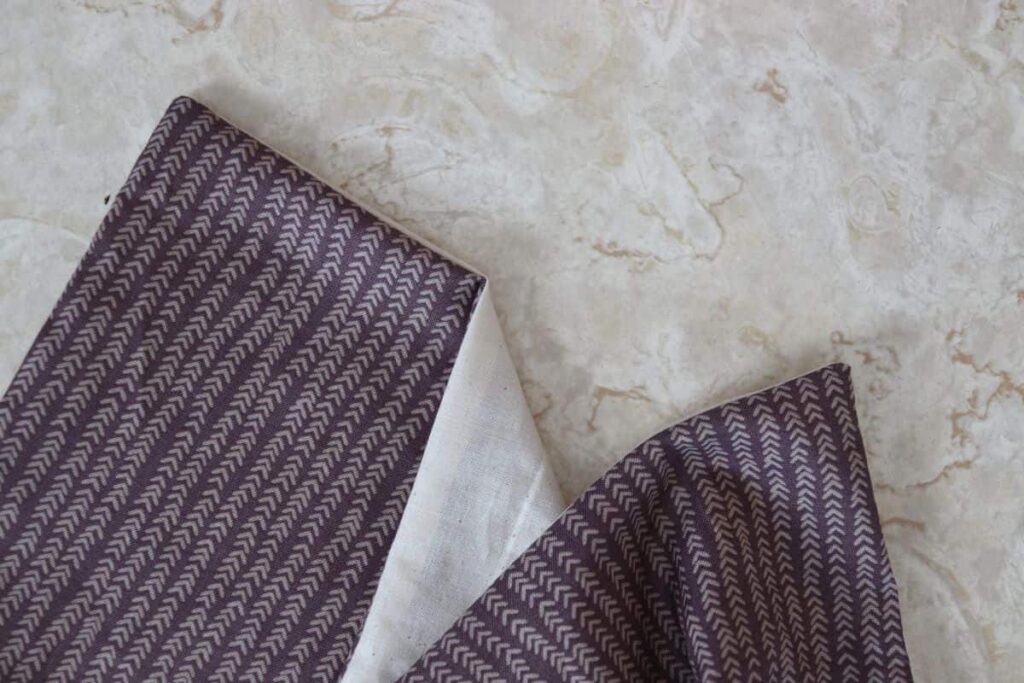
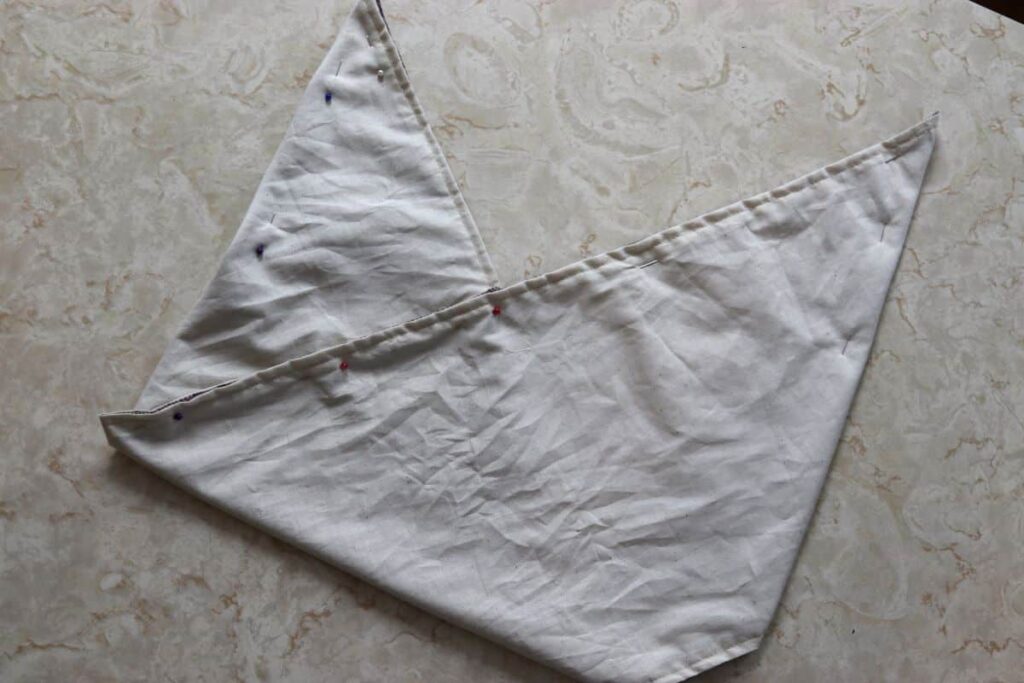
Lay the material out and fold the corners as shown. Pin them securely so that they do not unfold as you are shaping your bag to be sewn.
This next step is difficult to explain. I had a very hard time following it from other bloggers when I was learning to make this bag. And I’m afraid I find it hard to explain myself. If you have trouble following it as well, I recommend you watch the video posted above, as it is easier to show with movement as opposed to still photos.
Fold the material, at the top of the right hand corner of the bag. This creates the place for the seam on one side of the bag. Move the fabric up toward the top of the bag approximately 1 1/2 – 2 inches and then pin that seam together.
Flip the bag over. The seam on the other side will be bigger, as the material will not sit flush up against the other seam. You will have to maneuver it a bit to get it right.
Form that seam and pin it together. Remove the other pins from the bag.

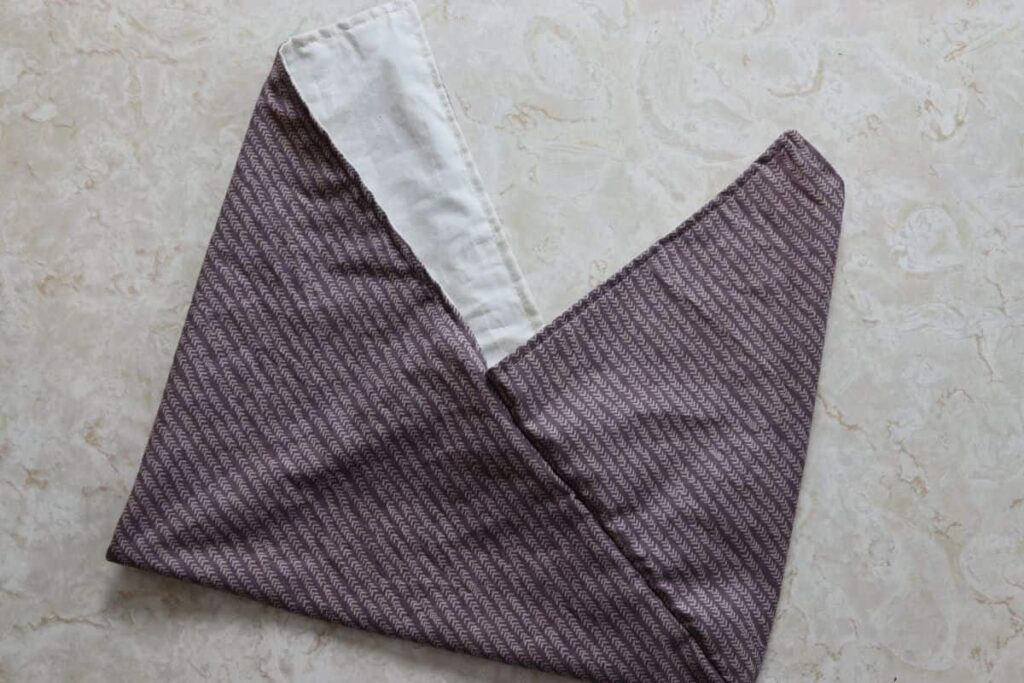
Sew both of the seams together, tacking at both ends.
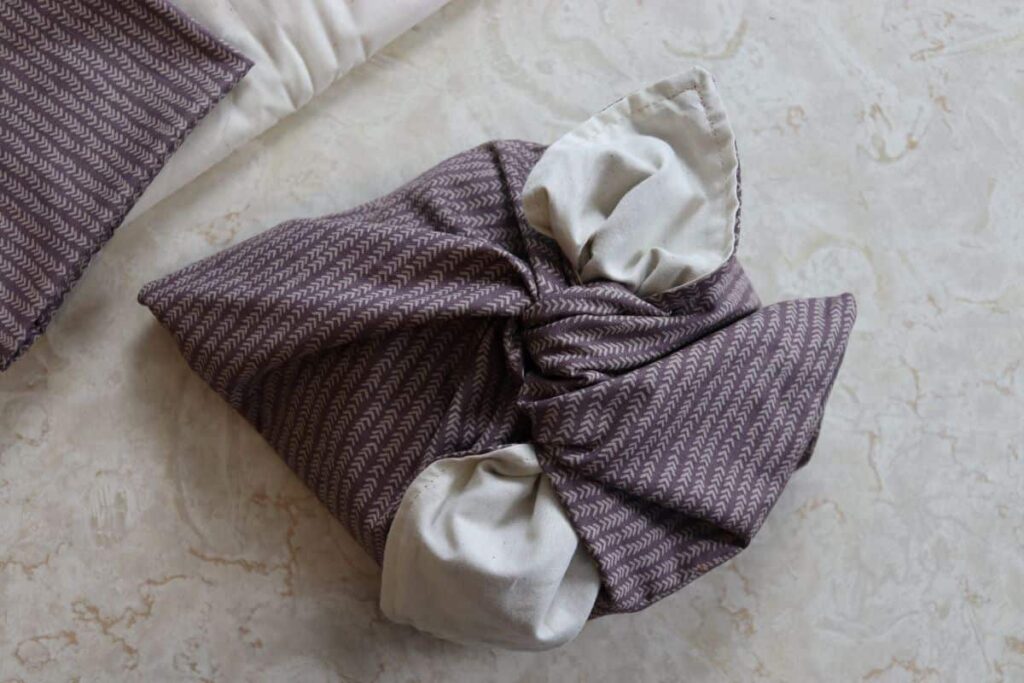
Turn the bag inside right (although technically it is reversible), and you’ve done it! You have a great bag to store that amazing homemade bread you love so much!
HOW LONG WILL THIS BAG KEEP MY BREAD FRESH
This reversible bento bread bag will keep bread fresh much longer than other means of storage. It will extend the life of a loaf by at least 1 or 2 days.
Although, it is very difficult to accurately measure how long it will keep your bread fresh because there are so many factors involved in that equation.
Homemade bread does not contain preservatives. Therefore, it doesn’t last as long as a store bought loaf.
BUT … it is exponentially better for your health. And the taste of store bought bread can’t even begin to compare to it.
If you find that you still have some of your homemade loaf left after a few days out on the counter in this bag, simply put it in the refrigerator bag and all.
This bag works very well in the refrigerator, so there’s no reason to look for another storage option when it’s time for your bread to be stored there.
It also works well short term in the freezer. It will keep bread for a week or two without freezer burn. Which is especially nice if you want to make several loaves at once.
Just an fyi for you … it will work to your benefit to slice your loaf before you freeze it.
OTHER WAYS TO USE YOUR REVERSIBLE BENTO BREAD BAG
There are so many reasons, apart from bread, to make a reversible bento bread bag.
They can be used for other food storage, like; bagels, hot pretzels, biscuits, english muffins, scones, cookies, fruit, and vegetables. And they can be used as a lunch bag as well.

It’s really nice to take a few of these bags to the farmer’s market to cut down on all of the paper/plastic waste that can be accumulated when bagging your produce.
You can also use these bags when harvesting vegetables from your garden. They work great for small harvests.
But, don’t limit your imagination to food products when considering how to use these bags. They are great for toiletries when traveling. They make a really nice on-the-run camera bag, and they’re perfect for wrapping gifts.
Recommended For You
If you try this project and love it, please give it 5 stars! It supports my work more than you may realize, and I appreciate that a great deal!
You can also show your support by tagging me on Facebook @sustainableslowliving and/or Instagram @slowlivingbydianegail when you post a pic of your finished project.

Reversible Bento Bread Bag
Equipment
- Iron and ironing board
- Measuring tape
- Fabric pencil
- yard stick
- Fabric scissors
- Sewing pins
- corner turning tool
Materials
- 2 yards linen, cotton, or muslin fabric 1 yard each of two coordinating prints/solid
- coordinating thread
Instructions
- Prep fabric: Wash, dry, and press both fabric pieces before cutting.
- Measure and cut: Mark and cut a 12"x36" rectangle from each fabric using the yardstick and fabric pencil.
- Align and pin: Place right sides of the fabric together and pin around all edges.
- Sew perimeter: Sew around all four sides with a 1/2" seam allowance, leaving a 2" gap along one long edge. Backstitch at both ends of the gap.
- Turn right-side out: Carefully pull the fabric through the gap to turn the bag right-side out.
- Shape corners: Use a blunt tool to gently push out and define the corners without tearing the fabric.
- Topstitch edges: Press the edges, then topstitch around the entire rectangle close to the edge, closing the gap in the process. Backstitch at the beginning and end.
- Fold right corner: With the rectangle flat, fold the lower right corner upward so the short edge aligns with the bottom long edge to form a triangle. Pin to secure.
- Fold left corner: Fold the upper left corner downward so the short edge aligns with the top long edge to form another triangle. Pin in place.
- Form bag shape: Fold the fabric horizontally at the upper fold of the right triangle to shape the body of the bag. Adjust so the overlap is about 1½"–2" longer where both sides meet.
- Pin and sew side seams: Pin both side edges where the folds meet. Flip and adjust as needed to fully close the bag, then sew the two side seams. Backstitch securely at each end.
Video
Notes
- Choose breathable fabrics: Linen, cotton, or muslin work best for storing bread while reducing moisture buildup.
- Use contrasting fabrics: Pick complementary solids or prints to make a stylish reversible design.
- Customize size: Adjust the rectangle dimensions to fit smaller or larger loaves. Maintain a 1:3 length-to-width ratio for best folding results.
- Storage: Keep your bread in the bento bag at room temperature for up to 3 days.


This reversible bento bread bag is a stylish and practical way to store your homemade loaves. It’s perfect for keeping bread fresh while adding a personal touch to your kitchen. If you make one, I’d love to hear how it goes in the comments. Happy sewing!
Such a great beginner friendly project! She explains it so well, made it so easy! Thank you!
Thanks so much Victoria!