Fabric Scrap Mache Bowls || How To Make Fabric Bowls

I saw a fabric scrap mache bowl on the big ‘ol interweb and I fell in love. So, I looked around at the different ways they’re being made out there, and I came up with a plan to make a set for myself.
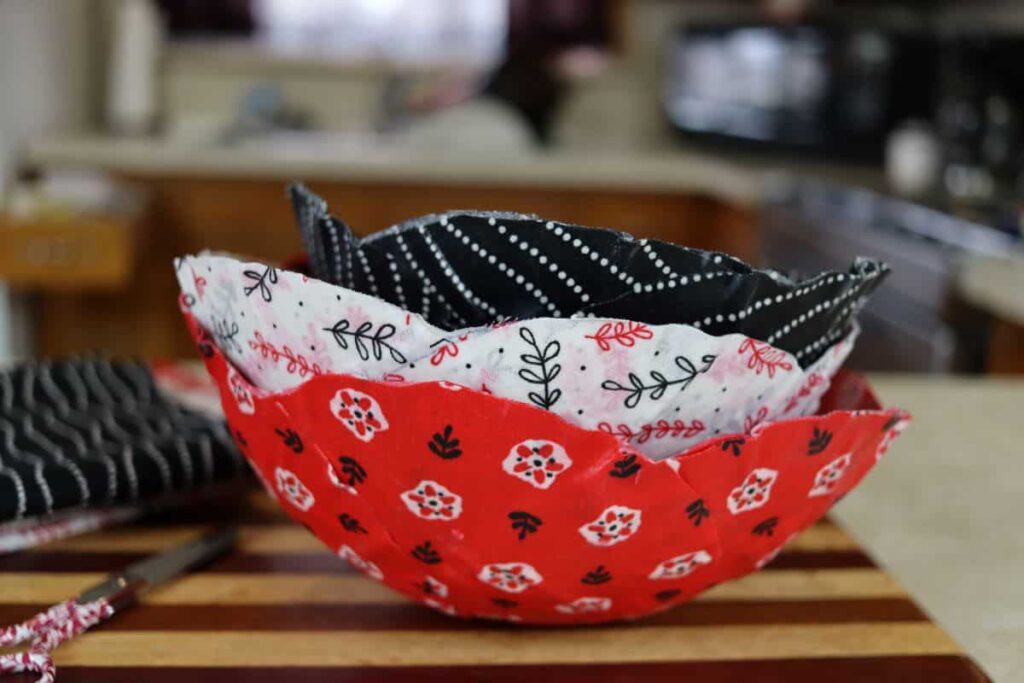
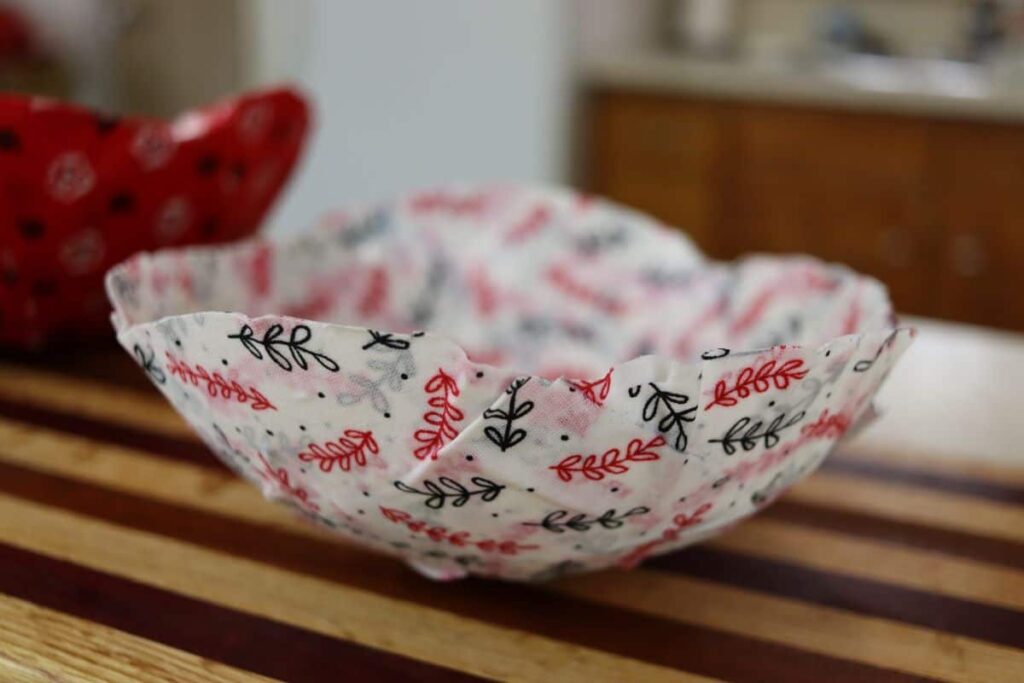
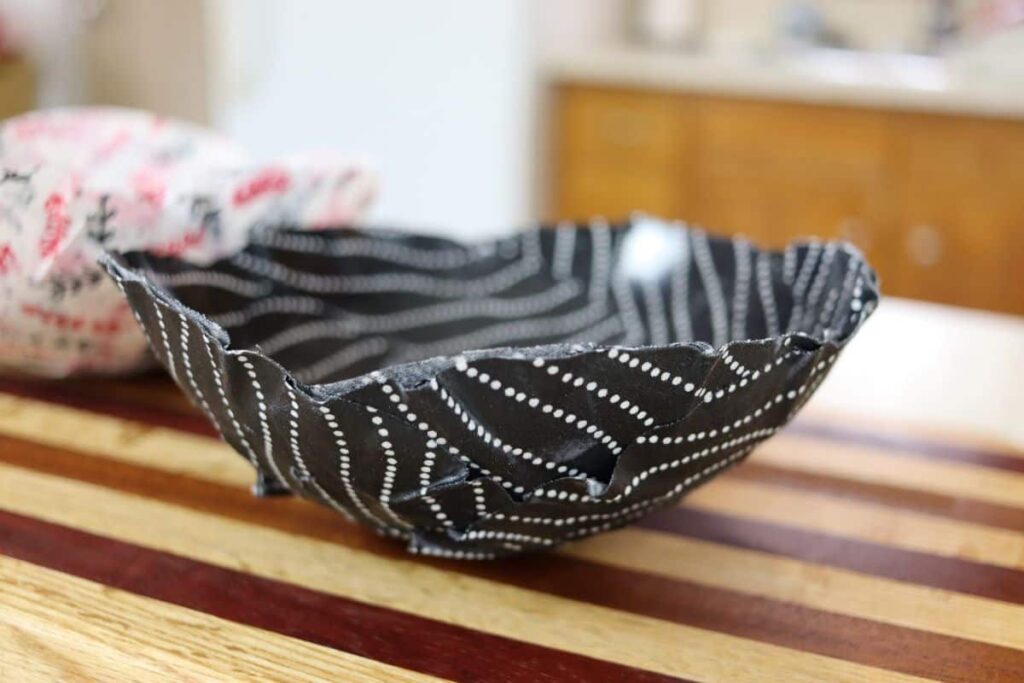
I adore the way they came out. They’re just so charming. And I absolutlely love the fact that the ‘feel’ of them can be changed up so easily, just by switching out the type of fabric used to make them.
Even just changing the color scheme of them makes a pretty big difference in their vibe. They are all around very easy to personalize.
And that’s a great quality to have in a hand made craft.
If you like making handmade crafts for your home, my DIY mini-macrame plant hanger, beaded wooden spoons, easy bento bread bag, easy wine cork garland, and basic tea light hangers are so useful and fun to make too.
WHAT YOU’LL NEED TO MAKE THIS PROJECT
Overall, this is a very inexpensive project to make. You should have just about everything you need to put a fabric scrap mache bowl or two together in your craft supply stash.
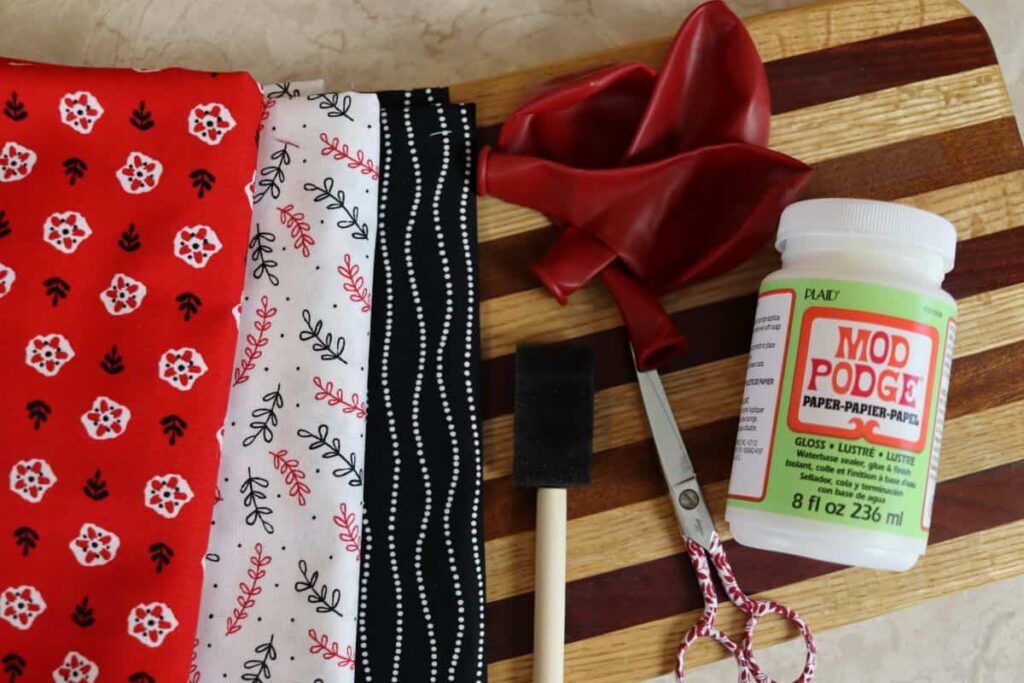
The only thing I had to pick up to do this project was a bottle of mod podge and a pack of balloons.
Here’s what you’ll need to get the job done …
- FABRIC – It takes just over 1/2 yard of fabric to make one of these bowls. This can vary depending on what size you decide to make, of course.
- BOWL – You will need a bowl that is about 6″ wide, both to trace out the rounds of fabric the bowl is made of and to hold the balloon while you attach the fabric to it with mod podge.
- PENCIL – A pencil or pen is needed to trace out the rounds of fabric the bowl is made of.
- FABRIC SCISSORS – You will need a pair of fabric scissors to cut the rounds from your fabric.
- BALLOON – A balloon will be used to shape your bowl on.
- MOD PODGE – This craft glue is the perfect medium for making these bowls.
- FOAM PAINT BRUSH – You will need a foam paint brush to spread the glue over the fabric layers of your bowl. It will work to your benefit for the brush to be small enough to fit inside the bottle of mod podge.
- CRAFT SCISSORS – You will have to trim the top of your bowl after you remove it from the balloon. You will want to use a pair of cheap, crappy scissors for this part of the project.
CHOOSING FABRIC FOR THIS PROJECT
You can make a fabric scrap mache bowl out of just about any fabric you like. I don’t have first hand experience with fabrics other than the basic cotton fabric that I used for my bowls.
So, it’s hard for me to pass on any advice to you about choosing fabric for your bowls. However, I can tell you that the cotton fabric I used was very easy to work with.
I’m thrilled with the way the bowls I made with it came out. I would definitely use this same type of fabric again.
And, I also feel confident saying that a thicker fabric would be a little difficult to work with. Only because I know that I had to be mindful of whether or not my edges were attaching to the bowl as I worked.
And it’s only logical that a thicker fabric would present a challenge in this area. Although, I did see a bowl made from denim while I was researching this article. So, it can be done.
And I have enough experience with fabric to know that if you choose to use a knit material you will likely have to be careful not to allow it to stretch too much as you apply the mod podge.
I would love to give silk a try with this project. I think the bowl would need to have more layers of fabric in order for something that thin to work well. But I feel like it would be especially appealing to the eye.
HOW TO MAKE A FABRIC SCRAP MACHE BOWL
It is so easy to make a fabric scrap mache bowl. It did take a bit of time for me to cut out all of the fabric rounds for the project. But, the rest of it was pretty quick.
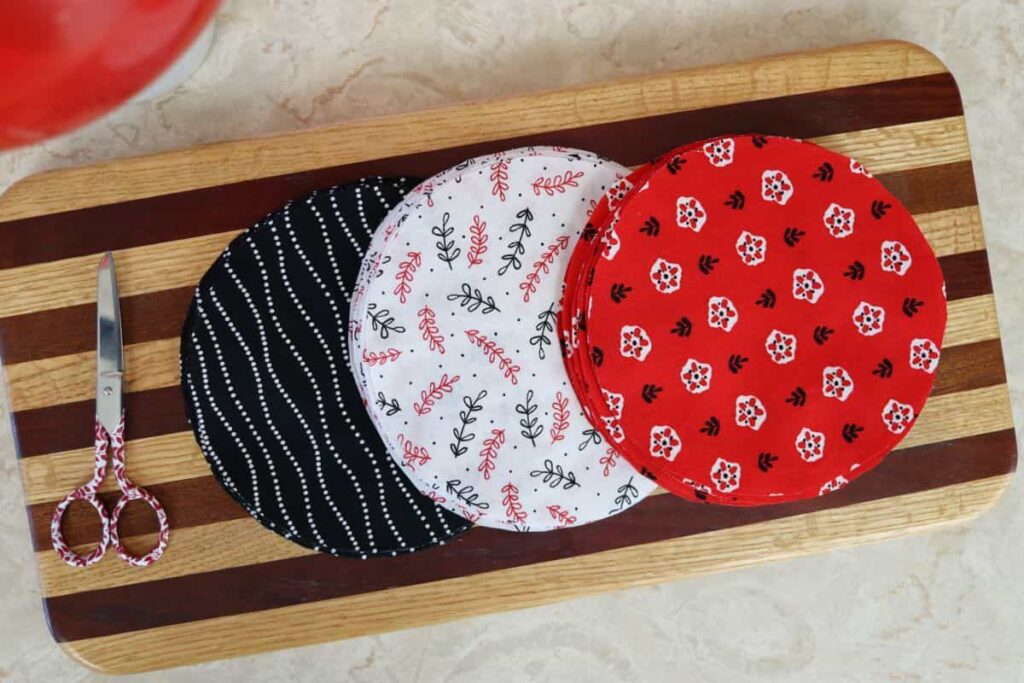
Cutting the fabric …
To start, I took a 6″ wide bowl and traced rounds onto the wrong side of my fabric with it. Use a pencil to do this. It will get all over the edge of the bowl.
And lead is easier to remove from the bowl than ink. A permanent marker may not come off at all. So, go pencil.
No matter what you use, be sure to wash your bowl as soon as you’re done tracing your rounds.
Then cut the rounds from the fabric. Be sure to cut inside the line that you drew on the fabric so that it doesn’t show up on your bowl.
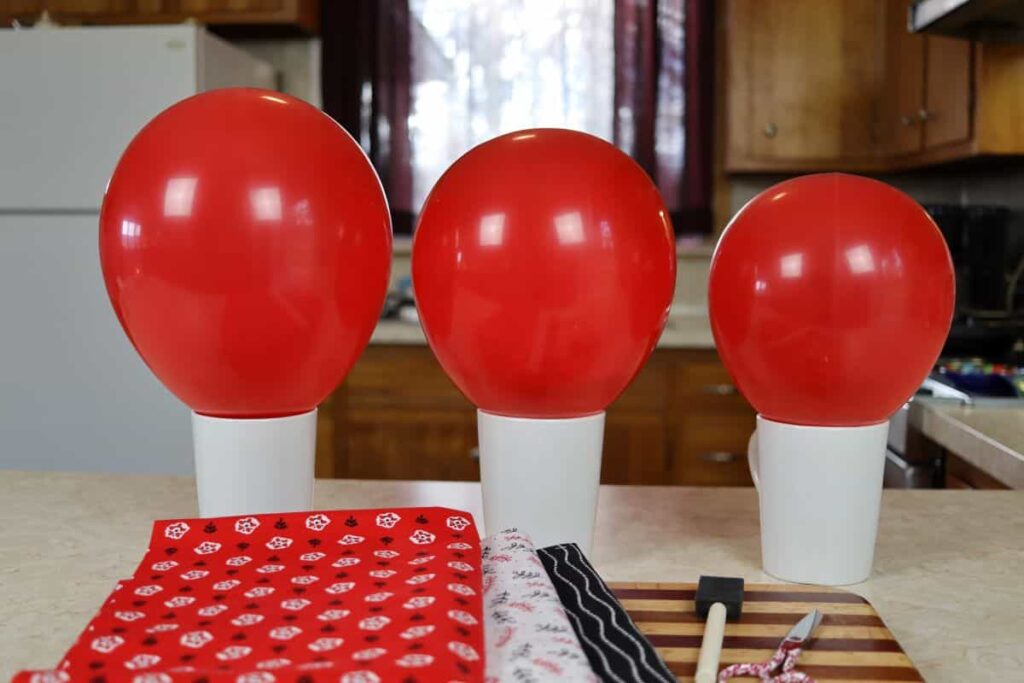
Making the bowl …
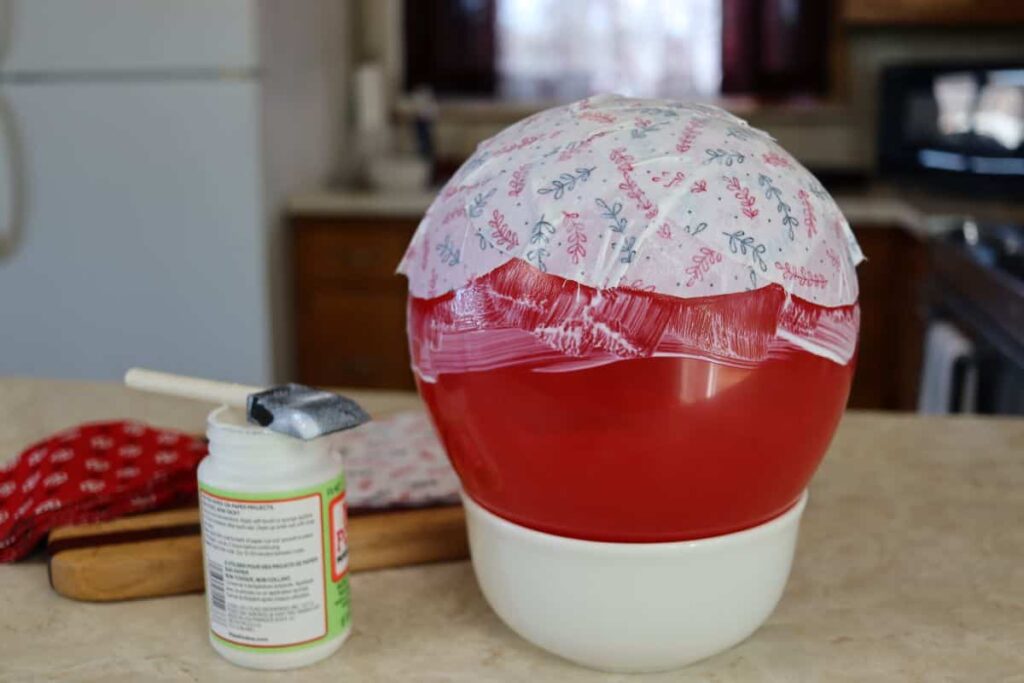
Next, blow up a balloon until it is appropriately sized for the bowl you want to make. And sit it right side up in the bowl you used to draw the rounds.
Take one of the foam paint brushes and paint the top of the balloon with mod podge. You will want to paint as far down the balloon as you expect your fabric rounds to be placed, even a little farther.
Then you’ll want to place a layer of fabric rounds on the balloon with the right sides facing the balloon. Place them one at a time, and cover each one with mod podge as you place it.
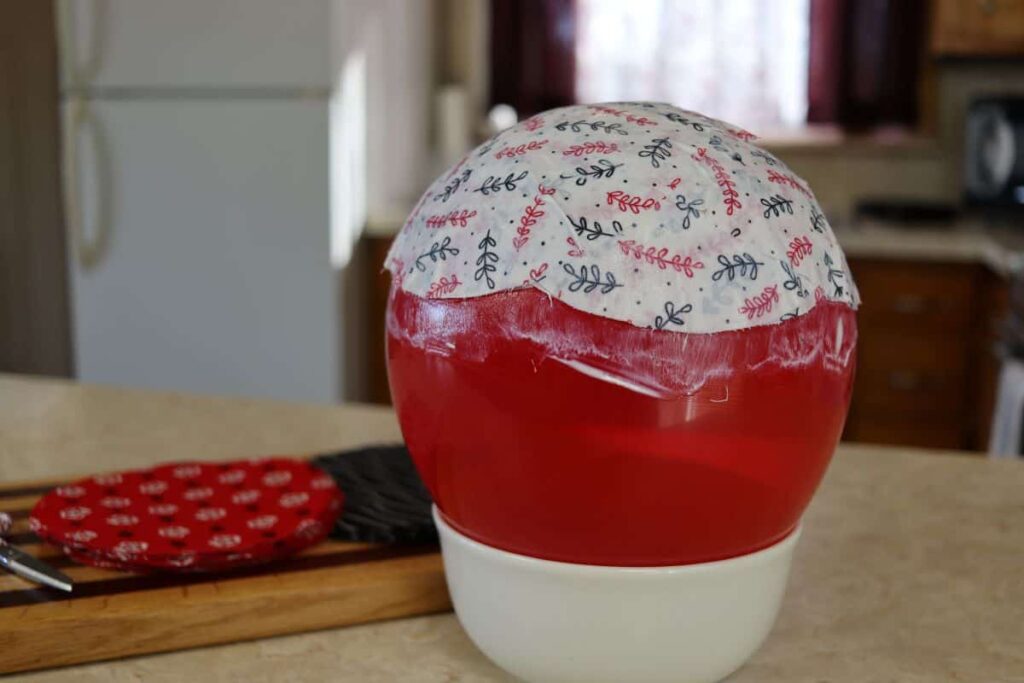
You will place two more layers of fabric on the balloon, mod podging each piece as it is placed. But these two layers will be put on the balloon with the right side facing out.
Would you like to save this post for later?
Letting it dry …
At this point, you will need to set the project aside for at least 24 hours to allow the bowl to dry completely.
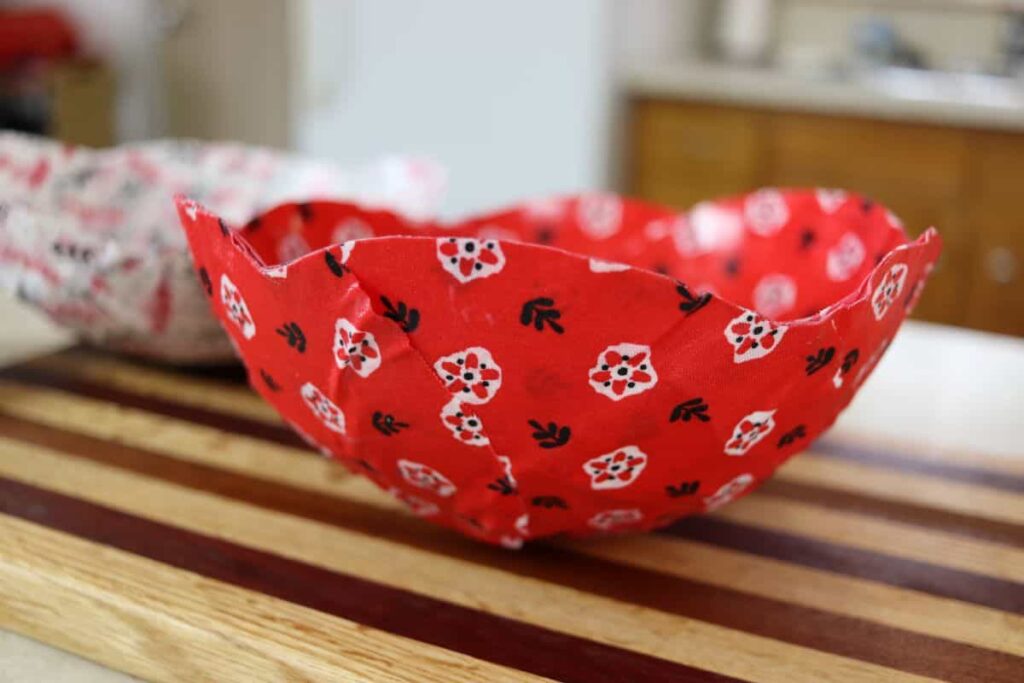
And then you will pop the balloon and remove it from the inside of the bowl, take a pair of craft scissors and trim the top edge of the bowl so that there are no wrong sides of the fabric showing, and you’re done.

You have made a sweet little bowl for yourself, that screams handmade charm.
THIS PROJECT AND THE ENVIRONMENT
One of the things I found to be a bit of a theme when I was researching this project was the idea that it could be made more environmentally friendly by shaping the bowl over another bowl wrapped in saran wrap.
I certainly don’t know the nitty gritty details on this theory enough to know which way is the most eco-friendly. I feel like it’s a bit of a tit for tat situation to be honest.
The fact is this is not necessarily the most environmentally friendly project going. Although it does utilize fabric scraps that would otherwise be tossed in a landfill. They will ultimately land there anyway, it will just take a little longer.
The balloons are not an eco-friendly product and I know there are concerns about their disposal because of wildlife. I’m not sure that saran wrap is all that different.
And, I imagine that mod podge isn’t really great for the environment either. So, it seems to me that someone saw the upcycling of fabric scraps and decided to tout the environmental friendliness of this project. However, fabric scraps are not the only element involved in it’s production.
If all of this rubs you the wrong way, this may not be the project for you. I too, prefer to keep things as environmentally friendly as possible.
But I’m okay with my little fabric scrap mache bowl project over here. You have to weigh these issues for yourself, and come to your own conclusions.
HOW TO USE A FABRIC SCRAP MACHE BOWL
A fabric scrap mache bowl has seemingly endless uses. You can use it just about anywhere in the house to hold just about anything imaginable.
I am considering using the small bowl from my set to sit by the front door so that I can toss my car keys in it when I come home. Or I might put it on my dresser to hold the change I empty from my apron when I come home from work.
Larger bowls are great for small crochet or knitting projects. Or to hold any small craft project that you are working on at the time.
I adore the idea of filling one with pine cones or acorns to decorate for the fall. A bowl made in a fall color scheme would be especially nice for this.
I imagine the largest of my set will become a catch all on my desk. Somehow, there is always a pile of odds and ends that grows there and ends up all over if it doesn’t have a home.
You can use them for anything you like. The only thing holding you back is your imagination.
NOTE: They are not suitable for food products. And they can not hold wet items.
HOW TO CARE FOR A FABRIC SCRAP MACHE BOWL
I have never had a fabric scrap mache bowl before the set that I made for this post. So, I’m not sure what it’s going to require to take care of them.
It’s obvious to me that they are not washable. I think it may be possible to quickly wipe them out with a damp rag. I would imagine it would have to be very quick.
And I would dry it with a blow dryer immediately after. As a matter of fact, the blow dryer would likely be a good way to keep it from getting dirty in the first place.
I think that the best approach to caring for this bowl is to do your best to prevent it from becoming dirty in the first place. Rather than trying to clean it after it has dust/dirt build up on it.
Even wiping it out with a dry rag as part of your regular cleaning routine would probably make a big difference in the length of it’s lifespan.
Recommended For You

If you try this project and love it, please give it 5 stars! It supports my work more than you may realize, and I appreciate that a great deal!
You can also show your support by tagging me on Facebook @sustainableslowliving and/or Instagram @slowlivingbydianegail when you post a pic of your finished project.

Fabric Scrap Mache Bowl
Equipment
- 6″ bowl
- Pencil
- Fabric scissors
- small foam paint brush
- Craft scissors
Materials
- fabric scraps
- mod podge
- balloon
Instructions
- Trace fabric rounds: Use a bowl and pencil to trace circles on the wrong side of your fabric scraps.
- Cut fabric shapes: Cut out approximately 18 rounds using fabric scissors, trimming inside the pencil line to avoid marks.
- Inflate balloon: Blow up the balloon to the size you want your finished bowl to be.
- Stabilize balloon: Place the balloon (tied end down) in the bowl to hold it steady.
- Apply base layer: Brush a layer of Mod Podge onto the balloon in the area where the bowl will form.
- Add first layer of fabric: Press 6 fabric rounds onto the Mod Podge area with the right side of the fabric facing in toward the balloon. Apply Mod Podge over each one.
- Add second and third layers: Repeat with two more layers of fabric rounds (about 6 per layer), this time with the right side of the fabric facing out. Mod Podge each round as you go.
- Dry completely: Let the bowl dry on the balloon for at least 24 hours in a well-ventilated space.
- Remove and trim: Pop the balloon and gently peel it away from the inside of the bowl. Use craft scissors to trim the edge cleanly, removing any visible fabric backs.
Video
Notes
- Use a mix of prints: Combining solids and patterns adds depth and charm to the finished piece.
- Adjust size easily: Choose a larger or smaller balloon depending on how big or petite you’d like your bowl.
- Skip perfection: Slight overlap or wrinkles in the fabric just add to the handmade appeal.
- Storage: These bowls are for decorative or light storage only. Avoid filling them with heavy items.

These fabric scrap mâché bowls are a great way to repurpose old materials into something both functional and beautiful. They add such a unique touch to any space! If you give this project a try, I’d love to hear how it turns out in the comments. Enjoy bringing your creativity to life!
Great idea! I have LOTS of scraps so I can finally put them to use! Thank you!
You’re very welcome. Happy crafting!