Easy Peanut Butter Bacon Pupcakes

These peanut butter bacon pupcakes follow a simple, from-scratch method using familiar ingredients and a straightforward baking process. They’re designed as an occasional homemade dog treat and can be prepared ahead of time for special moments or seasonal celebrations.
If you’re looking for other baked dog treats made the same way, you may also like my sweet potato dog treats and homemade apple dog treats.
Let’s talk about this recipe
This recipe focuses on a basic muffin-style batter baked into small pupcakes, then finished with a simple frosting and topping. The steps are easy to follow, and the process doesn’t require special tools beyond standard kitchen equipment.
These pupcakes are intended to be made occasionally and served separately from regular meals as a treat-style addition.
Why this recipe works
- Simple baking method keeps the process approachable and consistent.
- Straightforward ingredient list makes preparation easy to plan.
- Small batch format works well for occasional treat baking.
- Optional frosting and topping allow flexibility in presentation.
- Freezer-friendly results make it easy to prepare ahead of time.
Ingredients you’ll need
For the Pupcakes
- Coconut oil: Used to grease the muffin tin so the pupcakes release cleanly after baking. Other neutral oils can be used if preferred.
- All-purpose flour: Forms the structure of the pupcakes. Whole wheat flour can also be used if that’s what you have on hand.
- Applesauce: Use unsweetened applesauce made with simple ingredients to add moisture to the batter.
- Peanut butter: Choose a plain peanut butter with only peanuts in the label. Always check labels to avoid added sweeteners — be sure it doesn’t include xylitol.
- Olive oil: Adds richness to the batter. Any mild cooking oil can be substituted if needed.
- Honey: Provides light sweetness and helps balance the flavor of the pupcakes.
- Baking soda: Works with the other ingredients to help the pupcakes rise during baking.
- Baking powder: Supports the leavening process so the pupcakes bake evenly.
For the frosting
- Banana: Adds natural sweetness and helps create a smooth texture in the frosting.
- Cream cheese: Provides structure and spreadability for the frosting.
- Peanut butter: See the guidelines for choosing peanut butter in the batter ingredients above.
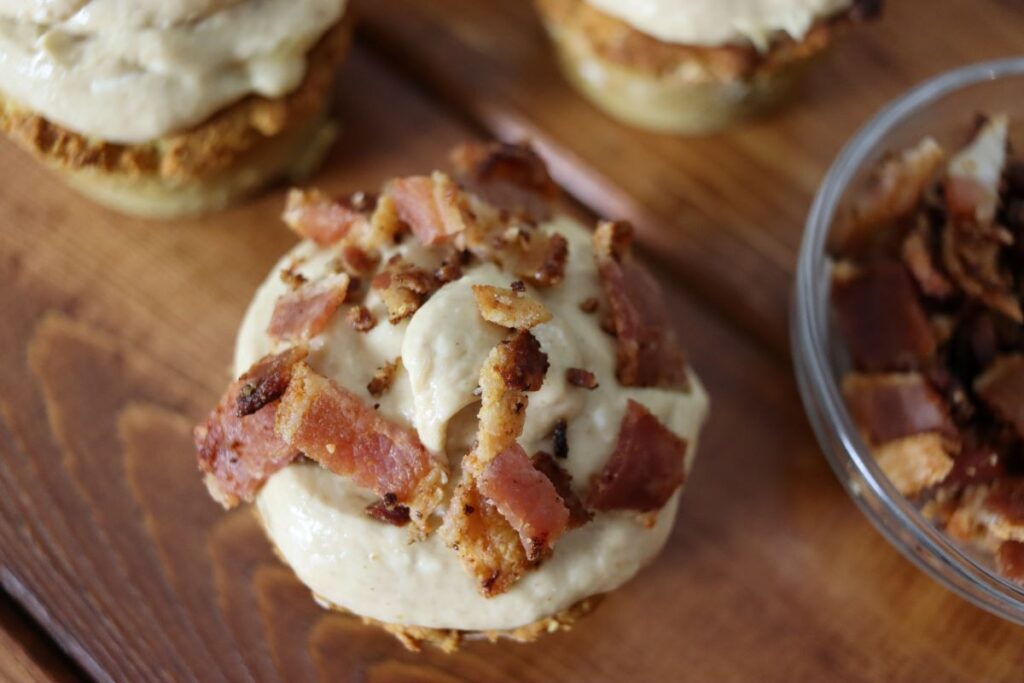
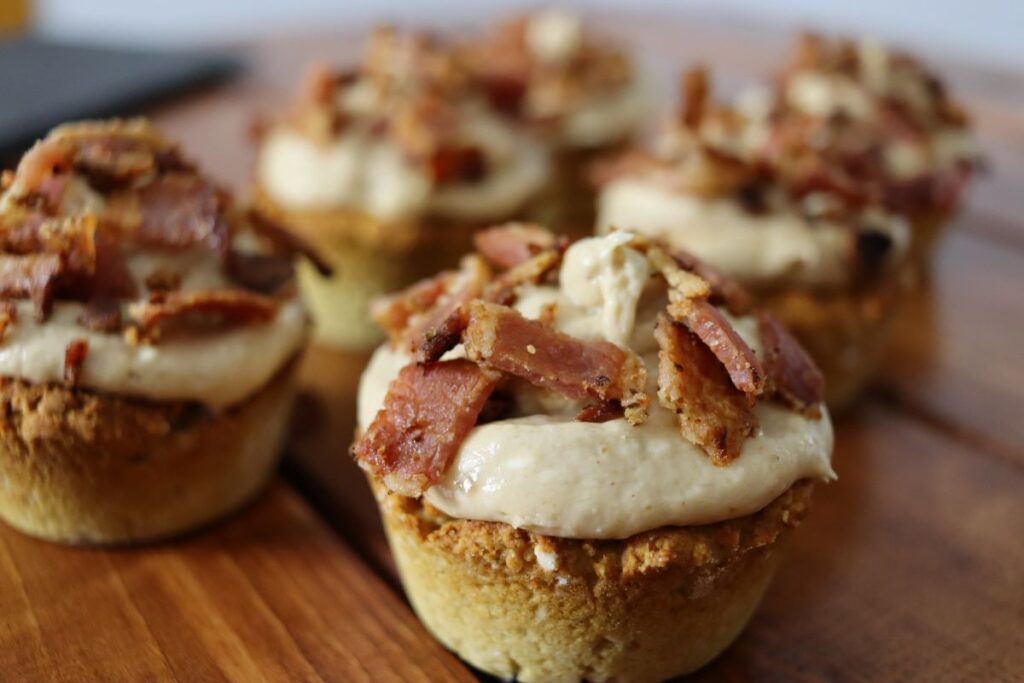
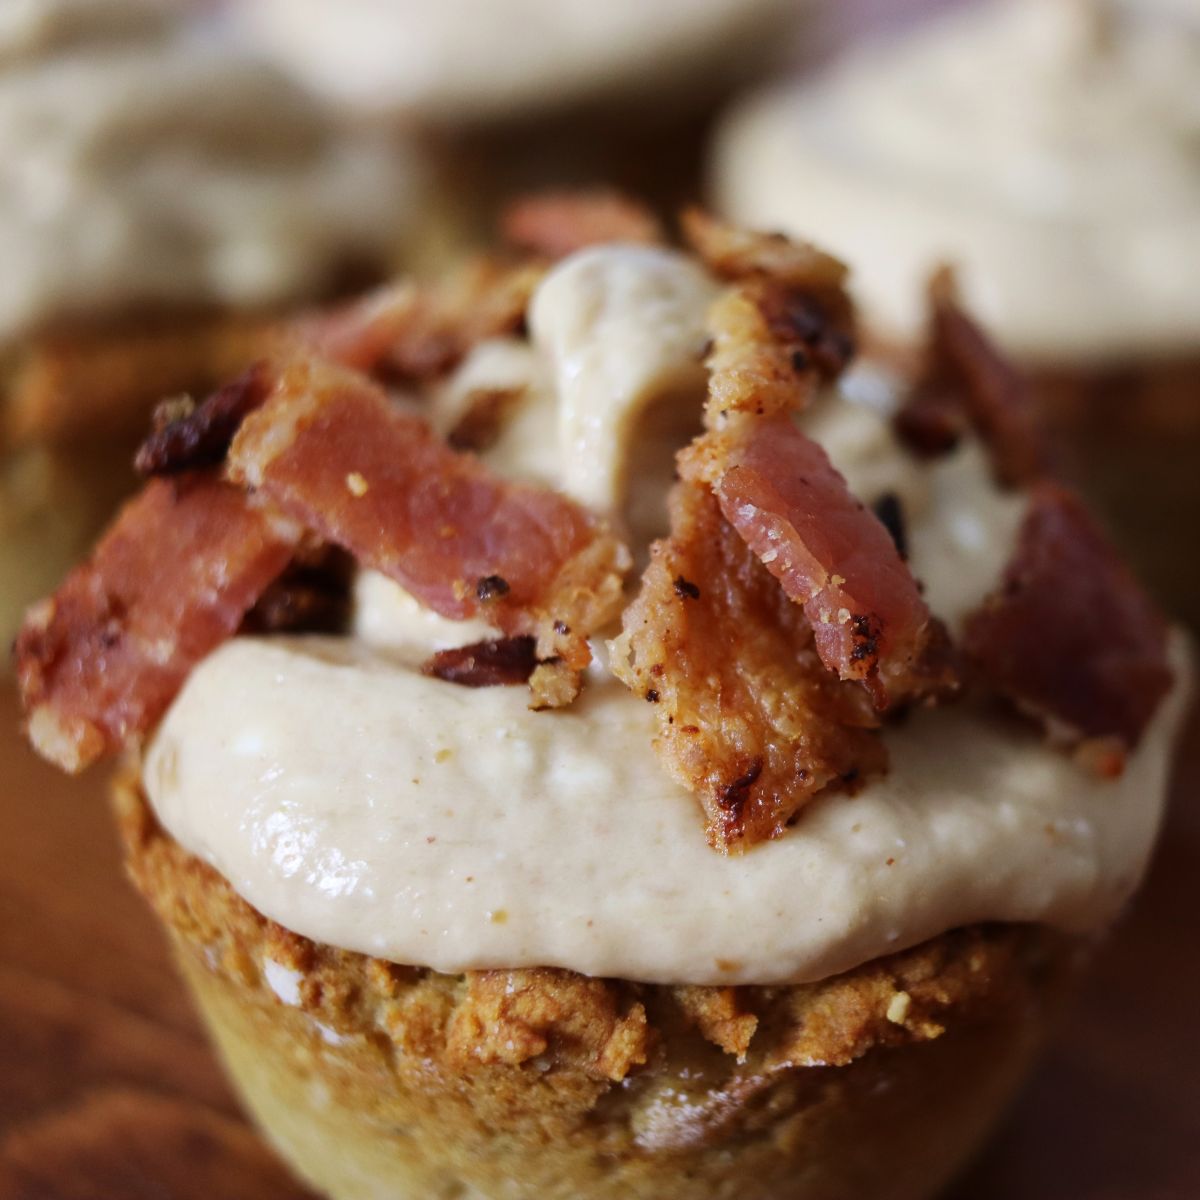
For the topping
- Bacon – Use plain cooked bacon without added flavorings, chopped finely for topping.
See recipe card below for full information on ingredients and quantities.
Would you like to save this post for later?
Make them your own
- Skip the frosting and serve the pupcakes plain if preferred.
- Leave off the bacon topping for a simpler finish.
- Use mini muffin tins to make smaller portions.
- Freeze unfrosted pupcakes and add toppings later if needed.
Make dog-friendly frosting
Step 1: Prepare the bacon by cooking, cooling, and chopping it finely. Set aside.
Step 2: Mix the dry ingredients together in one bowl.
Step 3: Combine the wet ingredients in a separate bowl.
Step 4: Stir the wet ingredients into the dry until just combined.
Step 5: Divide the batter evenly into a greased muffin tin.
Step 6: Bake until set, then cool completely before frosting.
Step 7: Combine the frosting ingredients in a bowl and blend until smooth.
Step 8: Spread a small amount over each cooled pupcake and finish with chopped bacon if using.
Recipe FAQs
Yes. The pupcakes can be baked in advance and stored refrigerated or frozen.
No. The frosting is optional and can be omitted.
Yes. Freezing works best before frosting and topping.
How these pupcakes are handled
These pupcakes are intended to be served as an occasional homemade treat. They can be offered separately from regular meals and are not meant to replace standard feeding routines.
Tips for consistent results
- Prepare ingredients ahead of time: Have everything measured and ready so the batter comes together smoothly.
- Mix the batter gently: Stir just until combined to keep the texture even.
- Cool completely before frosting: Let the pupcakes cool fully so the frosting stays in place.
- Apply frosting lightly: Use a small amount to keep the topping neat and easy to handle.
- Chop bacon finely: Smaller pieces distribute more evenly across the tops.
- Store properly: Refrigerate or freeze leftovers to maintain texture and freshness.
Other pet treat recipes you’ll love
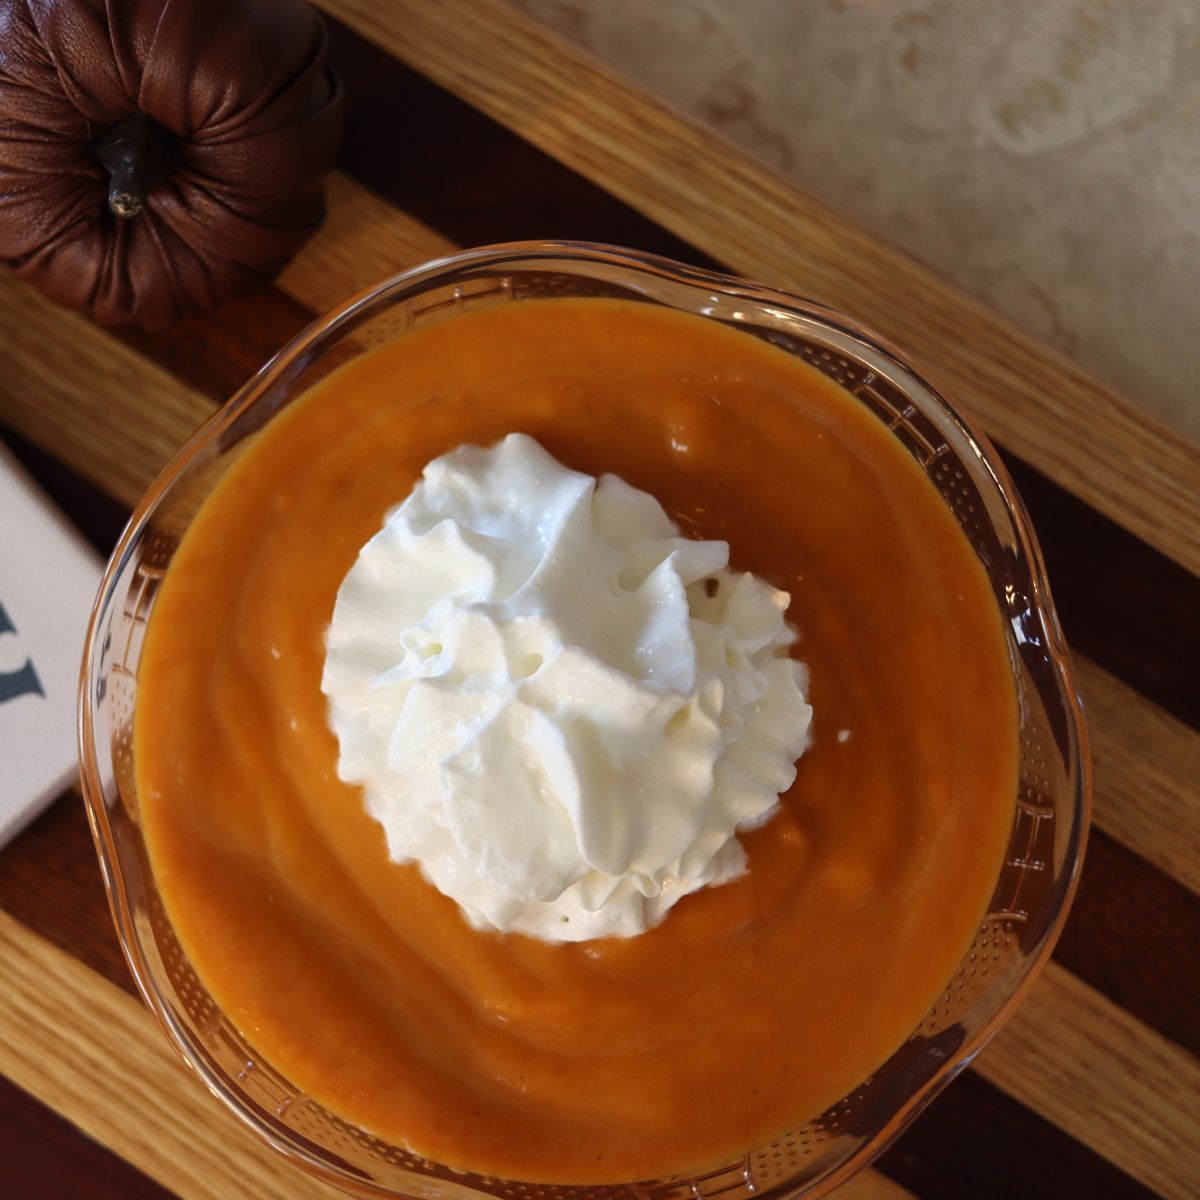
Pumpkin Latte For Dogs
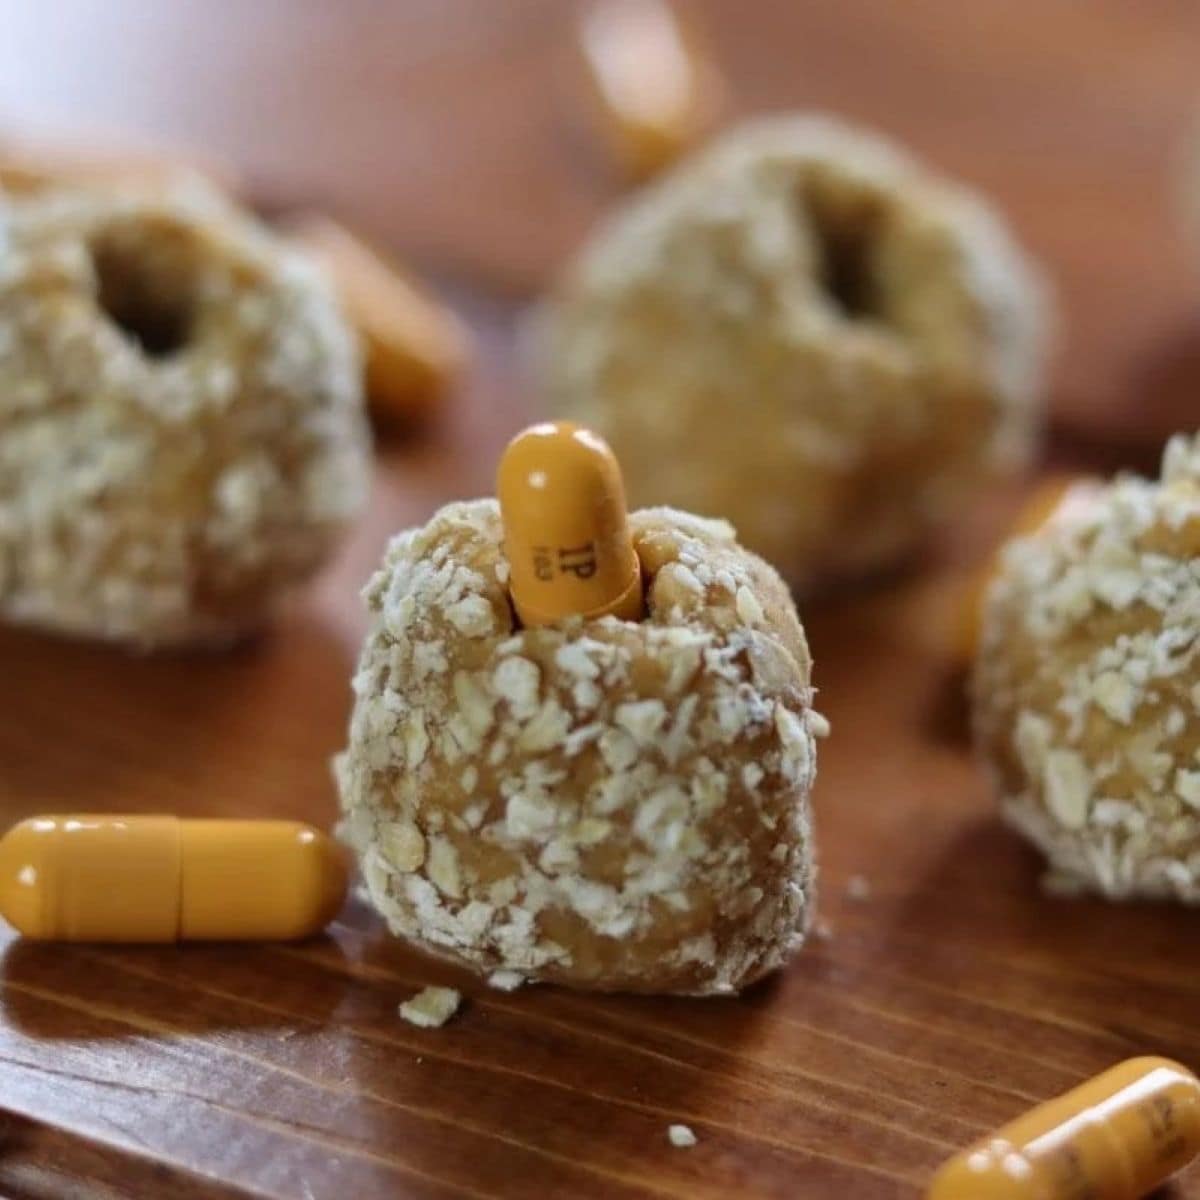
DIY Pill Pockets For Dogs
Homemade Chicken Cat Treats Recipe
Pumpkin Cat Treats Recipe
If you like this recipe, share it with someone you know will love it too.
Follow us on Pinterest, Instagram, Facebook, and YouTube for more recipes.
Your support through shares, comments, and a 5-star rating means the world!
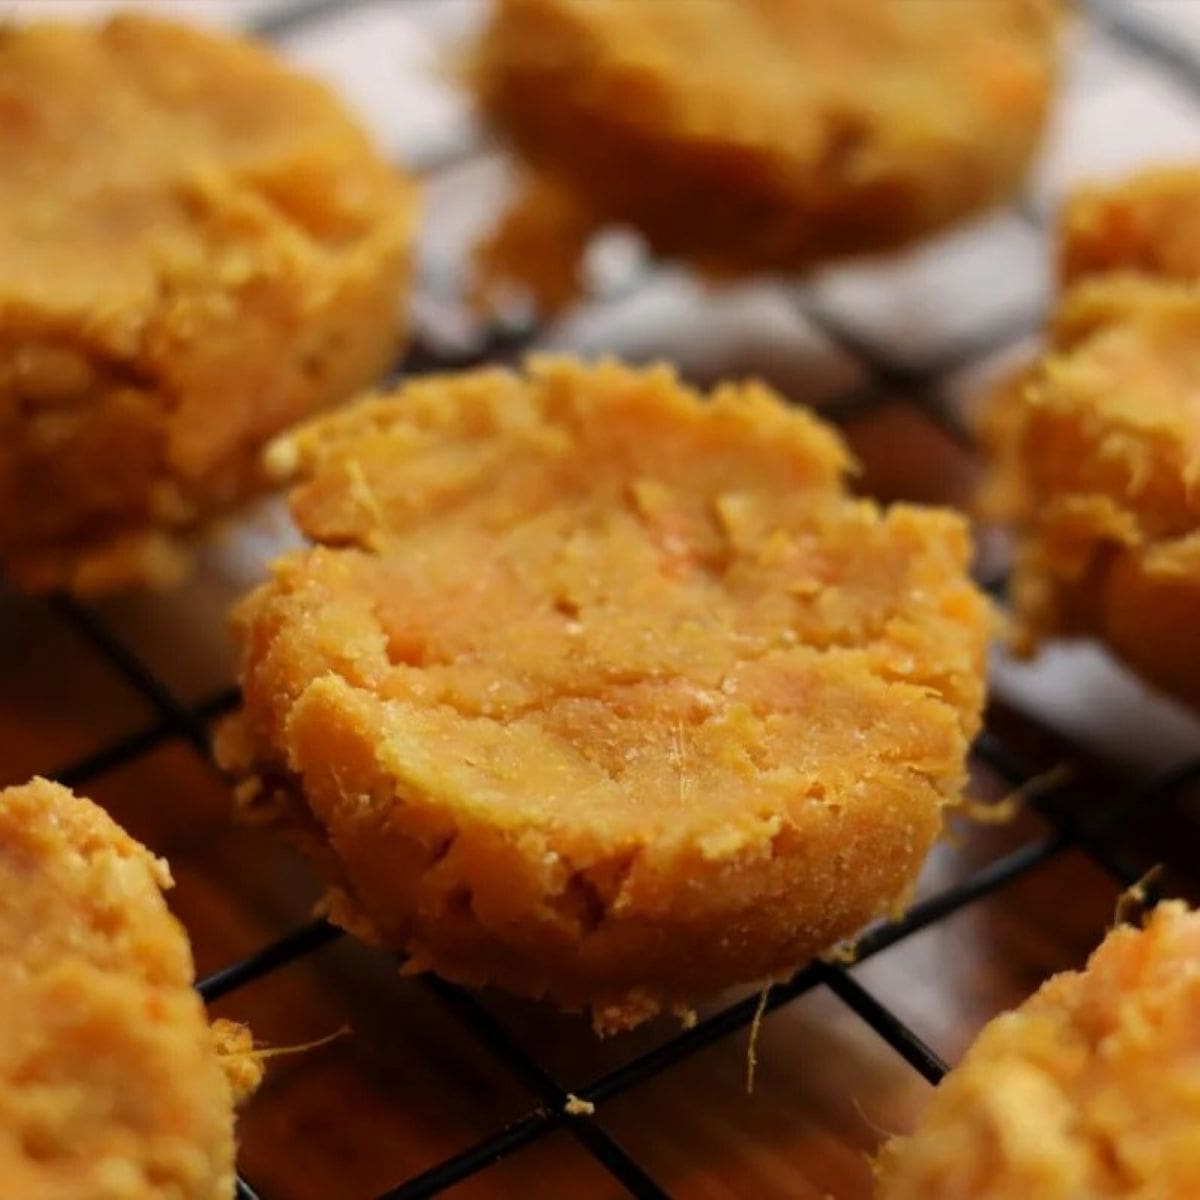
Peanut Butter Bacon Pupcakes
Ingredients
For the Pupcakes:
- 2 tablespoons coconut oil plus extra for greasing pan
- 1 cup all-purpose flour
- 1/2 cup unsweetened, unflavored applesauce
- 2 tablespoons peanut butter xylitol free
- 2 tablespoons honey
- 2 tablespoons extra virgin olive oil
- 1 teaspoon baking soda
- 1/2 teaspoon baking powder
For the Frosting:
- 1 mashed banana
- 2 oz cream cheese room temperature
- 4 tablespoons peanut butter xylitol free
For the Topping:
- 4 slices cooked bacon chopped
Instructions
- Preheat oven: Set to 350°F (175°C) to prepare for baking the pupcakes.
- Grease muffin pan: Lightly coat a 6-cup muffin pan with coconut oil to prevent sticking.
- Mix dry ingredients: In a small bowl, combine flour, baking soda, and baking powder.
- Mix wet ingredients: In a separate bowl, mix applesauce, peanut butter, honey, and olive oil until well blended.
- Combine mixtures: Add dry ingredients to wet mixture and stir until a smooth batter forms.
- Fill muffin cups: Divide batter evenly between the prepared muffin cups.
- Bake pupcakes: Place in the oven and bake for 8–10 minutes, or until a toothpick comes out clean.
- Cool thoroughly: Remove pupcakes from pan and let them cool on a wire rack.
- Prepare frosting: In a medium bowl, combine mashed banana, cream cheese, and peanut butter. Blend with a hand mixer until smooth.
- Frost and top: Once pupcakes are cool, frost them generously and sprinkle with chopped bacon pieces.
Notes
- Use silicone liners: Line the muffin pan with silicone cups for easy removal and cleanup.
- Choose plain peanut butter: Check the ingredient label and avoid products containing xylitol.
- Make mini versions: Use a mini muffin tin for smaller dogs or portion-controlled treats.
- Keep frosting firm: Chill frosting slightly before piping or spreading for a neater look.
- Store properly: Keep frosted pupcakes in the refrigerator for up to 3 days, or freeze unfrosted for longer storage.
Nutrition
Nutrition information is automatically calculated, so should only be used as an approximation.
These peanut butter bacon pupcakes are the ultimate treat for your dog — delicious and packed with flavor! They’re a fun way to spoil your pup with something homemade. If you try making them, I’d love to hear how your dog enjoyed them! Drop a comment below to share or ask any questions — I’m here to help!