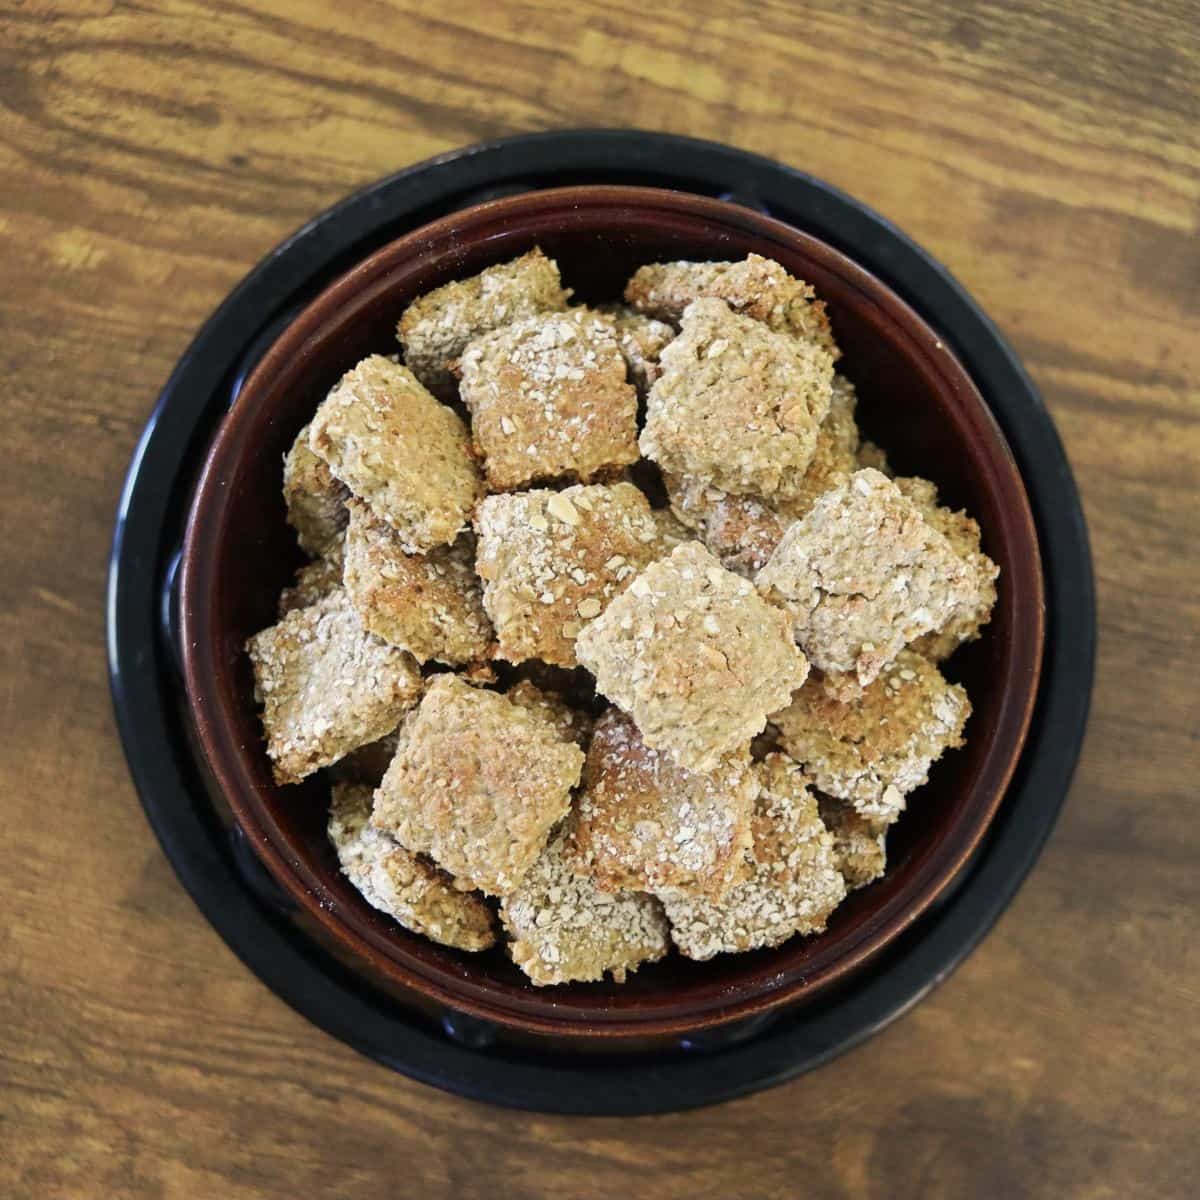
DIY Pill Pockets For Dogs

This DIY pill pockets for dogs recipe uses a simple, from-scratch method and a short ingredient list to create a soft treat that can be wrapped around a pill. It comes together quickly and is designed to help mask medication inside a homemade treat prepared in your own kitchen.
If you want to make all-natural, homemade treats for your pup, check out my sweet potato treats for dogs recipe and my homemade apple dog treats recipe too.
Let’s talk about this recipe
These homemade pill pockets offer a simple way to wrap medication inside a soft, treat-like dough made in your own kitchen. Instead of placing a pill directly in your dog’s mouth, the medication can be enclosed inside the pocket so it’s offered as a small snack, helping make the process more manageable for both of you.
Why this recipe works
- Soft, pliable texture allows the dough to be shaped around a pill so it can be offered as a small, treat-like portion.
- Small batch friendly makes it easy to prepare only what you need for short-term use without excess leftovers.
- Quick preparation time keeps the process simple, with the dough coming together in just a few minutes.
- Cost-effective ingredients make this a practical homemade option compared to many store-bought alternatives.
- Treat-style presentation allows medication to be enclosed in a familiar format rather than mixed into meals or other foods.
Ingredients for pill pockets for dogs
Just three basic ingredients are used to make this recipe, all of which are commonly found in most home kitchens. The ingredient list stays short and straightforward, making preparation simple and predictable.
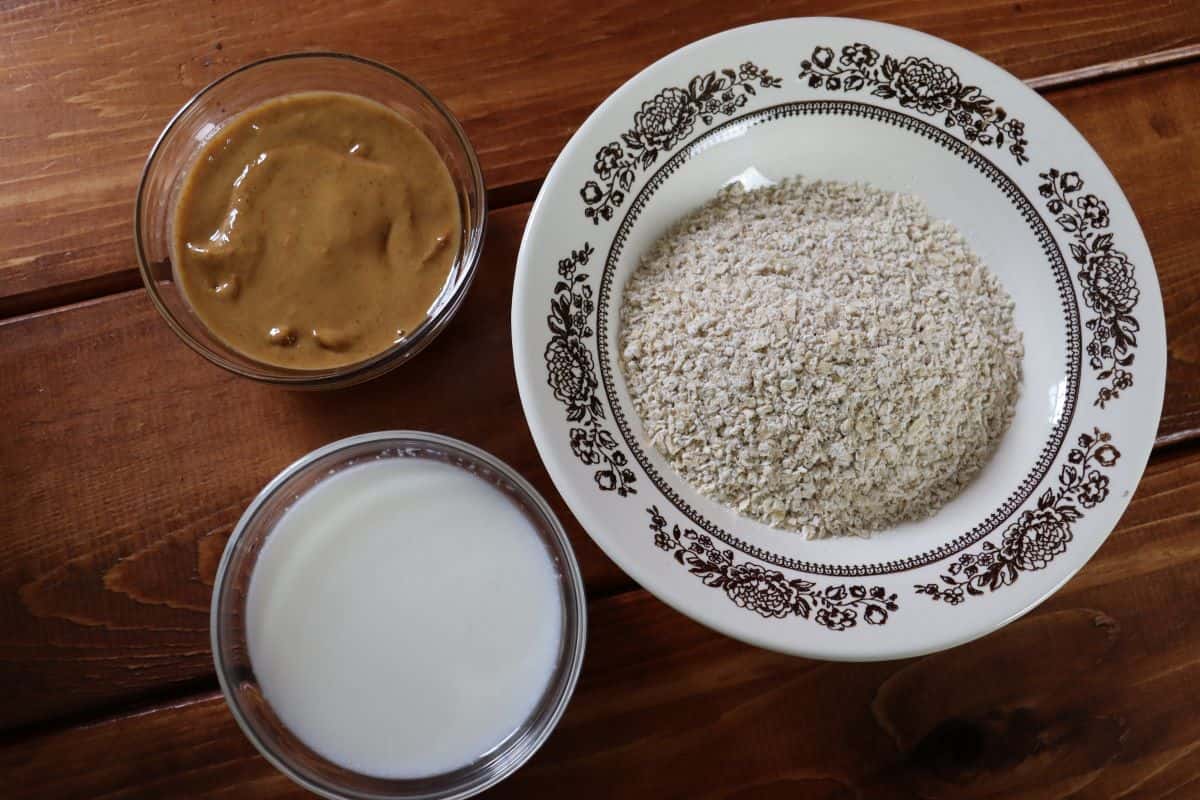
- Oat flour: Oat flour provides structure and flexibility, allowing the dough to be shaped and wrapped around pills. If needed, rolled oats can be ground into a fine flour using a food processor.
- Peanut butter: Use a natural peanut butter made only with peanuts or peanuts and salt. Use a natural peanut butter made only with peanuts or peanuts and salt. Avoid any product that lists xylitol on the ingredient label.
- Milk: A small amount of milk helps bring the mixture together into a workable dough. Regular milk can be used, or it can be replaced with another dog-appropriate milk option, keeping quantities small.
See recipe card below for full information on ingredients and quantities.
Variations and substitutions
- Swap the liquid by using water, goat’s milk, or a simple unsalted broth to adjust the dough’s softness and add variety.
- Change the flour by using coconut, spelt, barley, or garbanzo bean flour to alter texture while keeping the method the same.
- Use wheat flour if needed when other options aren’t available, adjusting the amount as needed to maintain a workable dough.
- Replace peanut butter, with pumpkin purée, if you prefer a different base, using plain pumpkin and adding extra flour to balance moisture.
Would you like to save this post for later?
How to make DIY pill pockets for dogs
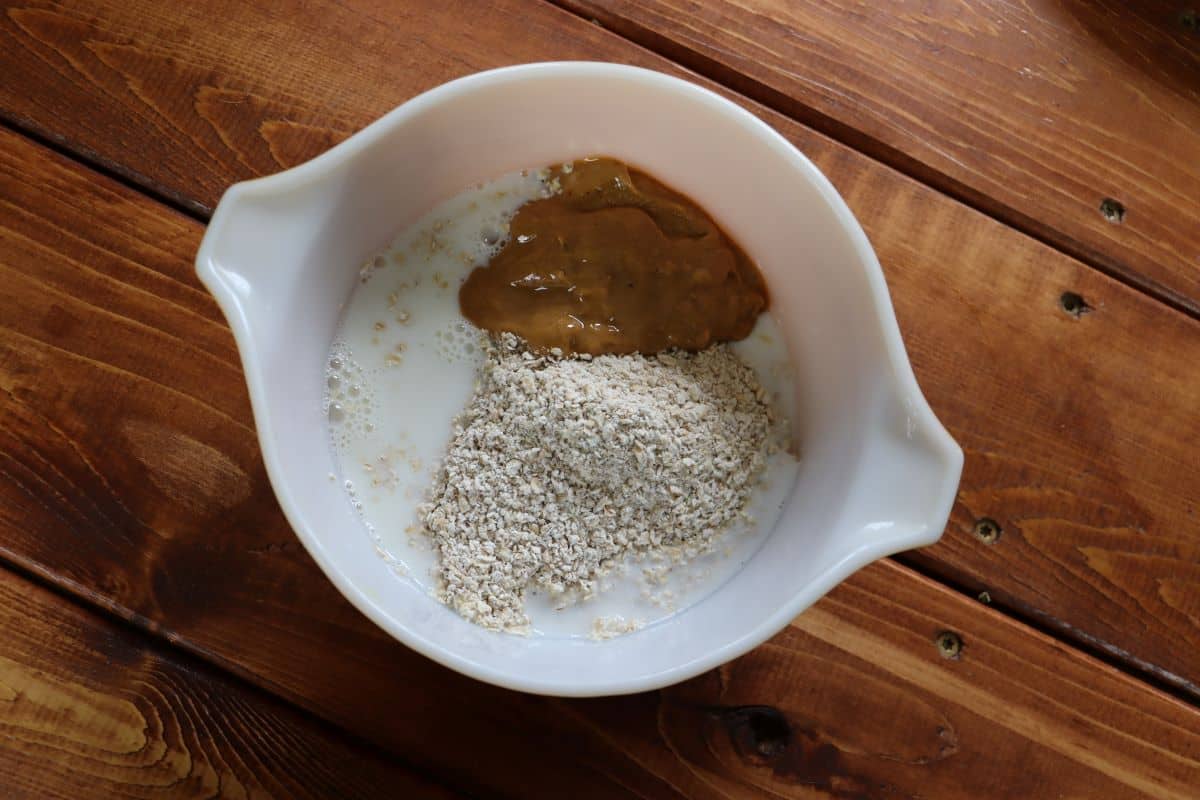
Step 1: Place oat flour, peanut butter, and milk in a mixing bowl.
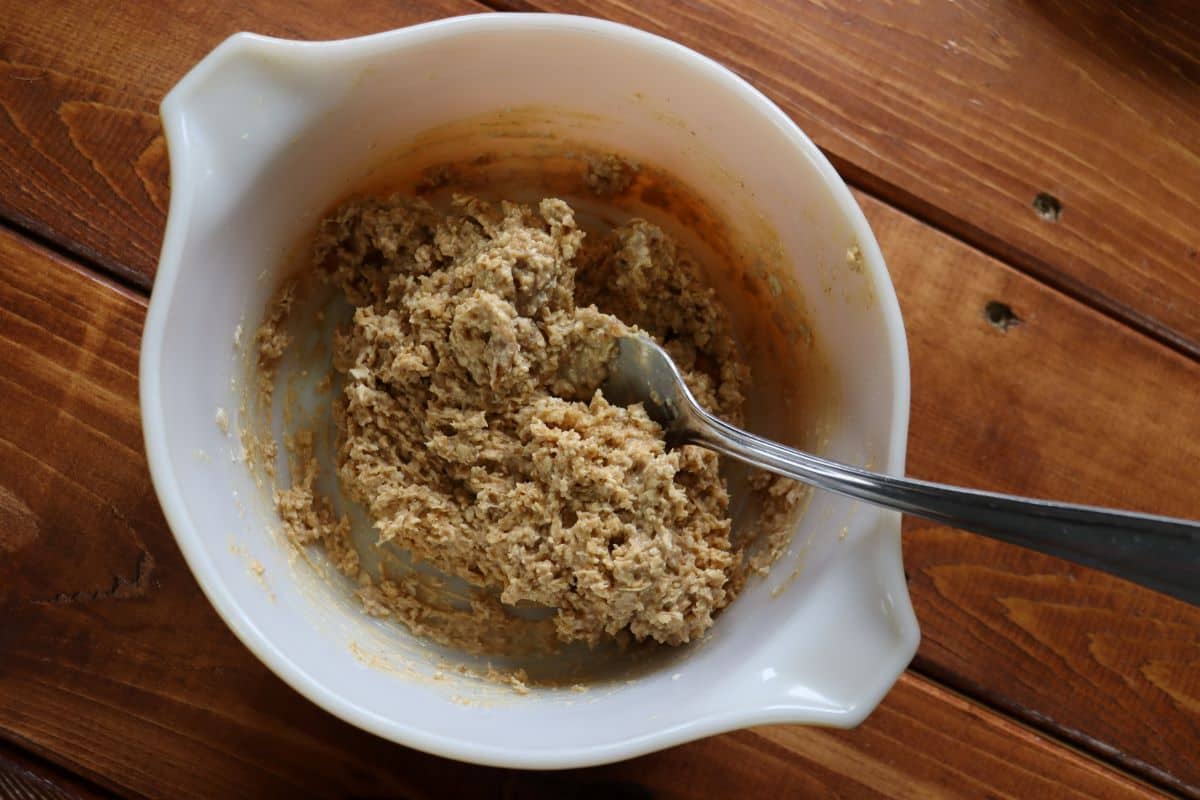
Step 2: Mix together well.
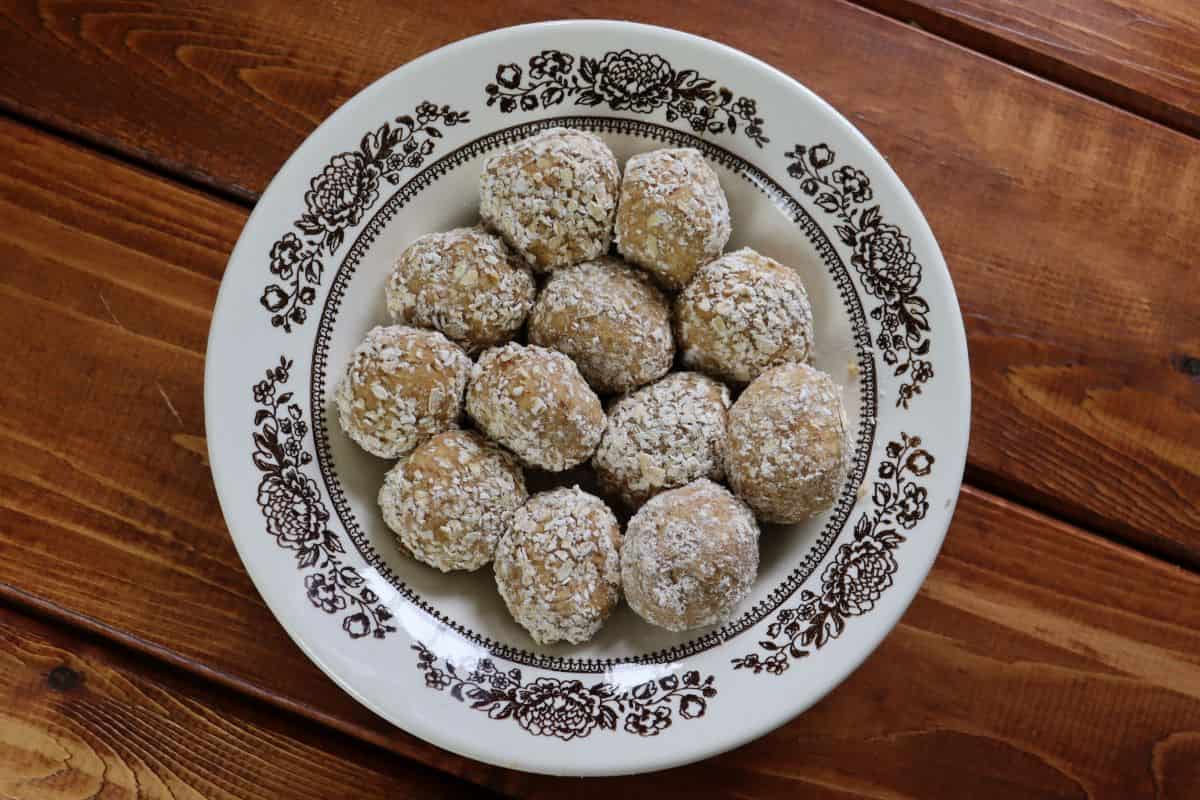
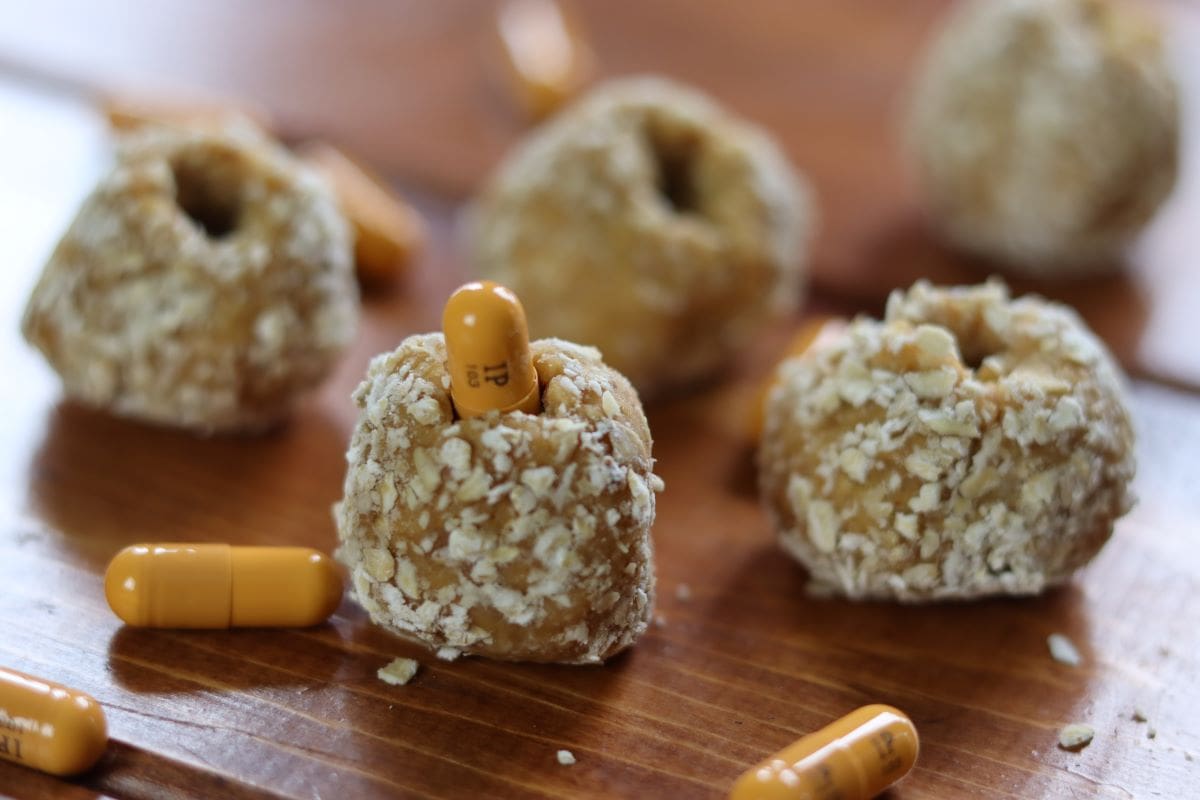
Step 3: Roll into balls.
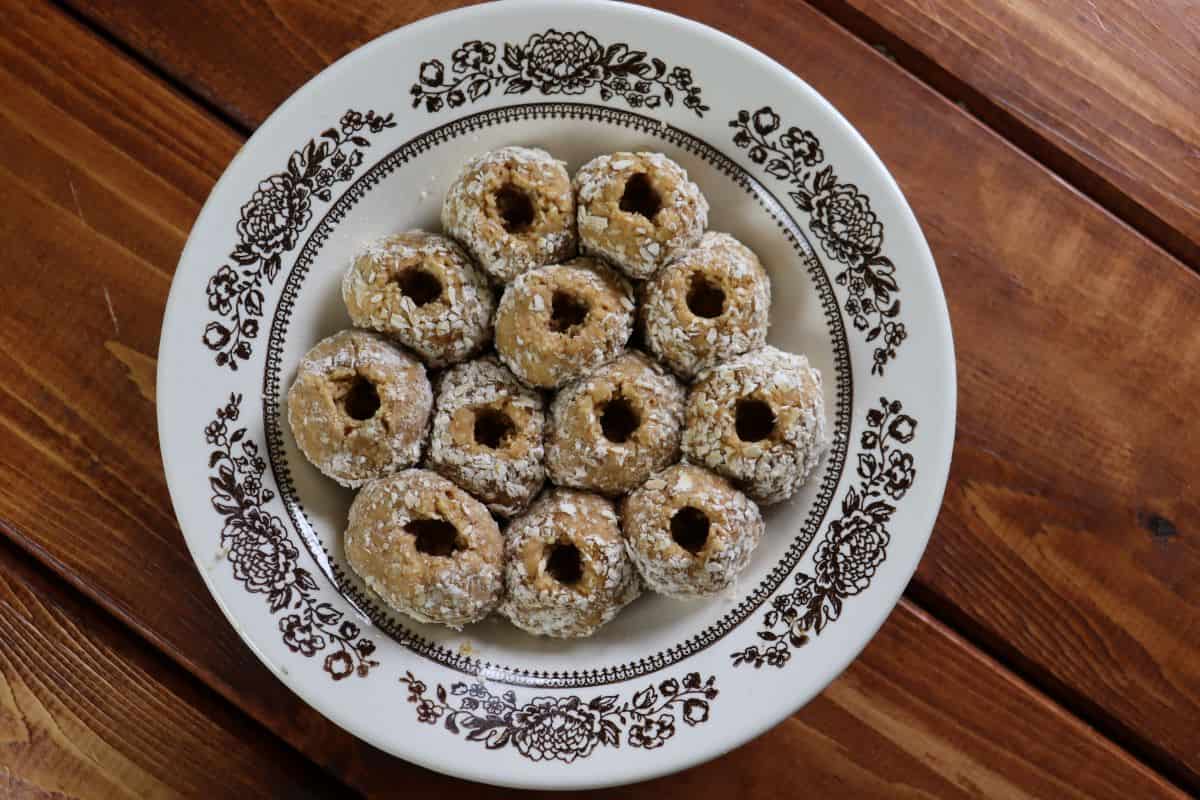
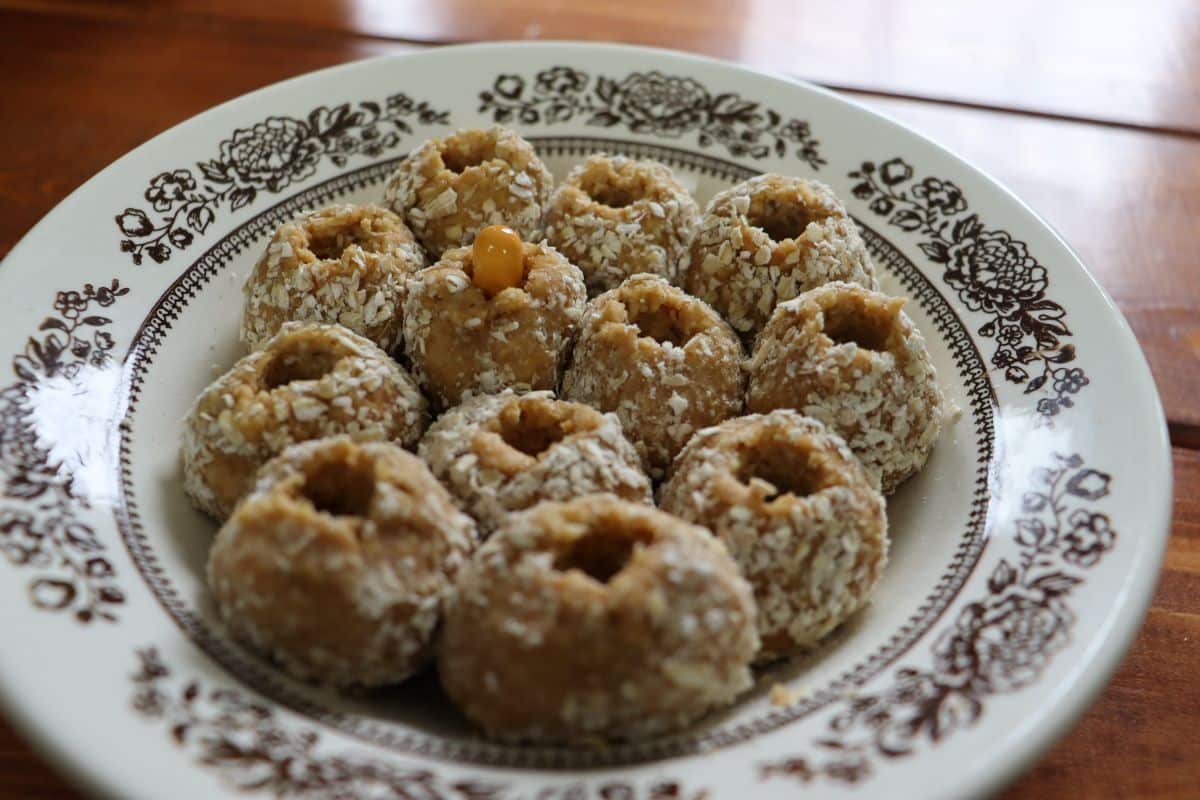
Step 4: Make a hole in the center for the pill.
Recipe FAQs
Yes, you can. They keep well in the refrigerator for several days, and you can also freeze them for longer storage.
Yes, but it must be 100% pure pumpkin. You’ll also need to add more flour to absorb the extra moisture in the pumpkin.
That depends on your dog and the size of the pill. Roll them large enough to generously cover the pill, without being oversized.
Yes! Most pups see them as treats. The peanut butter makes them taste great and it helps to cover any bitter taste from the medication.
How these treats are handled
These pill pockets are designed to hold medication so it can be offered in a familiar, treat-like form. When used as intended, they allow pills to be enclosed and given without drawing attention to the medication itself.
They can be prepared in small batches and kept on hand for situations where medication needs to be given. The soft texture makes them easy to shape around pills, helping simplify the process of offering medication as part of a routine.
Tips for consistent results
- Check the peanut butter label: Use a peanut butter made with peanuts only, avoiding added sweeteners or other ingredients not intended for dogs.
- Scale batches carefully: Increase the quantity by keeping the same ratio of ingredients so the texture stays workable and consistent.
- Freeze extras for storage: Freeze shaped pill pockets on a lined tray first, then transfer them to an airtight container to prevent sticking.
- Shape to fit the pill: Form each pocket just large enough to fully enclose the medication so it holds together when offered.
Other pet treat recipes you’ll love
Pumpkin Spice Latte For Dogs Recipe
Easy Peanut Butter Bacon Pupcakes
Easy Homemade Cat Treats Recipe
Pumpkin Cat Treats Recipe
If you like this recipe, share it with someone you know will love it too.
Follow us on Pinterest, Instagram, Facebook, and YouTube for more recipes.
Your support through shares, comments, and a 5-star rating means the world!
DIY Pill Pockets for Dogs
Ingredients
- 1/2 cup oat flour
- 1/4 cup 100% pure peanut butter peanuts as only ingredient
- 1/4 cup milk
Instructions
- Mix ingredients: Combine oat flour, peanut butter, and milk in a bowl until everything is fully blended into a soft dough.
- Roll into balls: Pinch off small portions and roll them between your hands into bite-sized balls.
- Make a hole: Press a hole in the center of each ball that’s big enough to hold the pill.
- Chill to set: Place in the refrigerator to firm them up, or freeze for later use.
Notes
- Use natural peanut butter: The ingredient list should be limited to peanuts only, without added sweeteners, flavorings, or other extras.
- Measure carefully: Stick with the 2:1:1 ratio so the dough holds together and stays easy to shape.
- Adjust with flour: If the dough feels sticky, sprinkle in a little more oat flour until it’s manageable.
- Size to the pill: Roll the pockets just large enough to cover the pill fully without making them oversized.
- Chill before serving: Refrigerating helps the pill pockets firm up so they’re easier to handle.
- Freeze for later: Lay them out on a tray to freeze, then transfer to a container for longer storage.
Nutrition
Nutrition information is automatically calculated, so should only be used as an approximation.
These look so much tastier than the store bought options. Thank you for sharing!
Wonderful idea! We’ve used hot dogs and it gets so expensive! I like that this uses ingredients from around the house. It was good to see your cautions as well.
I’ve used hot dogs in the past. They work pretty well but my bulldogge won’t eat them 🙁
I NEED to try this! Our baby has allergies & seizures, she takes 7 pills per day divided into 3-2-2. Suddenly she’s refusing them wrapped up in tiny treats. The store bought pill pockets are obviously too expensive for the quantity we need. I was desperate this morning as she recovered from a seizure, that’s when I found you online. I’m heading into the kitchen now. I’ll update the outcome. Thank you so much.
You are so very welcome! I hope they work well for you. You’re sweet baby needs a solution. It can be so hard to get them to take meds sometimes.
Thank you! Our girl has just got home after spinal surgery and it is normally a battle to get medication into her so I ground up the tiny painkillers and mixed into a bowl of meat – she turned up her nose… Made a batch of these and she swallowed them without even noticing! We’ve tried everything in the past with no luck
So very glad that these helped you get those meds into your sweet girl! Hope she heals quickly 😉
I make this recipe with water instead of milk for our dairy sensitive dog. She loves them and they freeze well if made in large batches. I just cut to size then freeze on a cookie sheet before bagging them.
Such a great idea! Thanks for sharing 😉
I made these with oat flour, bacon, peanut butter and almond milk for my dog who has been refusing pill pockets who takes multiple pills for multiple issues and it worked tonight so fingers crossed! Thank you for the recipe. Also for anyone who’s dog will eat and can eat pill pockets a tip for multiple pills is you can just tear those apart and stick the pill in a piece that fits. Makes them go way further
So glad this recipe helped you get your pooch to take those meds. Hope it continues to work for you. And thanks for sharing that tip on making the recipe go further. Great idea!
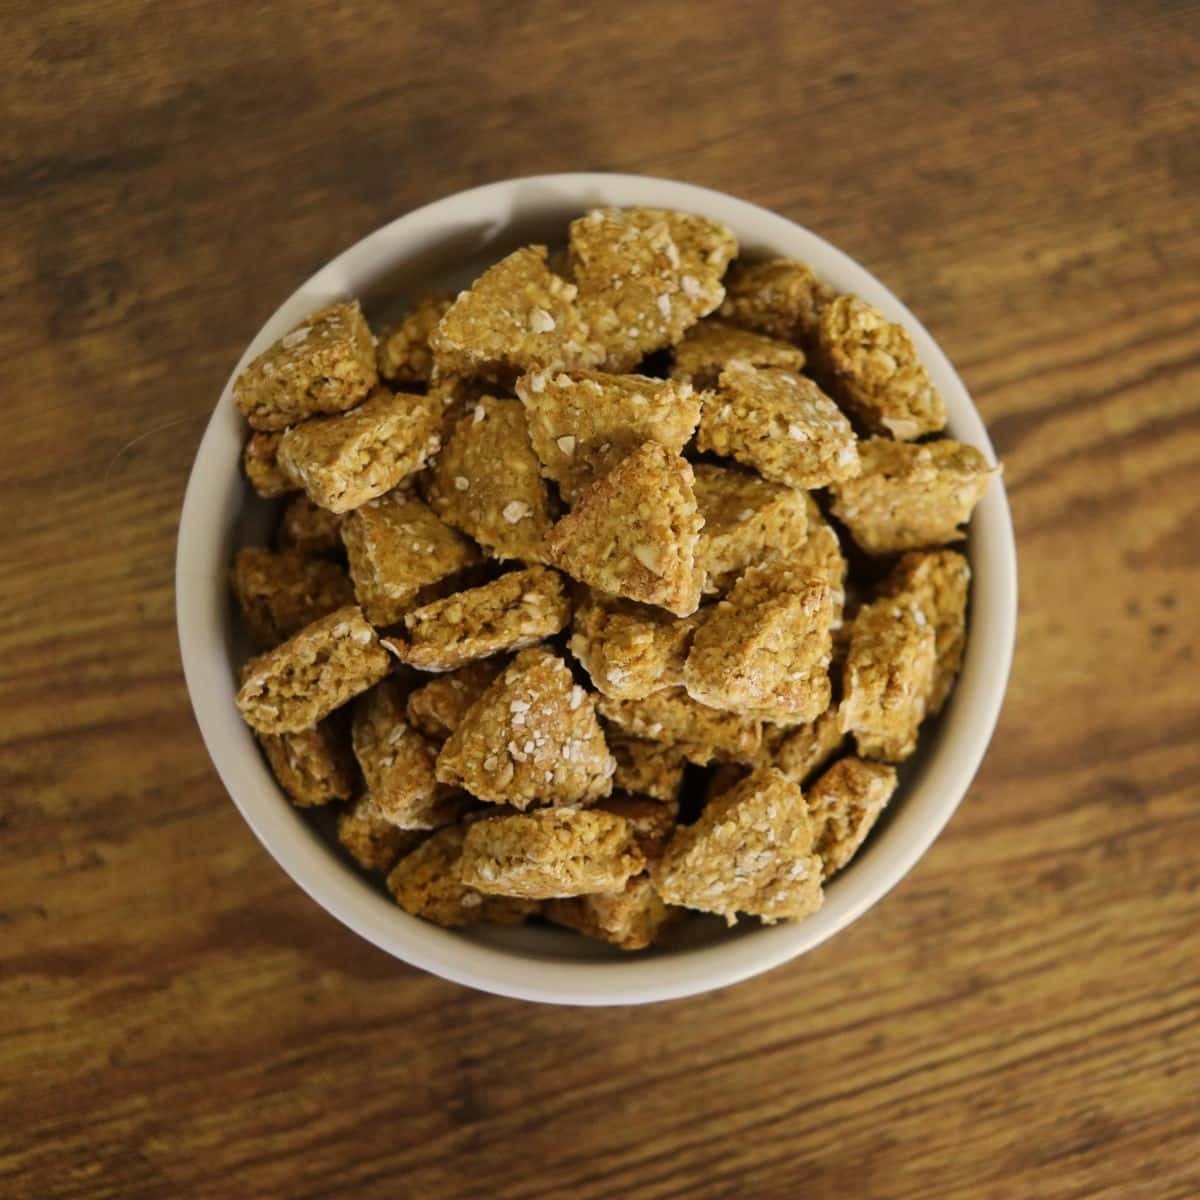
These look wonderful! Two questions though. I’m wondering what the white flakes on outside are? And could you use bone broth for liquid?
You can definitely use bone broth for liquid. And the white specks are oat flour. I grind my own, and it is more coarse than commercially ground. Hope your sweet canine finds them a good fit 😉
These DIY pill pockets are a game changer for giving your dog medication without the hassle! They’re easy to make and so much better than store-bought versions. If you try making them, I’d love to hear how your pup liked them! Drop a comment below to share or ask any questions — I’m happy to help!
Hi! I may be reading it wrong- in the narrative parts of your post you say use a 2:1:1 ratio, but the recipe measurements are 1:1:1. Is it a liquid vs dry ingredient thing? Thanks for your help!
Hi!
I recently updated this post and when I did I made a typo when moving the recipe over to a new card. Thanks for catching it — and taking the time to let me know. The ratio is 2:1:1 and the measurements on the post now reflect that 😉
Best ~ Diane Gail
I’ve made these several times. They are quick and easy, and best of all, the dog absolutely loves them!
That’s so great to hear! Thanks for sharing 😉
Are these best stored in the refrigerator or freezer? Say I make enough for 7-14 days, would that keep in the fridge? Thank you!!!
Hi Rebecca!
It’s best to freeze them if you have more than you need for 4 or 5 days. They freeze really well. I even used to make them for treats and freeze them so that I had them on hand.