DIY Bath Bombs || A Complete Step-By-Step Guide

With this easy-to-follow guide, you’ll learn everything you need to know to craft fizzy, aromatic, DIY bath bombs from the comfort of your own home.

Homemade bath bombs can transform an ordinary bath into an extraordinary experience.
And whether you indulge in a hot bath, using your homemade bath bombs at the end of a long day, or before heading to bed, it’s the perfect way to de-stress.
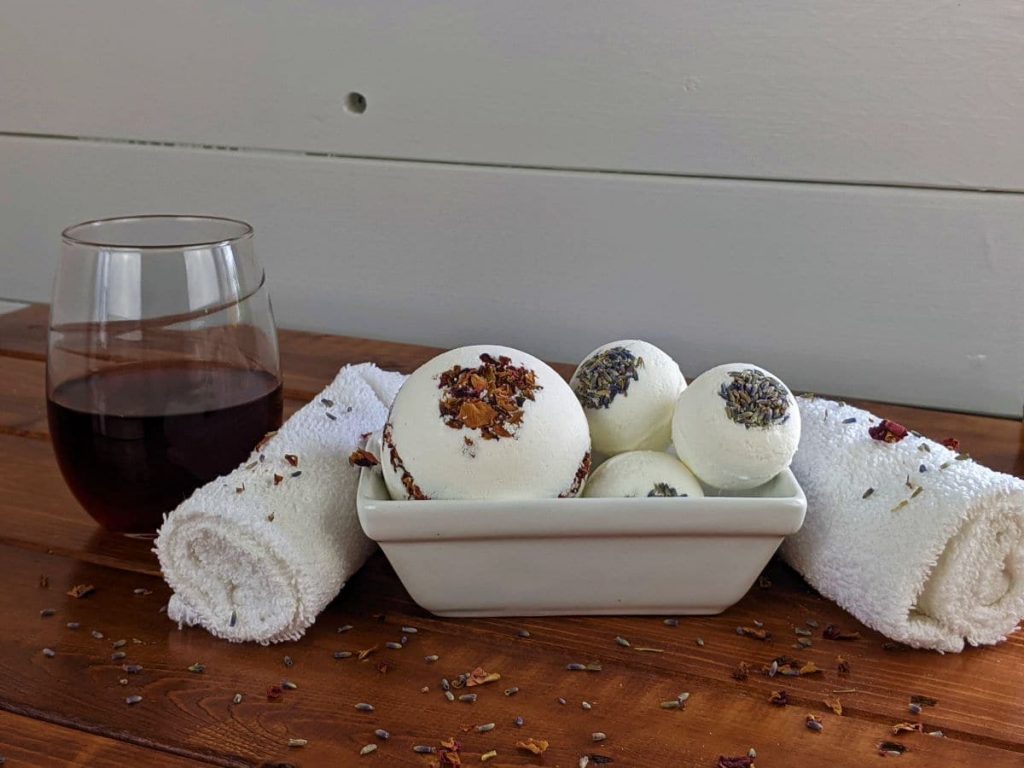
Add a good book, some low key soothing music (might I suggest classical), a candle or ten, and a glass of wine to elevate your bath into a luxurious, spa-like experience.
When you emerge from the tub, the stressed woman who first sunk in there will be nowhere in sight.
This ritual will quickly become the best part of your self-care routine. You’ll find yourself looking for ways to fit it into your schedule as often as you can.
Make yourself a simple fabric head scarf so that you’re nice and comfortable while enjoying your bath. And if you’re looking for other all-natural personal care products to keep on hand for your self-care routines, give an easy foot soak, all-natural DIY shaving gel, and effective bug bite oil a try too.
Are Bath Bombs Good For Your Skin?
DIY bath bombs contain ingredients, such as cornstarch and baking soda, that are known to be beneficial for your skin.
These natural ingredients provide soothing properties, helping to soften your skin as you soak in the bath.
Other ingredients, like citric acid, are used only to create the chemical reaction that produces the fizzing effect of the bomb.
They are essentially harmless, but don’t necessarily offer any skin enhancing benefits.
However, some people may be sensitive to citric acid, so it’s important to test the bath bomb on your skin before use.
If you have any sensitivities, you may want to consider creating your own bath salts, bath oils, or sugar scrubs instead.
Colorants and essential oils are optional ingredients in DIY bath bombs. They don’t benefit your skin in any way and can be eliminated if you choose.
They do significantly enhance the spa-like element of the experience that comes with the use of these fizzy little bombs of bath time delight. So, I like to add them in.
Ingredients Needed To Make DIY Bath Bombs
To make this DIY bath bombs recipe, you will need a few basic ingredients that are easy to find at most grocery or craft stores.
- Baking soda: Softens skin and promotes relaxation.
- Cornstarch: Helps to calm irritated skin and enhances the bath bomb’s texture.
- Citric acid: Responsible for the fizzing action when the bath bomb hits the water.
- Water: To bring everything together.
- Essential oils: Optional, but great for adding fragrance and mood-boosting benefits.
- Colorants: Optional for creating visually stunning bath bombs (food coloring works well here).
Choosing Essential Oils And Colorants
Pure essential oils are the key to infusing your bath bombs with delightful scents. They are 100% natural, unlike synthetic fragrance oil, making them the better choice for your health as well.
Contrary to popular information provided on the web, it’s not really possible to choose oils that will meet specific health needs. The ratio of oil to bath water is too vast when used in this way.
However, they can be a nice aromatherapy aid. You might want to use lavender for a calming effect, peppermint for stimulation, or rose for overall well-being.
For colorants, you can use cosmetic-grade coloring pigment or food coloring. Simply mix a bit into the dry ingredients to achieve the desired shade.
Choosing oils and colorants, that pair well together aesthetically, adds a nice touch to the finished product when making bath bombs, such as; purple colorant for lavender scented bombs or pink colorant for rose scented bombs.
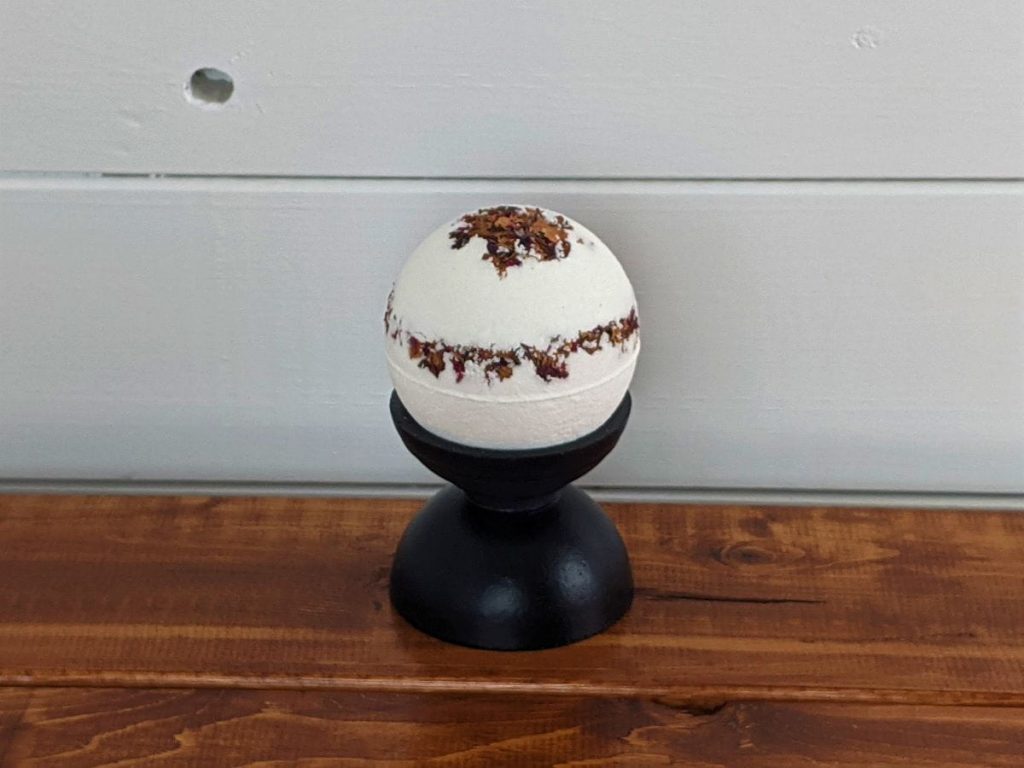
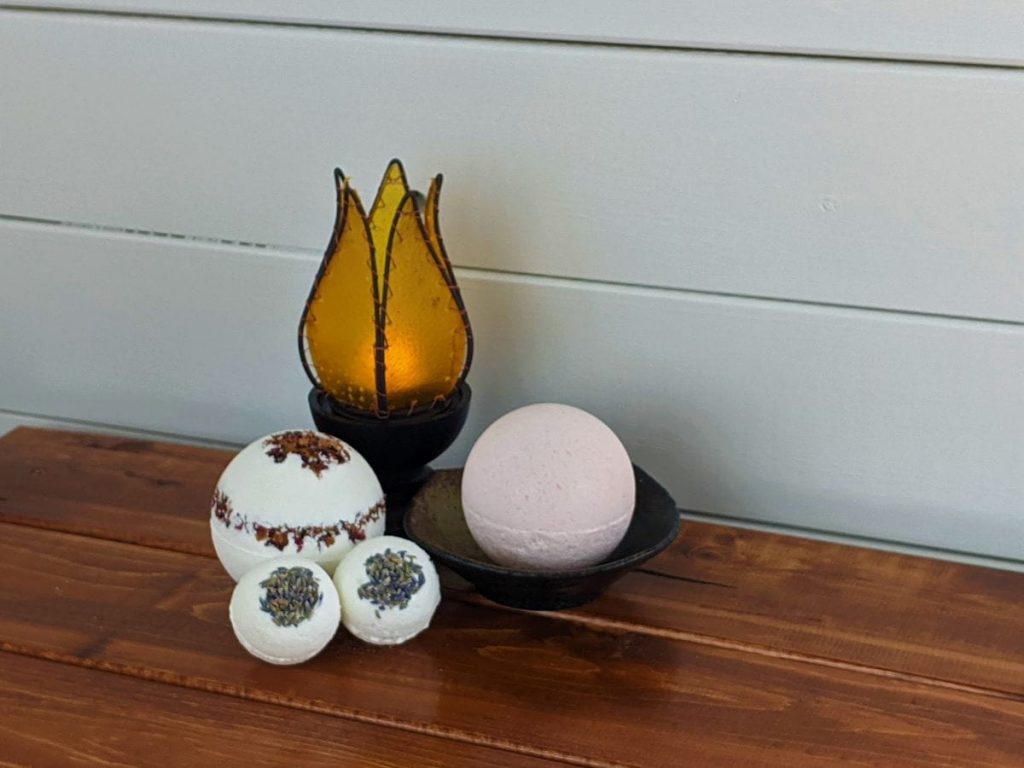
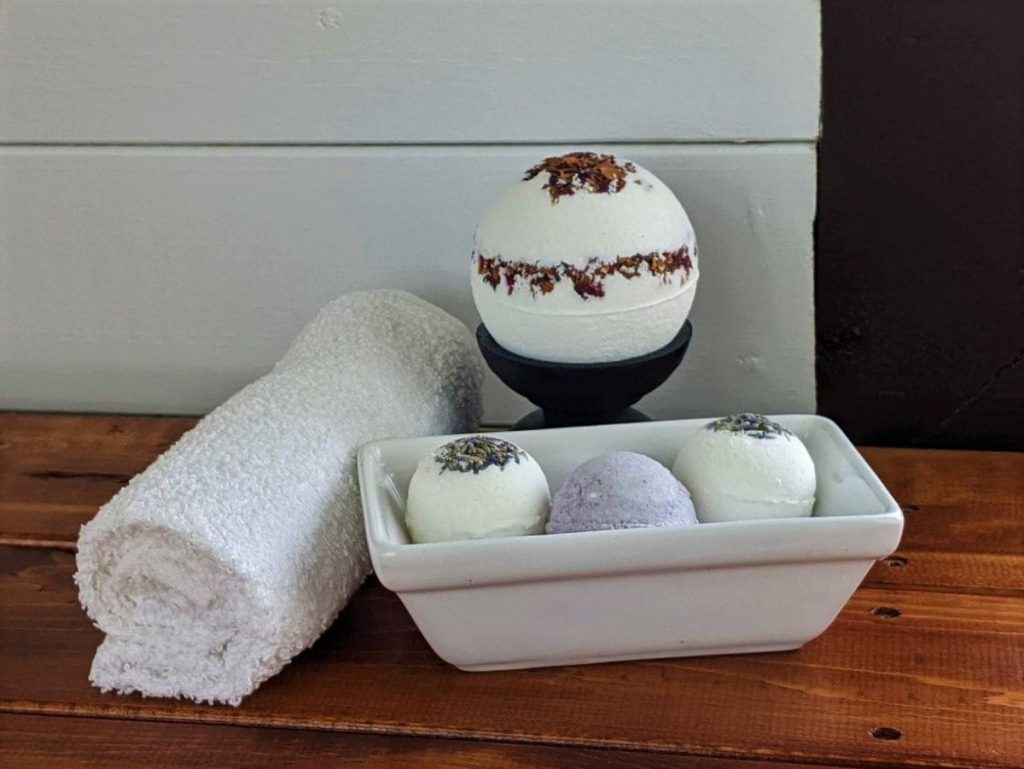
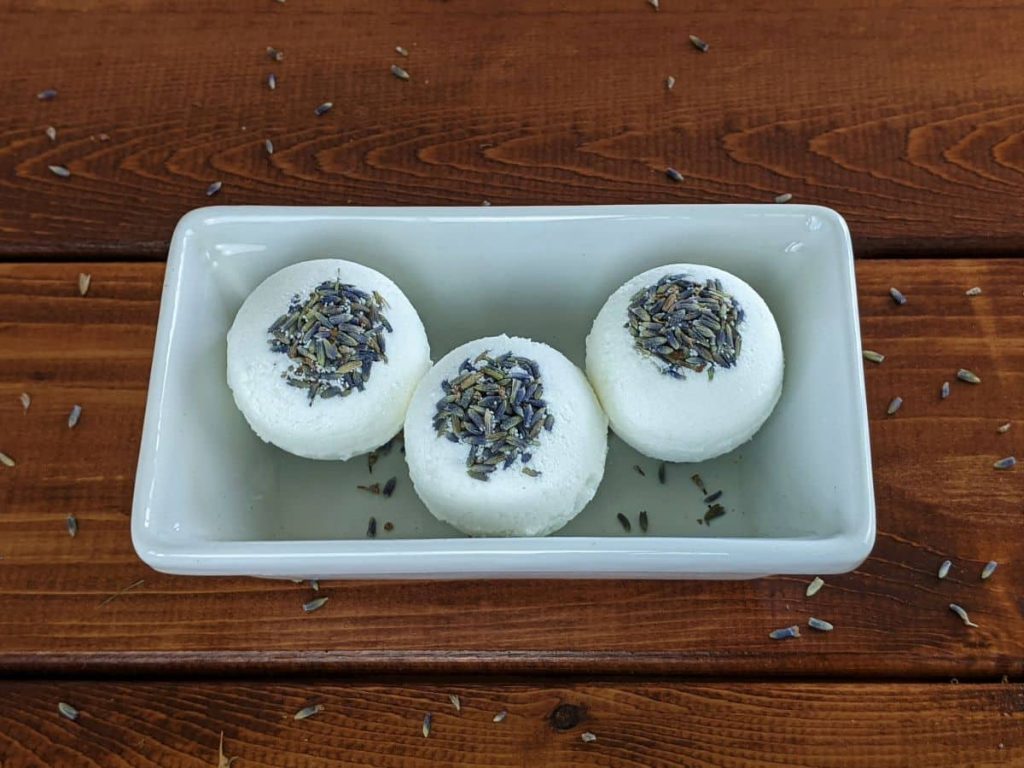
As previously stated, colorants are completely optional. And you can make beautiful bath bombs without them by adding dried flower buds or petals to the molds before the bath bomb mixture.
Would you like to save this post for later?
The contrast of the petals against the stark white color of the bomb really POPS! Two of my favorite additions are lavender buds and rose petals.
Calendula petals, hibiscus petals, and cornflower petals are great options too.
Choosing The Right Bath Bomb Molds
A good mold can make all the difference in how easy it is to make your bath bombs. You’ll want to consider the shape of the mold for aesthetic purposes.
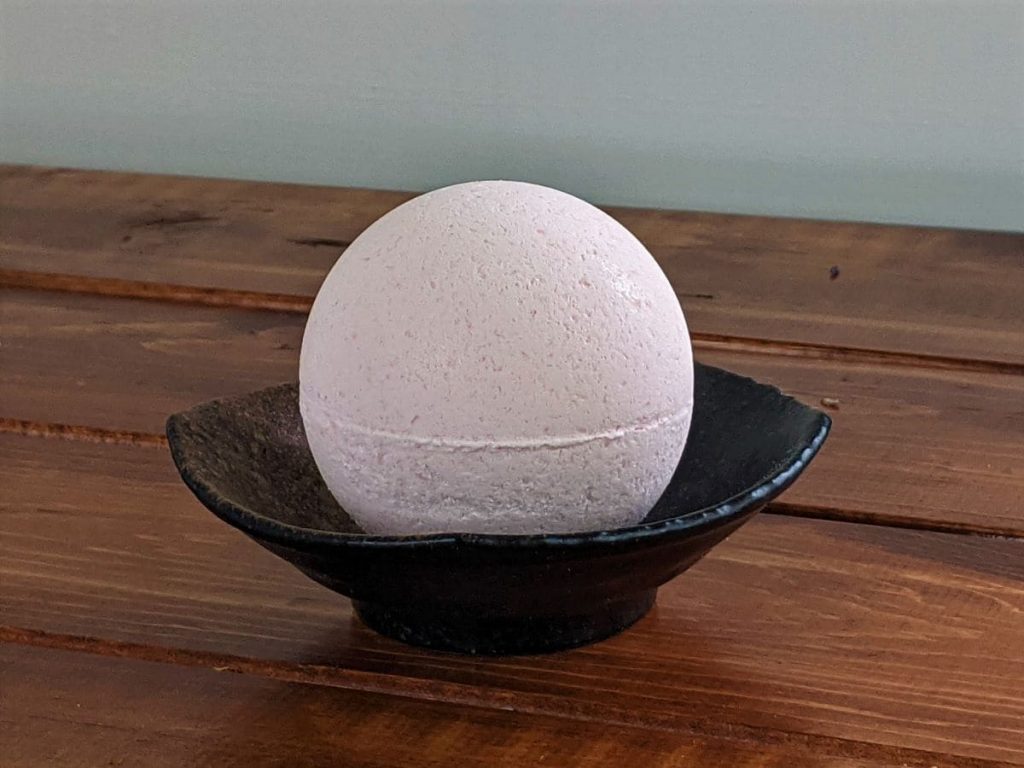
I’m partial to a big round bath bomb. It feels luxuriant to me.
But you may have a different preference. The more important aspect of the mold is the material it is created with, and just how easy it is to remove the bath bomb from it without it sticking to the side of the mold.
Stainless steel molds are a little pricier than other options, but they are well worth the investment. They produce a smooth, professional finish on a bath bomb.
If you are planning on selling the bombs you make, this might be the best route for you.
I used silicone molds to make the bombs for this post, and I was very pleased with them overall. They molded the bombs well, and it was very easy to remove them from the mold.
If you want to experiment using things that you already have around the house as molds, there are many ways you can go. Cupcake tins, ice cube trays, and cookie scoops are all great options.
When I had my apothecary, I made bath bombs, using a cookie scoop, and sold them in a nicely decorated glass jar.
They were a very popular item. And they were easy to customize with different colors for different occasions.
In this day and age we have endless varieties of silicone molds available to us, making it possible to create many different shapes.
Check your baking, housewares, candy making, and cake decorating isles at your local store.
You’re sure to find something that you like. If you can firmly press a bath bomb mixture into it, you’re good to go.
How To Make Your Own DIY Bath Bombs: 6 Simple Steps
Making natural DIY bath bombs is easier than you think! Follow these easy steps to create your own bath bombs that produce lots of fizzy bubbles.
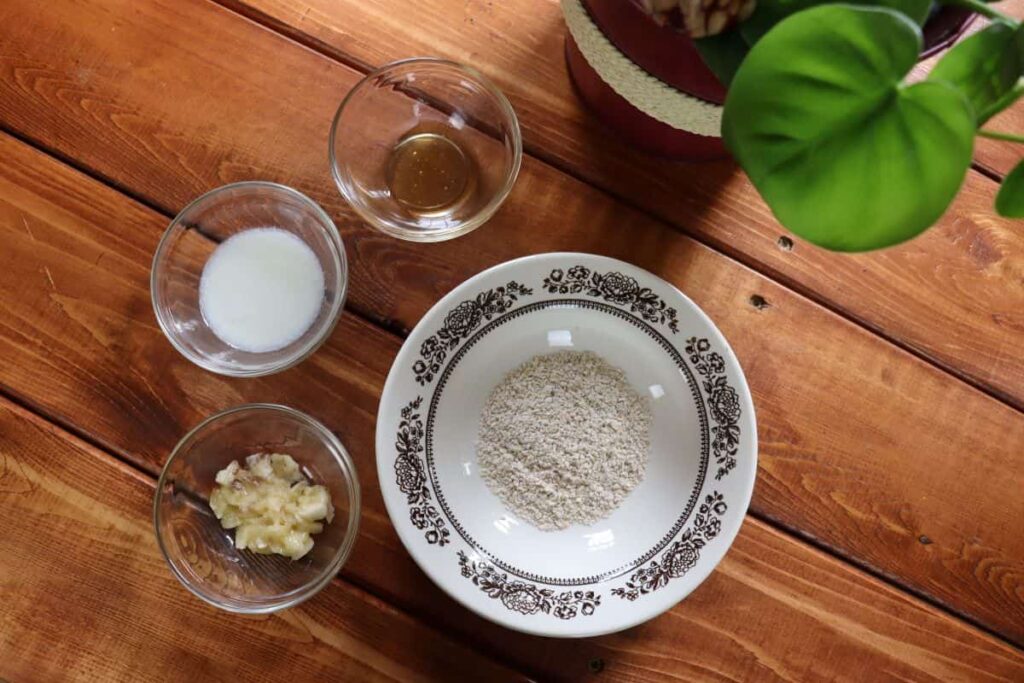
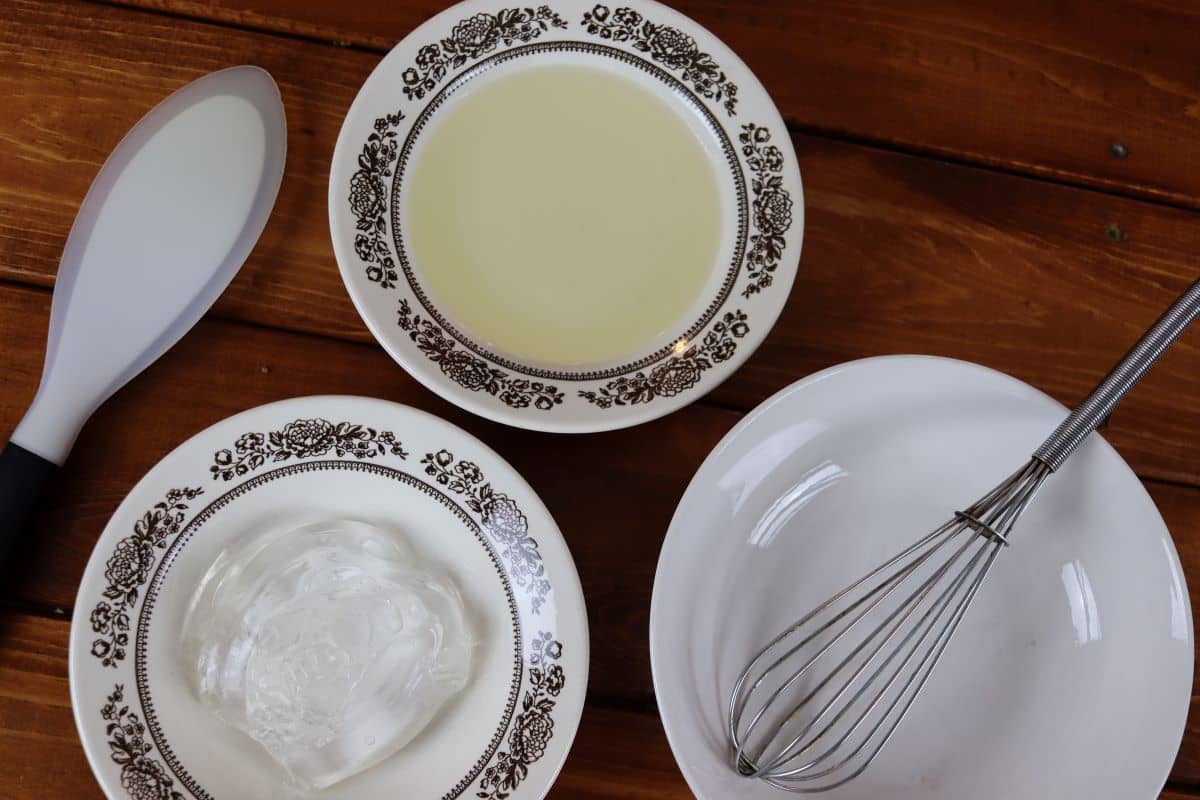
- Mix the Bomb Base: Combine baking soda and cornstarch in a mixing bowl using a whisk.
- Prepare Liquid Mixture: In a separate bowl, mix your liquid ingredients; essential oils (optional), colorant (optional), and water.
- Combine the Bomb Base and Wet Ingredients: Gradually add the wet ingredients to the dry ingredients, blending well.
- Allow to Rest: Let the blend sit for 3-4 minutes.
- Test the Texture: Check the texture by pressing the mixture into your hands. It should hold together without being too wet. If it holds shape, it’s ready for the mold. If it’s too crumbly, add a few more drops of water.
- Mix in Citric Acid: Slowly mix in the citric acid. Take your time so that the acid doesn’t react with the liquid in the mixture causing the bomb to become inactive.
- Press Mixture into Molds: Firmly press the mixture into your chosen molds. Use your fingers or a spoon to ensure the mixture is tightly packed.
- Let Dry: Allow your bath bombs to dry in the mold for at least 24-48 hours.
- Remove Bomb from Mold: Remove bombs from mold and set them on a wire rack. Let them sit out for another 24 hours to fully dry and harden.
How To Use A Bath Bomb
Using your DIY bath bomb is as simple as dropping it into warm bath water. As soon as it hits the water, it will start to fizz and release its aroma, providing an instant relaxing experience.
All you have to do is sit back, relax, and enjoy the soothing sensation as your bath bomb works its magic. If a nice relaxing bath is one of your favorite things, use this easy diy bath bomb recipe to raise it to the next level.
And go ahead and make up a few extra bombs to give to someone you know will appreciate a little pampering too. These bombs make a great gift.
Recommended For You
If you enjoy this DIY project, please consider leaving a 5-star rating!
Your feedback helps others discover these projects and supports my work more than you might know — I really do appreciate that support!
Don’t forget to tag me on Facebook @sustainableslowliving or Instagram @slowlivingbydianegail when you share a photo of your bath bombs. I love seeing your creations!

DIY Bath Bombs
Equipment
- Small mixing bowl
- Small condiment dish
- Whisk
- Measuring cups and spoons
- Bath bomb mold
- Gloves (optional)
Materials
- 1 cup Baking Soda
- 1/2 cup Cornstarch
- 2-4 drops food coloring optional
- 10-20 drops essential oil optional
- 2-3 teaspoons Water
- 1/2 cup citric acid
Instructions
- Mix the Bomb Base: Combine baking soda and cornstarch in a mixing bowl using a whisk.
- Prepare Liquid Mixture: In a separate bowl, mix the liquid ingredients together; essential oils (optional), colorant (optional), and water.
- Combine the Bomb Base and Wet Ingredients: Gradually add the wet ingredients to the dry ingredients, blending well.
- Allow to Rest: Let the blend sit for 3-4 minutes.
- Test the Texture: Check the texture by pressing the mixture into your hands. It should hold together without being too wet. If it holds shape, it's ready for the mold. If it’s too crumbly, add a few more drops of water.
- Mix in Citric Acid: Slowly mix in the citric acid. Take your time so that the acid doesn't react with the liquid in the mixture causing the bomb to become inactive.
- Press Mixture into Molds: Firmly press the mixture into your chosen molds. Use your fingers or a spoon to ensure the mixture is packed tightly.
- Let Dry: Allow your bath bombs to dry in the mold for at least 24-48 hours.
- Remove Bomb from Mold: Remove bombs from mold and set them on a wire rack. Let them sit out for another 24 hours to fully dry and harden.
Notes
- Use a fine mesh strainer for even texture: Sifting the dry ingredients before mixing helps create a smoother bath bomb with a more professional finish.
- Don’t rush the citric acid step: Adding it too quickly or mixing too aggressively can cause early fizzing. Sprinkle it in slowly and mix gently to maintain the bomb’s effectiveness.
- Drying time may vary: If your space is humid or cool, allow extra drying time. Fully dried bath bombs will feel firm and no longer cool to the touch.
- Storage tip: Store finished bath bombs in an airtight container in a cool, dry place. This helps preserve their fizz and prevents them from absorbing moisture from the air.


I’ve added this to my Bath bombs Pinterest board! I’m hoping to experiment with these as gifts this Christmas!!! I know it only April but hey, I might actually be organised for once?!!
They make such a nice gift Sharon. You’re making me wish I was on your gift list, LOL! I hope your Christmas this year is more organized than you could ever imagine 😉
I’ve never seen such pretty bath bombs! I pinned this and can’t wait to try it out!
Such a nice compliment! Thank you! I hope you enjoy making them. AND soaking with them 😉
DIY bath bombs are such a fun and relaxing way to add a little luxury to your bath! With endless customization options for scents and colors, they make for the perfect homemade gift or self-care treat. If you try making them, I’d love to hear how they turned out or if you added any personal touches. Drop a comment below to share your experience or ask any questions — I’m always happy to help!