Garlic Pickles Recipe – Refrigerator or Canned
Garlic pickles are crisp, tangy quick pickles loaded with fresh garlic and classic dill flavor. They take just minutes to prepare and can be refrigerated for quick pickling or processed for shelf-stable storage.
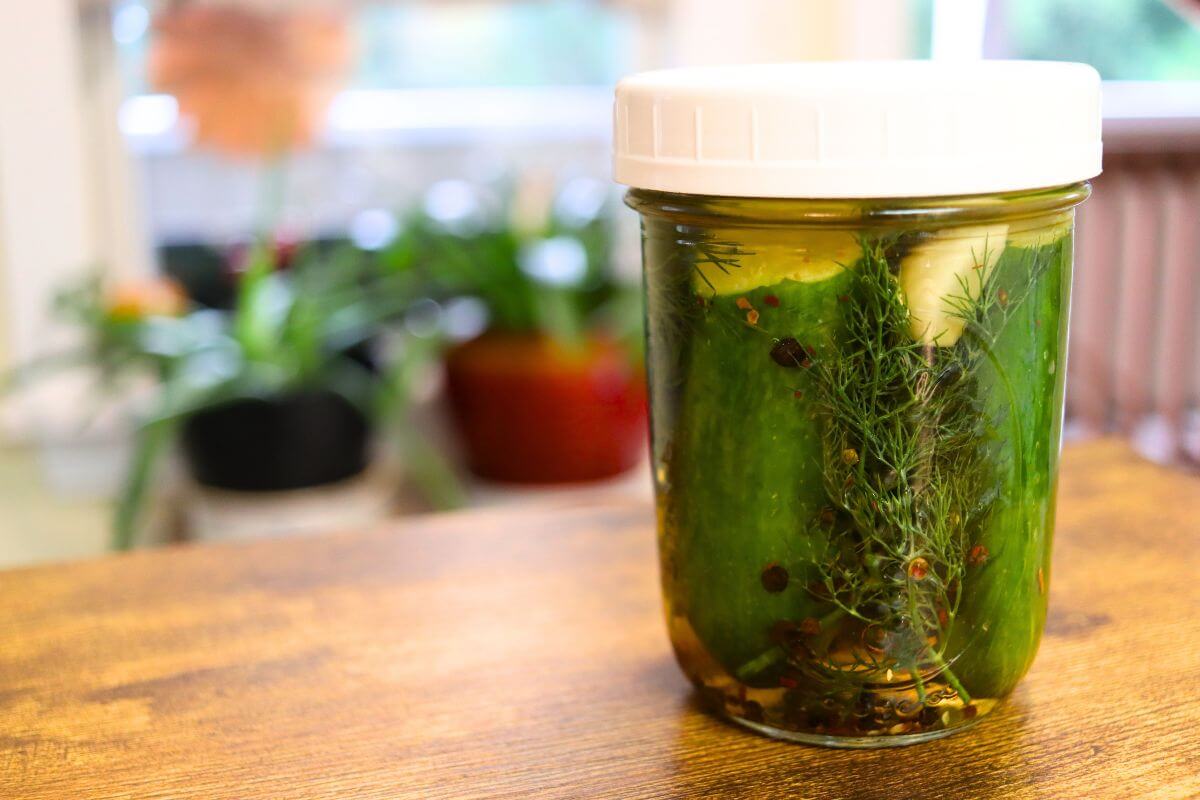
Refrigerator pickles with a garlic bite
I love quick pickling. It’s so easy, and it takes just minutes to do. It feels like very little effort for a pretty substantial reward. I like to have briny veggies in the fridge to snack on and serve as a tangy accompaniment to dinner.
This quick garlic pickles recipe came out perfect the first time I tried it. No tweaking needed. And if you prefer to put your pickles up for the pantry, you can do that too, leaving store-bought pickles behind year-round. Perhaps more importantly, you can get your from-scratch pucker on year-round. Salty, sour, and packed full of garlic dill flavor — it’s everything you could hope for in a good pickle.
If you like to put fruits and veggies up in jars, give my quick pickled spicy garlic, white wine pickled mushrooms, and traditional salt preserved lemons a try next.
Recipe ingredients
- Kirby cucumbers: Kirby cucumbers are a classic choice for pickling because of their firm flesh, thin skin, and small size. I’ll go into more detail about different varieties and other criteria to consider when choosing cucumbers for pickling below.
- Apple cider vinegar: Provides the acidity that gives garlic pickles their characteristic sour, briny flavor and is essential to the pickling liquid. Use apple cider vinegar labeled 5% acidity, particularly if you plan to process the pickles for shelf-stable storage.
- Pickling salt: Pickling salt dissolves readily in the brine and contains no iodine or anti-caking agents that can make pickle brine cloudy. This recipe uses 2 tablespoons pickling salt. You can substitute about 2 tablespoons fine sea salt or 3 tablespoons Diamond Crystal kosher salt.
- Garlic cloves: Fresh garlic is a defining flavor in these garlic pickles, infusing the brine and cucumbers as they sit. Use firm, fresh cloves without soft spots or green sprouts for the cleanest garlic flavor.
- Fresh dill sprigs: Choose fresh dill with bright green fronds and firm stems, avoiding bunches that are yellowing or wilted. Both the fronds and tender stems can go into the jars, and fresh dill flower heads are an excellent choice when they’re available.
See the recipe card for full information on ingredients and quantities.
Choose the best cucumbers for pickling
The cucumbers you start with make a noticeable difference in how crisp your garlic pickles stay. Pickling cucumbers are the best choice because they tend to have firmer flesh, smaller seed cavities, and thinner skins than standard slicing cucumbers.
Several varieties work particularly well for pickling:
- Kirby cucumbers: One of the most common pickling cucumbers, Kirbys have dense, firm flesh, thin bumpy skin, and relatively small seeds. They’re an excellent choice for whole pickles, spears, or slices.
- Boston Pickling cucumbers: An old-fashioned pickling variety with crisp flesh and thin skin. Their compact size makes them particularly well suited to whole or halved pickles.
- Persian cucumbers: While not a traditional pickling variety, Persian cucumbers are a good alternative when pickling cucumbers aren’t available. They’re small, thin-skinned, and have few seeds. Choose the firmest, freshest ones you can find.
- National Pickling cucumbers: If you grow your own cucumbers, you may come across National Pickling when shopping for seeds. This cultivar was developed for pickling and produces firm cucumbers that can be harvested small for whole pickles or allowed to grow larger for spears and slices.
- Homemade Pickles cucumbers: Another cultivar you’re more likely to encounter when choosing seeds than buying cucumbers at the store. It’s bred for pickling and can be harvested at different sizes depending on how you plan to cut or pack your pickles.
Whatever variety you use, freshness matters. Look for firm cucumbers that feel heavy for their size, with taut, dry skin and an even deep-green color. Avoid cucumbers with wrinkled or puckered ends, soft spots, or yellow streaking. Yellowing generally indicates an older, more mature cucumber, which is more likely to soften during pickling.
For small whole pickles, cucumbers around 2 to 3 inches long are ideal. Try to stay under 4 inches when choosing cucumbers for this purpose; larger, more mature cucumbers generally have bigger seeds and a softer interior. If you’re making spears or slices, somewhat larger pickling cucumbers can still be useful as long as they’re young, firm, and not seedy.
An attached green stem or blossom can be a useful sign that a cucumber was harvested recently. If you’re growing your own, harvest pickling cucumbers in the morning while they’re firm and well hydrated, and pickle them as soon after picking as practical.
Preparing the jars
Wash the canning jars, lids, and bands thoroughly in hot, soapy water and rinse well. Inspect each jar carefully, particularly around the rim, and don’t use any with chips or cracks. Discard lids or bands that are damaged, dented, or rusted.
If you’re processing the garlic pickles for shelf-stable storage, prepare a boiling-water canner fitted with a canning rack. Add enough water to cover the filled jars by at least 1 inch during processing and begin heating the water while you prepare the cucumbers and brine.
Keep the clean jars hot until you’re ready to fill them. There’s no need to pre-sterilize empty jars when the filled jars will be processed for at least 10 minutes. Follow the manufacturer’s directions for preparing your canning lids; modern canning lids generally should not be boiled.
If you’re making refrigerator garlic pickles rather than processing them, thoroughly cleaned jars are all you need.
How to make garlic pickles
Prepare the Cucumbers
Step 1: Wash the cucumbers thoroughly under cool running water and dry them. Trim about 1/16 inch from the blossom end of each cucumber. The blossom end contains enzymes that can contribute to softening, so don’t skip this small step.
Step 2: Leave small cucumbers whole or cut them into spears or pickle chips. Keep the pieces reasonably uniform so they pickle at a similar rate and pack neatly into the jars.
Pack the Jars
Step 1: Divide the garlic cloves, fresh dill sprigs, black peppercorns, and crushed red pepper flakes evenly among the prepared jars.
Step 2: Pack the cucumbers snugly into the jars without crushing or forcing them. Fill any larger gaps with smaller cucumbers or pieces when possible, leaving enough room at the top to maintain the required 1/2-inch headspace.
Would you like to save this post for later?
Make the Pickling Brine
Step 1: Combine the apple cider vinegar, water, and pickling salt in a saucepan. Bring the brine to a boil, stirring until the salt is completely dissolved, then remove it from the heat.
Fill the Jars
Step 1: Carefully pour the hot brine over the cucumbers, leaving 1/2 inch of headspace between the brine and the top of each jar.
Step 2: Remove trapped air bubbles by sliding a plastic or wooden utensil around the inside of each jar. Adjust the cucumbers if necessary, then check the headspace again and add more hot brine if needed to maintain 1/2 inch.
Step 3: Wipe the jar rims with a clean, damp cloth so they’re free of brine or food particles. Center the lids on the jars and screw on the bands until fingertip-tight. Don’t overtighten them.
For Shelf-Stable Garlic Pickles
Step 1: Place the filled jars on the rack in the water bath canner, making sure the jars are covered by at least 1 inch of water. Cover the canner and bring the water back to a full rolling boil.
Step 2: Once the water reaches a full boil, begin timing and process the jars for 10 minutes.
Step 3: When processing is complete, turn off the heat, remove the canner lid, and wait 5 minutes. Using a canning jar lifter, carefully remove the jars, keeping them upright. Set them on a towel or cooling rack and leave them undisturbed for 12 to 24 hours.
Step 4: After 12 to 24 hours, remove the bands and press the center of each lid. A properly sealed lid will be slightly concave and will not flex or pop when pressed. If a jar hasn’t sealed, refrigerate it rather than storing it at room temperature. Label the sealed jars and store them in a cool, dark place. For the best developed pickle flavor, wait at least 1 week before opening.
For Refrigerator Garlic Pickles
Step 1: Apply the lids and bands after filling the jars. For refrigerator pickles, you can use a plastic canning lid instead if you prefer; it’s my preferred method. Allow the jars to cool to room temperature, then refrigerate. When using metal lids and bands, the lids may seal as the jars cool, but this does not make unprocessed pickles shelf stable.
Step 2: Let the pickles sit in the refrigerator for 1 week before serving so the cucumbers have time to absorb the garlic, dill, and seasoned brine.
Top tips
- Chill the cucumbers: Starting with chilled cucumbers helps preserve their firm texture while you prepare the jars and brine.
- Consider the cut: Whole cucumbers generally retain the most crunch, followed by spears, while thinner slices soften more quickly as the brine penetrates the cucumber. Choose the cut based on the texture you want as well as how you plan to serve the pickles.
- Choose nonreactive cookware: Prepare the vinegar brine in stainless steel, enameled, or other nonreactive cookware. Avoid aluminum, copper, and unlined cast iron, which can react with the vinegar.
- Maintain the brine proportions: You can adjust the garlic, dill, and dry seasonings to suit your taste, but don’t alter the proportions of vinegar, water, or salt. The amount of salt required varies by the type of salt used, as noted above.
- Consider a pickling weight: For refrigerator garlic pickles, a glass pickling weight is optional but can help keep cucumbers completely submerged beneath the brine.
- Use clean utensils: Take pickles from the jar with a clean fork or tongs rather than your fingers to help keep the remaining refrigerator pickles in good condition.
Serve
Garlic pickles are a natural match for sandwiches, barbecue, and picnic foods. Serve them alongside simple loose meat sliders from scratch, homemade buffalo chicken sliders, a classic New York style club sandwich, grilled tuna melt sandwich, or turkey bacon cheese melt sandwich. They’re also right at home with easy homemade egg salad,or simple from scratch chicken salad made into sandwiches.
For a cookout or summer dinner, pair them with baked barbecue chicken leg quarters or homemade pineapple BBQ chicken. Add classic potato salad and homemade deviled eggs from scratch for an easy picnic-style spread.
Garlic pickles are also great with burgers, hot dogs, sausages, fried chicken, charcuterie, and cheese boards. Or chop a few and stir them into egg salad, potato salad, macaroni salad, tartar sauce, or burger sauce.
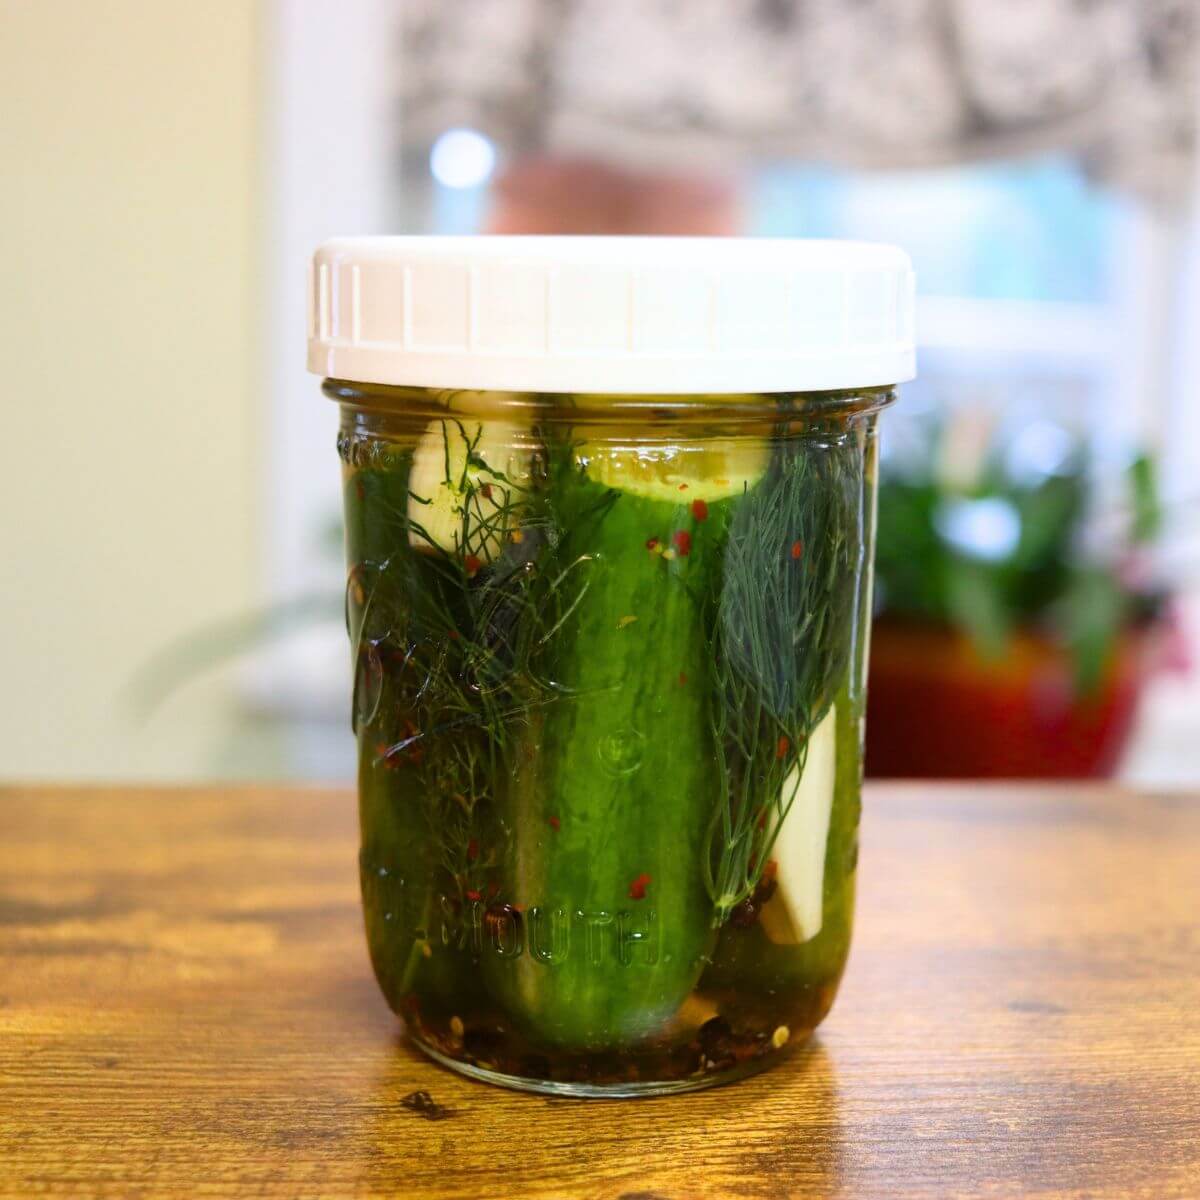
Garlic Pickles
Ingredients
- 2 pounds Kirby cucumbers
- 9 large garlic cloves peeled
- 1 1/2 teaspoons black peppercorns
- 3/4 teaspoon crushed red pepper flakes
- 9 fresh dill sprigs
- 1 1/2 cups apple cider vinegar
- 1 1/2 cups water
- 2 tablespoons pickling salt
Instructions
- Wash the jars, lids, and bands in hot, soapy water and rinse thoroughly. Inspect the jars for chips or cracks and the lids and bands for damage. Keep the jars hot if you will be processing the pickles.
- Wash and dry the cucumbers. Trim about 1/16 inch from the blossom ends. Leave the cucumbers whole or cut them into spears or slices.
- Divide the garlic cloves, black peppercorns, crushed red pepper flakes, and fresh dill sprigs evenly among 3 pint jars. Pack the cucumbers snugly into the jars without crushing them, leaving room for 1/2 inch headspace.
- Combine the apple cider vinegar, water, and pickling salt in a saucepan. Bring the brine to a boil, stirring until the salt is completely dissolved, then remove it from the heat.
- Pour the hot brine over the cucumbers, leaving 1/2 inch headspace. Remove trapped air bubbles with a plastic or wooden utensil. Recheck the headspace and add more brine if needed.
- Wipe the jar rims clean. Center the lids on the jars and secure the bands until fingertip-tight.
- For refrigerator garlic pickles, allow the jars to cool to room temperature, then refrigerate. Let the pickles develop their flavor in the refrigerator for about a week before serving.
- For shelf-stable garlic pickles, fill a water bath canner fitted with a canning rack with enough water to cover the filled jars by at least 1 inch. Bring the water to a boil. Using a canning jar lifter, lower the filled jars onto the rack and cover the canner. Bring the water back to a full rolling boil, then begin timing and process the jars for 10 minutes.
- Turn off the heat, remove the canner lid, and wait 5 minutes. Remove the jars while keeping them upright. Set them on a towel or cooling rack and leave undisturbed for 12 to 24 hours.
- Remove the bands and check the seals by pressing the center of each lid. Properly sealed lids will not flex or pop when pressed. Refrigerate any jar that did not seal. Label sealed jars and store them in a cool, dark place.
- Let the garlic pickles rest for at least 1 week before opening for the best developed flavor.
- Makes approximately 3 pint jars of garlic pickles.
Notes
- Cucumber cuts: Leave small pickling cucumbers whole for the firmest texture, cut them into spears, or slice them into chips. Thinner cuts will soften more quickly as they absorb the brine.
- Salt substitutions: This recipe uses 2 tablespoons pickling salt. Substitute 2 tablespoons fine sea salt or 3 tablespoons Diamond Crystal kosher salt, if preferred.
- Refrigerator storage: Keep unprocessed garlic pickles refrigerated, even if the lids appear to seal as the jars cool. A vacuum seal alone does not make the pickles shelf stable.
- Brine proportions: Do not alter the proportions of vinegar and water when making this recipe for shelf-stable storage. The garlic, dill, and dry seasonings can be adjusted to taste.
- Pickling weights: A glass pickling weight is optional for refrigerator pickles and can help keep cucumbers submerged beneath the brine.
Nutrition information is automatically calculated, so should only be used as an approximation.