Old-Fashioned Chicken and Gravy

Old-fashioned chicken and gravy is the kind of meal that reminds you just why homemade gravy matters. This recipe is built around pan juices, butter, and broth, and cooked slowly in a cast iron skillet, so the gravy develops naturally and coats the chicken the way it should.
If you’re looking for more chicken recipes to make in your kitchen, try a one-pan Tex-Mex chicken meal, garlic parmesan–style chicken tenders, and from-scratch creamy chicken pasta next.

Let’s talk about this recipe
This is a straightforward, from-scratch chicken and gravy made the traditional way — by cooking chicken in a skillet, then building the gravy directly in the same pan. There are no mixes, no packets, no jars, and no shortcuts. Everything happens in one place, in the right order, so the gravy carries the full flavor of the chicken.
I love homemade gravy, and I’m particular about it. If it isn’t made from scratch, I don’t want it on my plate. This method is how I’ve always made it — using real fat, real broth, and time. The result is a thick, savory gravy that tastes like chicken, not salt or seasoning packets.
What makes this recipe so good?
- The gravy is built directly in the skillet after cooking the chicken, so it captures all of flavor of the browned bits and pan juices.
- Butter and flour are cooked together before the broth is added to the skillet, creating a smooth, stable gravy with classic texture.
- Chicken thighs release enough fat and flavor to give the gravy body without relying on packaged ingredients.
- Cooking and finishing the gravy in cast iron maintains steady heat and prevents scorching.
- Letting the gravy rest off the heat allows it to finish thickening naturally without overcooking.
Ingredients you’ll need
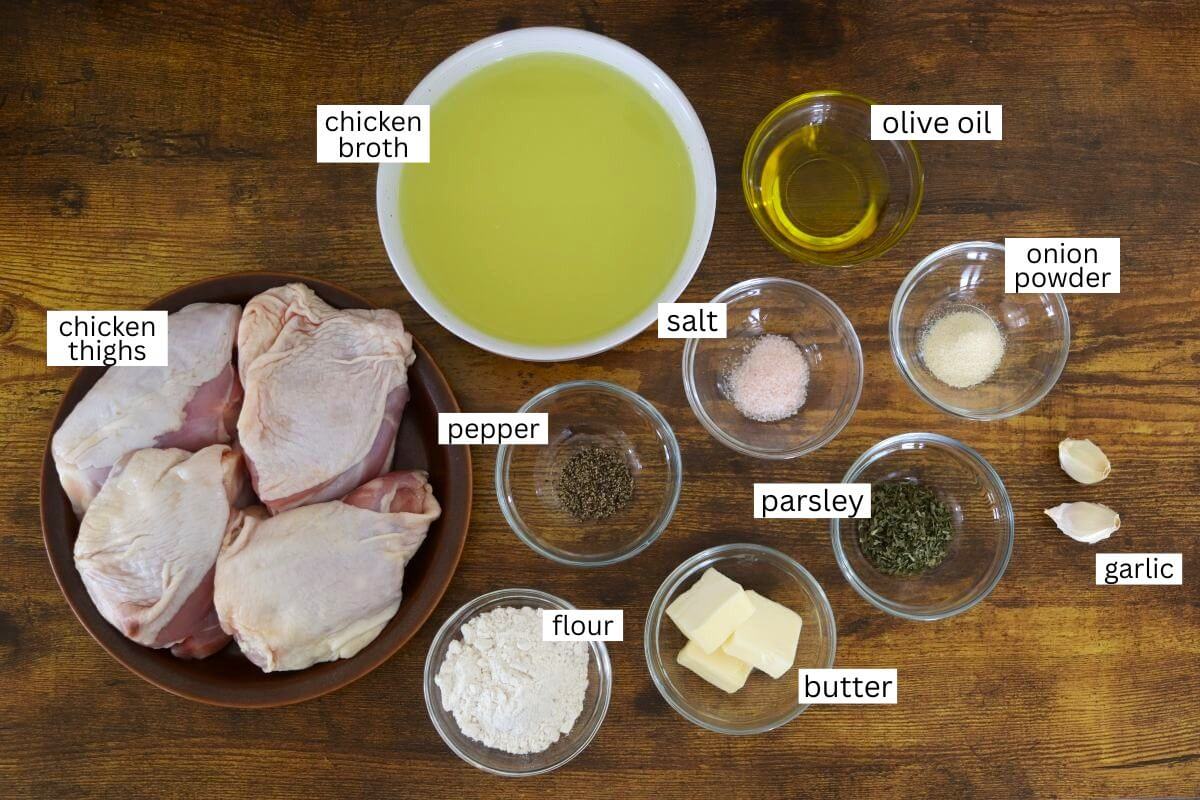
- Chicken thighs: Bone-in, skin-on thighs are my first choice here — they render enough fat and juices to build a full, flavorful gravy right in the pan.
- Chicken broth: Old-fashioned chicken broth gives the gravy the most depth and body, but a good-quality store-bought broth will still work if that’s what you have.
- Butter: Butter is essential for forming the roux and creating a smooth gravy. Fresh homemade butter adds richness, but standard butter works perfectly well.
- Onion powder: A small amount adds the perfect background flavor without competing with the chicken.
See recipe card below for full information on ingredients and quantities.
Make it your own
- Use different chicken parts if needed, but keep the skin on so enough fat and juices are released to build the gravy properly.
- Add a sprig of your favorite fresh herbs, when you add the broth, for a subtle variation.
- Stir in a small pinch of dried herbs, along with the broth, to add a gentle layer of flavor without overpowering the chicken.
- Add an extra clove or two of garlic if you prefer a more pronounced garlic flavor in your gravy.
- Adjust the gravy thickness, by adding a small splash of broth after resting, if it thickens a little more than you like.
Would you like to save this post for later?
How to make old-fashioned chicken and gravy
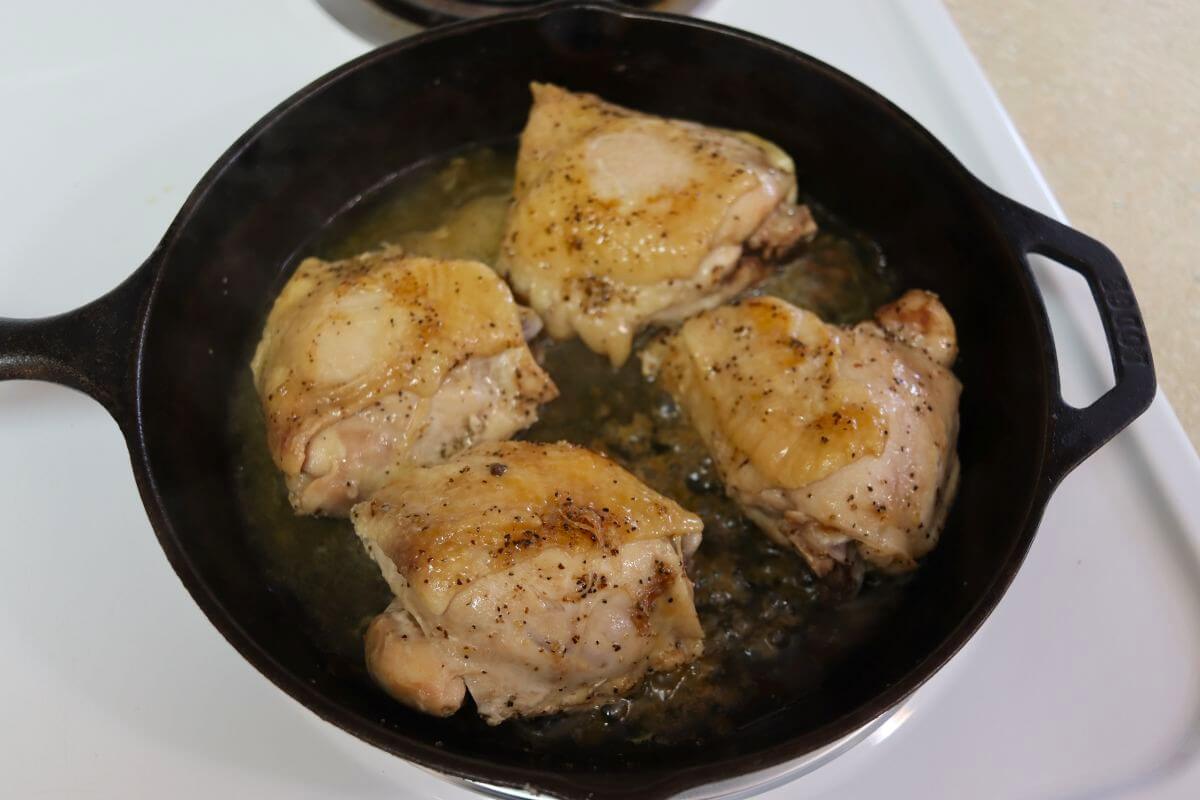
Step 1: Heat olive oil in a cast iron skillet over medium heat. Add the chicken thighs directly to the skillet and season with salt and pepper. Cook until well browned, then flip and season the second side. Continue cooking until the chicken is cooked through and no longer pink in the center.
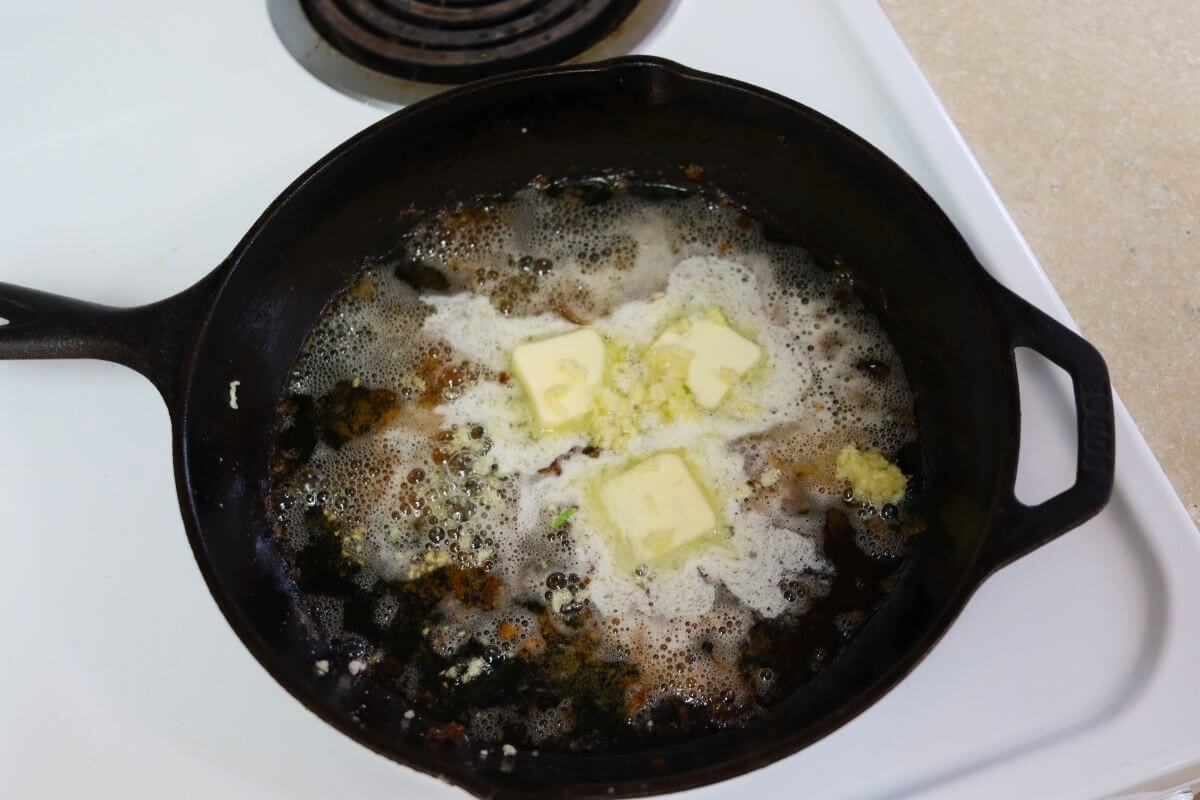
Step 2: Remove the chicken from the skillet and set aside. Add butter to the hot skillet along with pressed garlic. Let the butter melt and allow the garlic to cook for about one minute, just until fragrant.
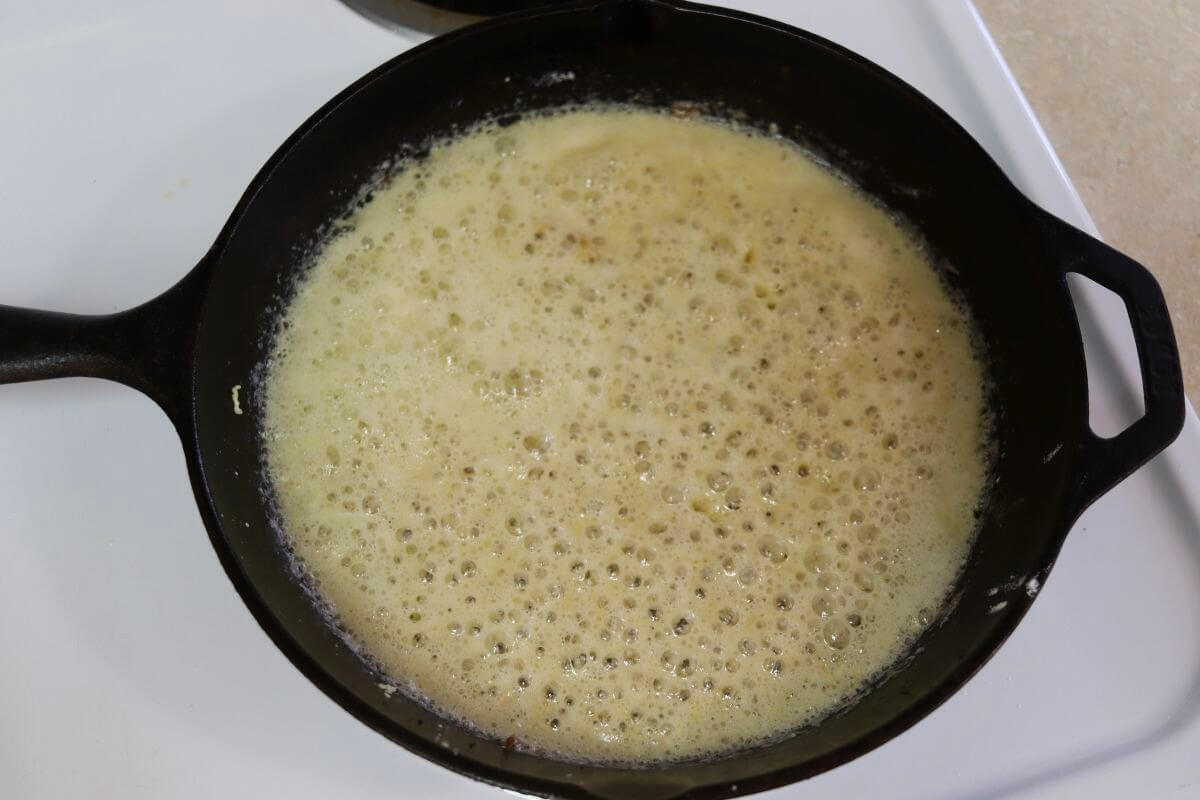
Step 3: Sprinkle in the flour and whisk immediately to prevent clumping. Cook very briefly just to remove the raw flour taste.
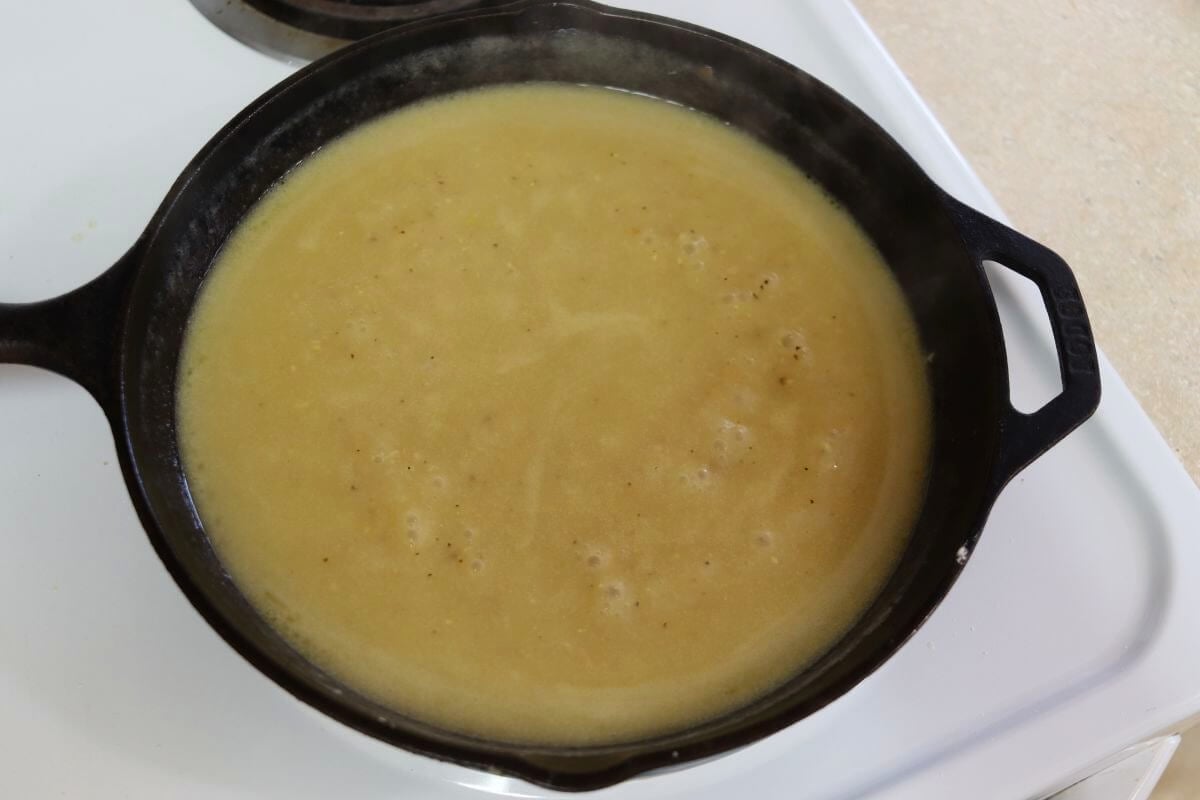
Step 4: Slowly add the chicken broth while whisking, then stir in the onion powder. Bring the mixture to a low simmer and cook until the gravy thickens.
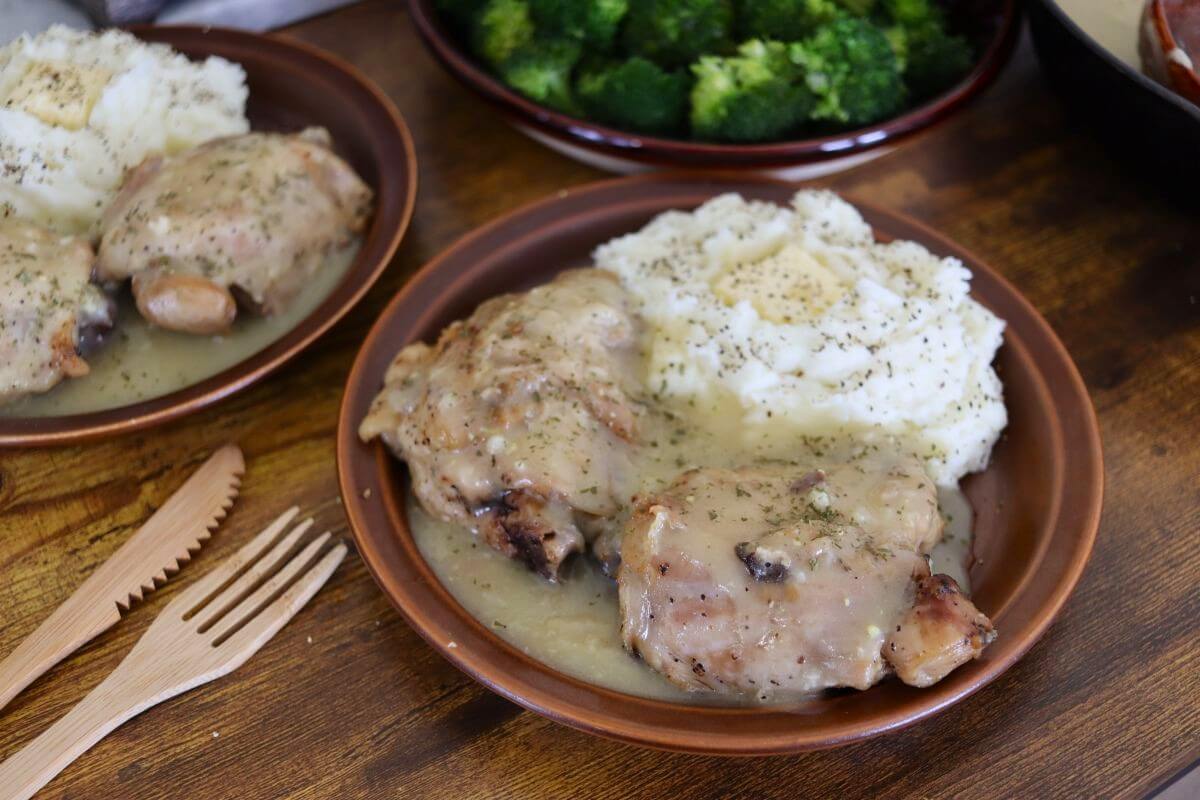
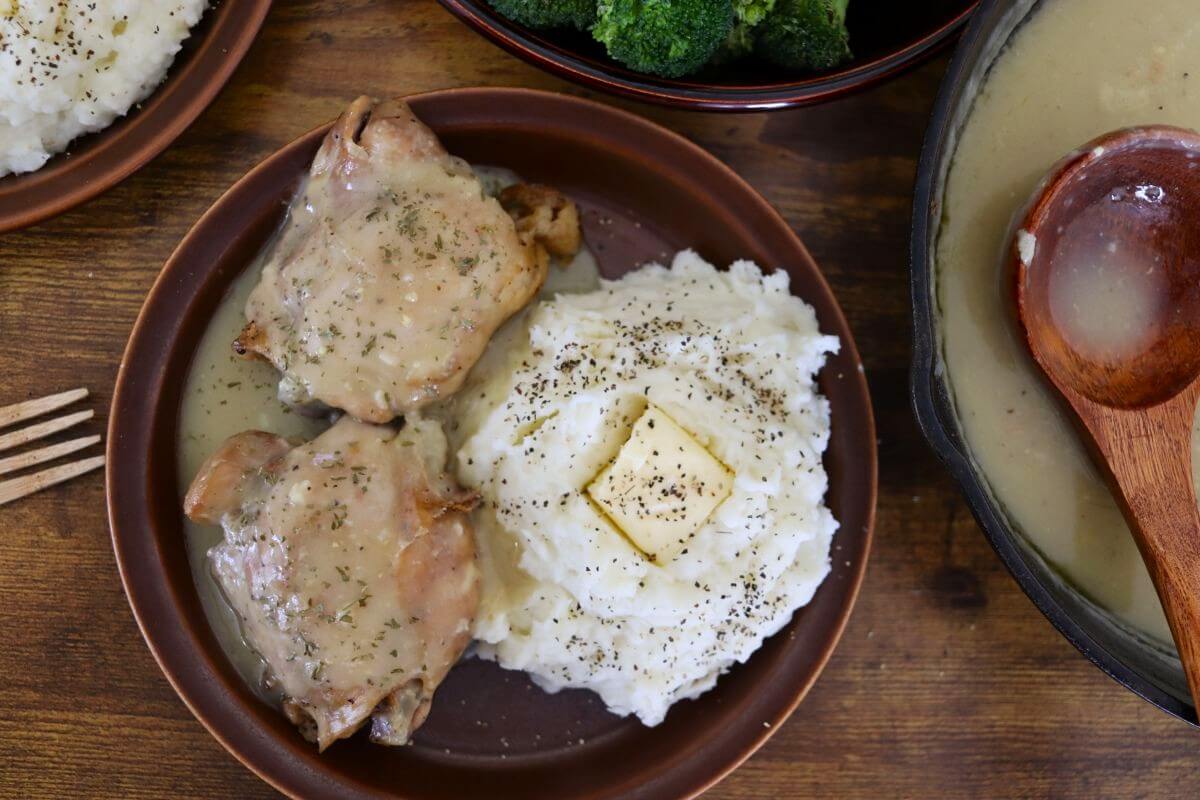
Step 5: Remove the skillet from the heat and let it rest for about 10 minutes. The gravy will continue to thicken as it sits. Pour the gravy over the chicken thighs and garnish with parsley, if desired.
Recipe FAQs
You can, but it releases far less fat and fewer pan juices, which makes it harder to build a rich, traditional gravy.
Yes. Store it in the refrigerator and reheat gently on the stove. Expect the gravy to thicken as it sits, and loosen it gradually with a small amount of broth rather than water.
Lumps form when flour isn’t fully combined with the fat before liquid is added to the skillet, or when broth is poured in too quickly without whisking.
Yes. Flour-based gravies continue to thicken off the heat, which is why resting the skillet before serving is important.
Gravy thickens only after the flour has time to hydrate at a low simmer. Removing it from the heat too early will leave it thin.
No, but the pan should be heavy-bottomed. Thin skillets heat unevenly, and increase the risk of scorching the flour or causing the gravy to separate.
Serving ideas
This old-fashioned chicken and gravy is best served with simple sides that can soak up the sauce and balance its richness. Mashed potatoes are the most traditional choice, giving the gravy plenty of surface to cling to. If it’s potatoes you want, cheesy fried wedge potatoes and stuffed baked potatoes are great options as well.
For vegetables, keep things straightforward with lightly sweet or tangy flavors. Roasted carrots finished with honey and balsamic vinegar pair especially well with the savory gravy. A smooth, gently sweet caramel applesauce adds contrast without competing with the dish, and farmhouse-style coleslaw helps cut through the richness and round out the plate.
Diane Gail’s tips for success
- Keep the heat moderate when cooking the chicken so the fat renders without burning the skillet drippings.
- Don’t rush the roux — fully coating the flour in fat before adding the broth is what keeps the gravy smooth.
- Add the broth gradually, while whisking, so the gravy thickens evenly instead of tightening in patches.
- Maintain a low simmer once the broth is added; boiling can cause the gravy to separate or scorch.
- Scrape the skillet thoroughly when adding the liquid, to release the browned bits which are essential for flavor.
- Let the gravy rest off the heat before serving, so it finishes thickening without continuing to cook.
- If the gravy tightens more than expected, loosen it gently with a small amount of warm broth rather than stirring aggressively.

Old-Fashioned Chicken and Gravy
Ingredients
- 4 chicken thighs bone-in, skin-on
- 2 tablespoons olive oil
- salt to taste
- ground black pepper to taste
- 3 tablespoons butter
- 2 large garlic cloves pressed
- 4 tablespoons all-purpose flour
- 3 cups chicken broth
- 1/2 teaspoon onion powder
- dried parsley optional garnish
Instructions
- Brown the chicken: Heat olive oil in a cast iron skillet over medium heat, add the chicken thighs, season with salt and pepper directly in the skillet, and cook until well browned; flip halfway through and season the second side.
- Remove the chicken: Transfer the cooked chicken thighs out of the skillet and set aside, leaving the rendered fat and browned bits in the pan.
- Melt the butter and cook the garlic: Add the butter and pressed garlic to the hot skillet, allowing the butter to melt and the garlic to cook for about one minute until fragrant.
- Form the roux: Sprinkle the flour into the skillet and whisk immediately so it fully absorbs the butter and cooks without clumping.
- Build the gravy: Slowly whisk in the chicken broth, add the onion powder, and bring the mixture to a low simmer until the gravy thickens.
- Rest the gravy: Remove the skillet from the heat and let the gravy rest for about 10 minutes so it finishes thickening naturally.
- Finish the dish: Pour the thickened gravy over the chicken thighs and serve.
Notes
- Chicken choice: Bone-in, skin-on thighs produce the richest gravy, but other cuts can be used if the skin is left on.
- Flour prep: Sifting the flour ahead of time reduces the chance of lumps when whisking it into the butter.
- Heat control: Keep the gravy at a low simmer — boiling can scorch the flour and break the sauce.
- Resting: Allowing the gravy to rest off the heat is essential for proper thickening and texture.
Nutrition
Nutrition information is automatically calculated, so should only be used as an approximation.