Halloween Chicken Pot Pie
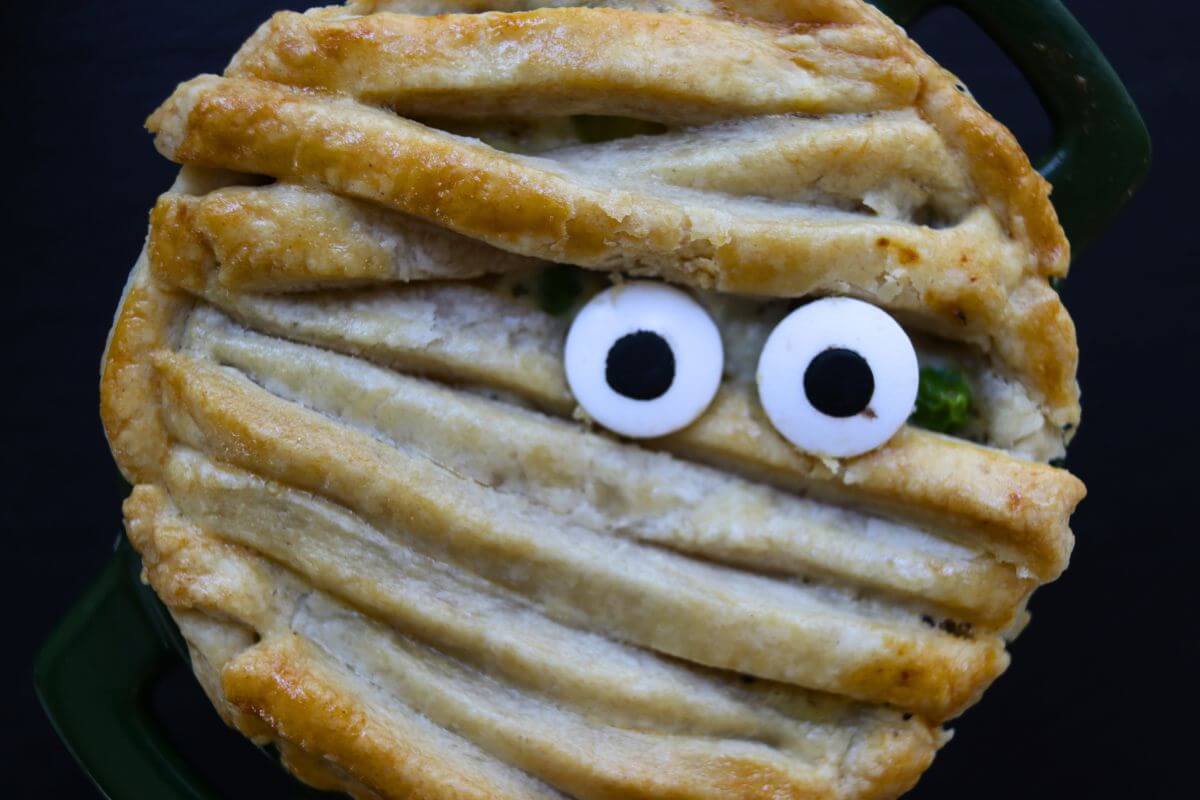
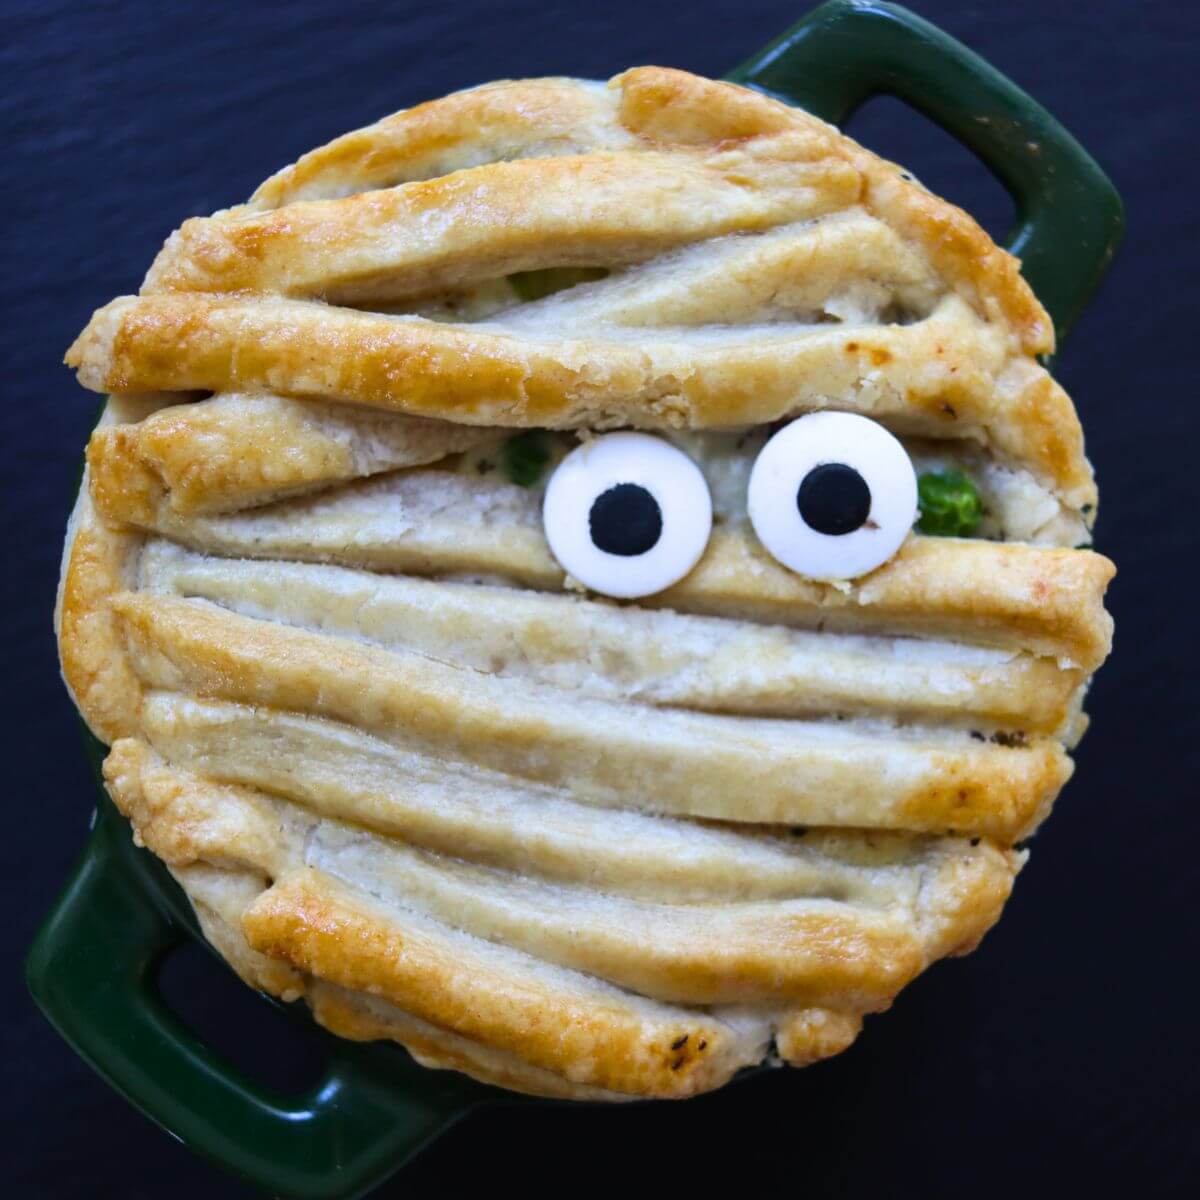
This Halloween chicken pot pie recipe is a fun way to put a spooky spin on a classic comfort food favorite. Individual mini pot pies are topped with strips of crust to look like little mummies, making them a festive meal to serve before a night of Halloween fun or a great addition to a Halloween party spread.
Pot pie goes spooky
I always have so much fun making these little pot pies each year. They have a ton of spooky charm for something that is so easy to assemble, and I love serving individual pies to guests. It’s like handing everyone their very own little edible ghoulish treasure.
The filling is made completely from scratch, and I’m not telling tall tales when I say it’s the best chicken pot pie filling I’ve ever tasted — hands down! I use this same recipe year-round, most often for a traditional chicken pot pie. But I’ve also dressed up the crust in different ways over the years to fit all kinds of occasions.
If you’re looking for other great holiday-themed recipes to make your celebration table festive, my savory pumpkin cheese ball, focaccia bread spider pizza, and spooky taco layer dip are sure to fit right in.
Recipe ingredients
- Pie crust: Use your favorite pie crust, or make a tender, flaky pie crust from scratch. A good pie crust provides the pastry base for each mini pot pie and is sturdy enough to cut into strips for the mummy wrappings while still baking up golden and delicate.
- Chicken breast: Choose plump, boneless, skinless chicken breasts with a fresh pink color and little visible fat. Chicken breast gives the pot pie substantial, satisfying pieces of chicken and a clean, savory poultry flavor that complements the rich filling.
- Chicken broth: Provides the primary savory flavor for the chicken pot pie filling, so use a good-quality, flavorful broth. Simple homemade chicken broth gives you complete control over the flavor and is a natural fit for a pot pie made from scratch.
- Heavy cream: Adds richness and body to the filling and gives the sauce its creamy texture. Use heavy cream rather than a lower-fat dairy product for a smooth, full-bodied sauce.
- Candy eyes: Gives the little pot pies their unmistakable mummy appearance as they peek out between the strips of crust. Choose candy eyes large enough to remain clearly visible between the mummy wrappings.
See the recipe card for full information on ingredients and quantities.
How to make Halloween chicken pot pie
Step 1: Heat the measured olive oil in a skillet over medium heat. Add the chicken and season it to taste with salt, black pepper, and granulated garlic. Cook just until the chicken is cooked through, taking care not to overcook it since it will cook again when the pies are baked.
Step 2: Remove the chicken from the skillet and set it aside while you prepare the vegetables and sauce.
Step 3: Add the carrots, celery, and onions to the same skillet. Cook, stirring occasionally, until the vegetables have softened and the onions are semi-translucent.
Step 4: Add the pressed garlic and cook just until fragrant, stirring it into the vegetables so it doesn’t scorch.
Step 5: Sift the flour into the skillet a little at a time, stirring well after each addition. Continue stirring until the flour is thoroughly incorporated and no dry pockets remain.
Would you like to save this post for later?
Step 6: Stir in the chicken broth, then add the thyme, salt, and black pepper. Bring the mixture to a low simmer and cook for 5 minutes, stirring occasionally as the sauce thickens.
Step 7: Return the chicken to the skillet and add the frozen peas. Stir everything together and allow the filling to heat through.
Step 8: Remove the skillet from the heat, then stir in the heavy cream until it is fully incorporated. Set the filling aside while you prepare the ramekins.
Step 9: Line the bottom and sides of 6 small ramekins with pie crust, cutting and shaping the dough as necessary to fit each dish.
Step 10: Divide the chicken pot pie filling evenly among the 6 prepared ramekins.
Step 11: Cut the remaining pie crust into strips about 1/2 inch wide. Layer the strips loosely across the top of each ramekin to resemble mummy wrappings, leaving an open space where the candy eyes will be placed after baking.
Step 12: Beat the egg with 1/2 teaspoon of water to make an egg wash. Lightly brush it over the exposed pie crust strips.
Step 13: Arrange the ramekins on a baking sheet and place it on the middle rack of a preheated 375°F/191°C oven. Bake for 25–30 minutes, until the crust is golden.
Step 14: Transfer the ramekins to a cooling rack. While the pot pies are still warm, carefully position the candy eyes.
Step 15: Let the pies rest for 5–10 minutes before serving.
Top tips
- Keep the pie crust cold: Chilled dough is easier to cut into neat strips and less likely to stretch or lose its shape as you arrange the mummy wrappings.
- Let the filling cool slightly: Putting very hot filling against the raw dough can soften the crust before the ramekins go into the oven.
- Watch the crust as it bakes: If the narrow mummy strips begin browning too quickly, loosely shield the tops with foil for the remainder of the baking time.
- Skip the bottom crust: Leave the bottom crust out completely if you prefer and add the chicken filling directly to the ramekins before arranging the mummy strips over the top.
- Make one large pot pie: Assemble the recipe in one larger baking dish instead of individual ramekins if you prefer.
- Prepare the crust and filling ahead: Make the pie crust and chicken pot pie filling ahead of time and refrigerate them separately. Assemble the pot pies when you’re ready to bake them so the crust doesn’t sit against the filling for an extended period.
- Adjust for the size of your baking dishes: The amount of filling and pie crust needed for each pot pie will vary depending on the size and shape of the dishes you use. You may end up with more or fewer than 6 individual pot pies.
- Allow for differences in baking time: The size, depth, and material of your baking dishes can affect how quickly the pot pies bake. Use the stated baking time as a guide and look for a golden crust and hot, bubbling filling to determine when they’re ready.
- Store leftovers properly: Cover the cooled pot pies or transfer leftovers to an airtight container and refrigerate for up to 3–4 days.
- Freeze for longer storage: Freeze the cooled pot pies without the candy eyes, well wrapped, for up to 3 months. Thaw them overnight in the refrigerator before reheating, and add the candy eyes afterward.
Serve
These mini pot pies are rich and hearty, so they pair especially well with sides that bring in something fresh, crisp, or a little tangy. A simple green salad with balsamic vinaigrette with mustard, roasted Brussels sprouts, roasted broccoli, cucumber salad, or sautéed greens are all good choices if you want to keep the rest of the meal lighter.
For more traditional comfort food sides, serve them with traditional cabbage coleslaw, classic stewed green beans, or honey balsamic glazed carrots. A red cabbage and apples side dish is another excellent fall option, with a sweet-tart flavor that balances the creamy chicken filling particularly well and a bright purple color that looks great on a Halloween themed table.
Other recipes you’ll love
If you loved this from scratch pot pie recipe, give these other great recipes a try too!
Chocolate Peanut Butter Candy Apples
Cajun Turkey Breast
Creamy Baked Pumpkin Pasta
Traditional Cottage Pie
Mushroom Macaroni and Cheese Skillet
Apple and Pork Tenderloin with Maple Dijon Sauce
Halloween Chicken Pot Pie
Ingredients
- 2 tablespoons olive oil
- 1 pound chicken breast cut in 1/2" cubes
- 1/2 teaspoon salt more to taste
- 1/4 teaspoon coarse ground black pepper more to taste
- granulated garlic to taste
- 1 cup chopped carrots
- 1 cup chopped celery
- 1 cup chopped yellow onion
- 3 large garlic cloves pressed
- 1/4 cup all-purpose flour
- 2 cups chicken broth
- 1 teaspoon dried thyme
- 1 cup frozen peas
- 1/2 cup heavy cream
- 2 9-inch pie crusts
- 1 large egg
- 12 candy eyes
Instructions
- Heat the olive oil in a skillet over medium heat. Add the chicken; season to taste with salt, black pepper, and granulated garlic. Cook just until cooked through. Remove from the skillet and set aside.
- Add the carrots, celery, and onions to the skillet. Cook until softened and the onions are semi-translucent. Add the pressed garlic and cook until fragrant.
- Sift in the flour incrementally, stirring well after each addition. Stir in the chicken broth, thyme, salt, and black pepper. Bring to a low simmer and cook for 5 minutes.
- Return the chicken to the skillet and add the frozen peas. Heat through, then remove the skillet from the heat and stir in the heavy cream. Set aside.
- Line the bottom and sides of 6 small ramekins with pie crust, cutting and shaping it as needed. Divide the filling evenly among the ramekins.
- Cut the remaining pie crust into 1/2-inch strips. Arrange them over each pot pie like mummy wrappings, leaving a gap for the eyes.
- Beat the egg with 1/2 teaspoon water and brush the egg wash over the crust.
- Place the ramekins on a baking sheet. Bake on the middle rack at 375°F/191°C for 25–30 minutes, until the crust is golden.
- Transfer the ramekins to a cooling rack and carefully add the candy eyes. Rest for 5–10 minutes before serving.
Notes
- Keep the pie crust chilled until you are ready to work with it so it is easier to cut and shape.
- The amount of filling and pie crust needed, as well as the final yield, will vary depending on the size and shape of your ramekins.
- For a top-crust-only version, omit the bottom crust and spoon the filling directly into ungreased ramekins.
- Baking time can vary with the size, depth, and material of the baking dishes. Bake until the crust is golden and the filling is hot and bubbling.
Nutrition
Nutrition information is automatically calculated, so should only be used as an approximation.