How To Make A Head Scarf

If you’ve ever wondered how to make a head scarf, you’ve come to the right place! I’m going to show you how to do just that.

And you aren’t going to believe how easy it is to do. They can be made in just 10 minutes, not even kidding.
These pieces are both functional and stylish. I love using them to keep my hair away from my face when I’m wearing a DIY natural oatmeal mask, all-natural shaving gel, or soaking in a bath infused with handmade bath bombs. If you make one, you’re bound to make at least a dozen more.
And if you’re looking for other simple fabric crafts, be sure to check out my reversible bento bread bags, fabric scrap mache bowls or leaf stamped tea towels.
WHY YOU NEED A HEAD SCARF
You need to know how to make a head scarf because you are going to want them in every color, and a variety of patterns too.
And when you find that you bought an outfit that would look great with one, you can pick up a piece of fabric and make it happen. Just like that!
But, perhaps the more important question is, why are you going to want to have a great selection of them on hand?
And there’s more than one answer to that question. First, they have the ability to elevate just about any outfit. There are very few looks that are out of their league. They cover everything from very casual to casual business attire with ease.
They keep your hair out of your face when you’re involved in hands on activities, like; gardening, yard work, cooking, sewing, cleaning, and more.
And they can conceal a bad hair day like nobody’s business. Put on a simple head scarf and all of a sudden your hair is looking great.
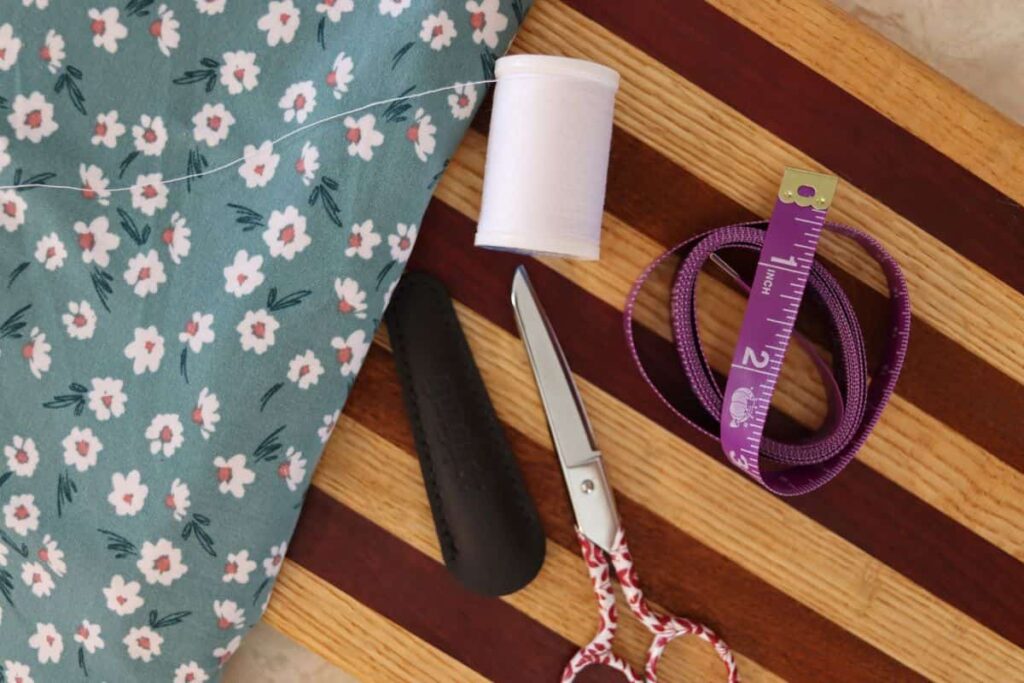
SUPPLIES NEEDED TO MAKE THIS PROJECT
There are very few supplies needed to make a head scarf. And it is likely that you have all of them in your craft supplies already.
You may have to pick up the fabric, but that’s really a big part of the fun of learning how to make a head scarf.
Here’s a list of what you’ll need to make one for yourself …
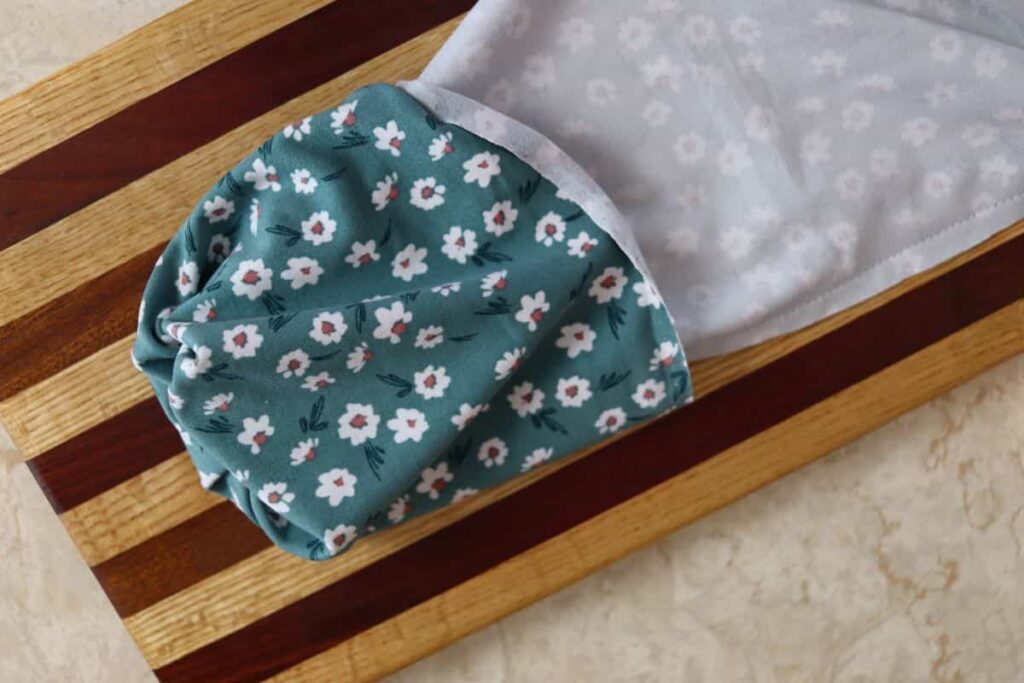
- KNIT FABRIC – If you can get some jersey knit fabric for your head scarf that is the ideal choice. It’s thinner than regular knit fabric and makes a very appealing piece. I used regular knit for the scarf I made for this project because that was what was available to me. I’m happy with the result, and would recommend this fabric as well.
- MEASURING TAPE – I like to use a measuring tape that’s made for sewing when working with fabric. I feel it’s easier to work with. But any measuring tape will do the job. You can even use a ruler for this job, as you will not be measuring more than 12″.
- MARKER – If you have a fabric pencil you can use that to make your scarf. It will wash out of the fabric when you run it through the washing machine. I just used a regular sharpie marker as that’s what I had. It’s simple enough to cut inside the line on the fabric. And if you miss a spot it won’t matter because the line lands on the inside of the scarf anyway.
- FABRIC SCISSORS – A good pair of fabric scissors makes cutting the fabric accurately much easier when doing this project.
- THREAD – You will need thread that coordinates with the fabric you choose to make your scarf.
- SEWING MACHINE – This project could be sewn by hand. It would take some time, but it is definitely doable. If you have access to a sewing machine you can have it done in just minutes.
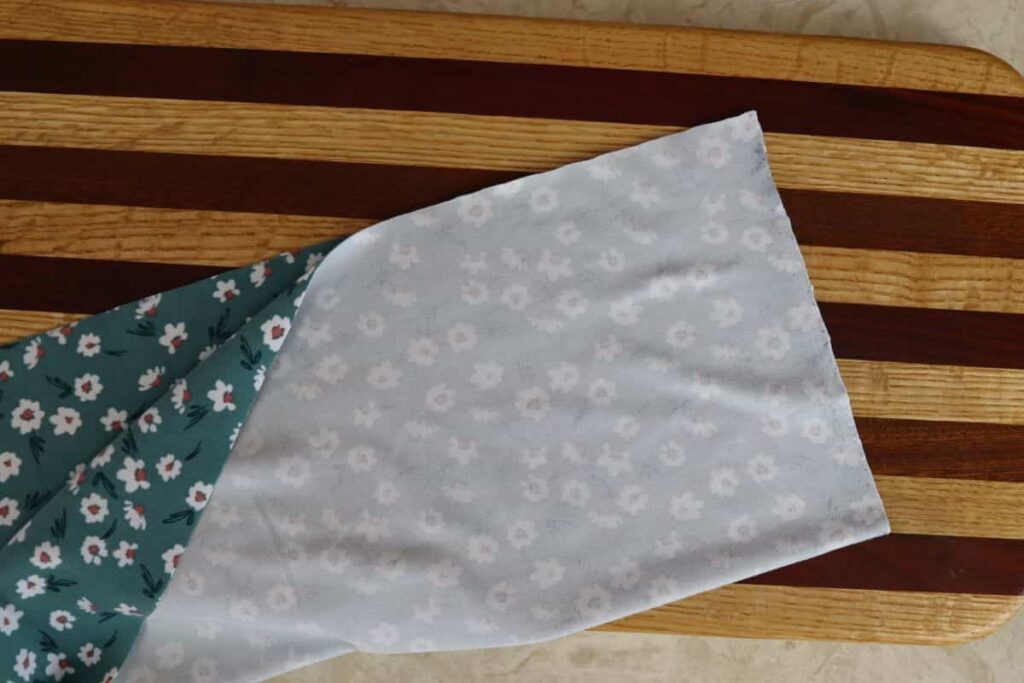
CHOOSING MATERIAL FOR THIS PROJECT
When learning how to make a head scarf, it’s very important to learn how to choose the right material for the project.

The material that I’ve seen most often recommended to make these pieces is jersey knit. I couldn’t find any of that particular type of fabric at my local store. So, I picked up a piece of regular knit material.
The difference between the two of these fabrics is their thickness. Jersey knit is thinner than regular knit.
Each of them will have a slightly different look when completed. I’m perfectly happy with the scarf I made from regular knit. But I may order a piece of jersey knit online to make another for my upcoming collection.
I haven’t tried other materials but I’m thinking that anything with a little bit of stretch and ‘grab’ to it would work.
You have to have stretch in the material so that it can be snuggly placed on your head. And it will need to have a texture that grabs to itself, so that it stays put when you tuck in the ends to secure it.
Additionally, if the fabric you choose is prone to fraying, you will have to hem the ends of the scarf to prevent that from happening. This step is not necessary when working with knit material.
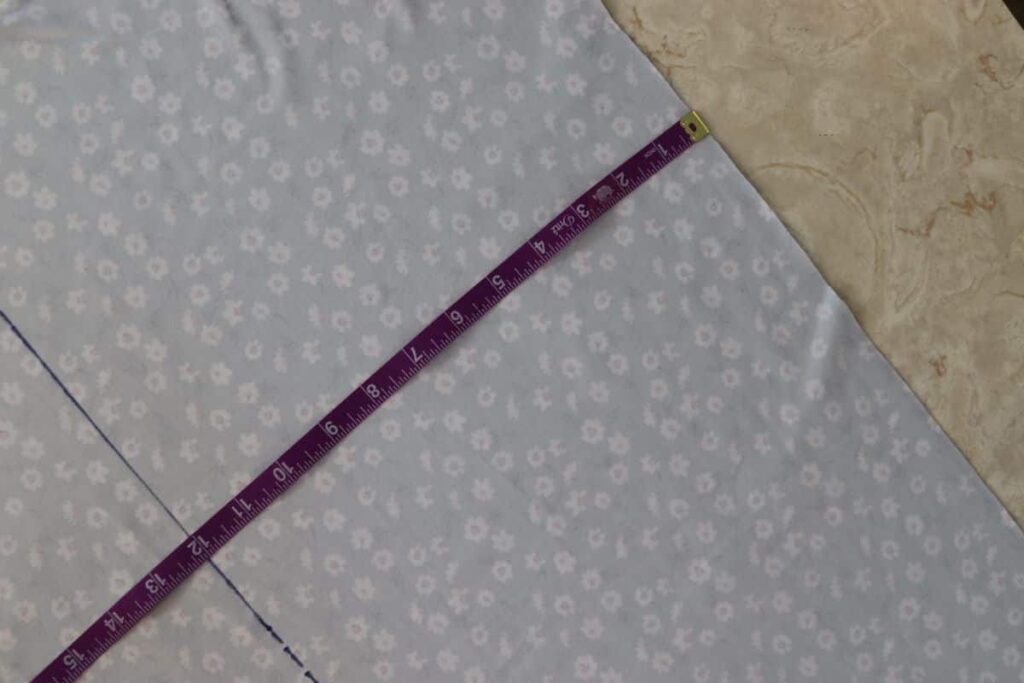
HOW TO MAKE A HEAD SCARF
If you follow these 4 simple steps you will have learned how to make a head scarf like a pro. And believe me, steps don’t get any easier than these.
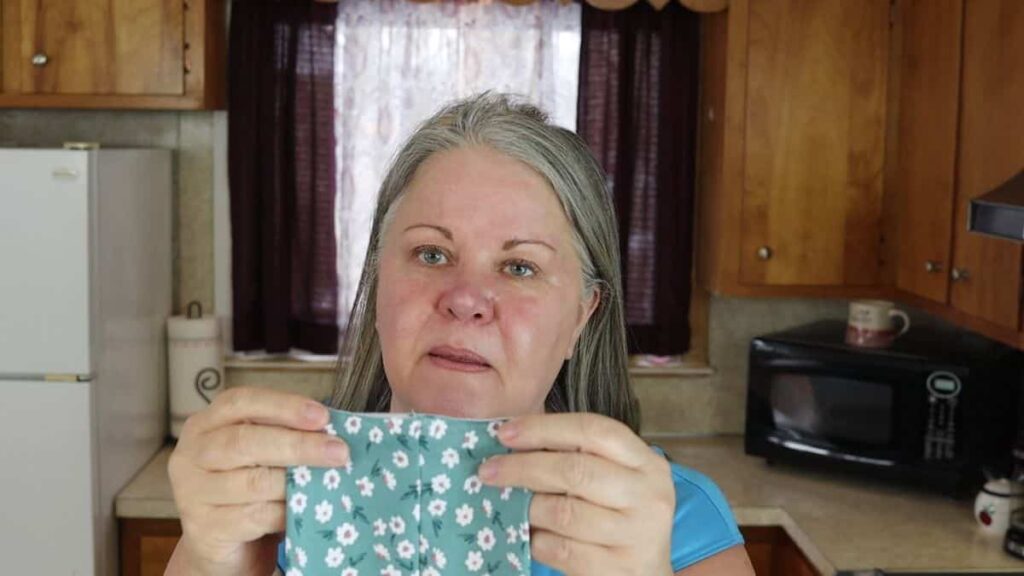
First measure and cut your fabric to a 12″ x 65″ piece.
Would you like to save this post for later?
Then fold it lengthwise, keeping right sides of the fabric together, and matching up the edges as you do.
Sew the edges of the fabric closed, using a 1/4″ to 1/2″ seam. Be sure to tack the ends of the seam well.
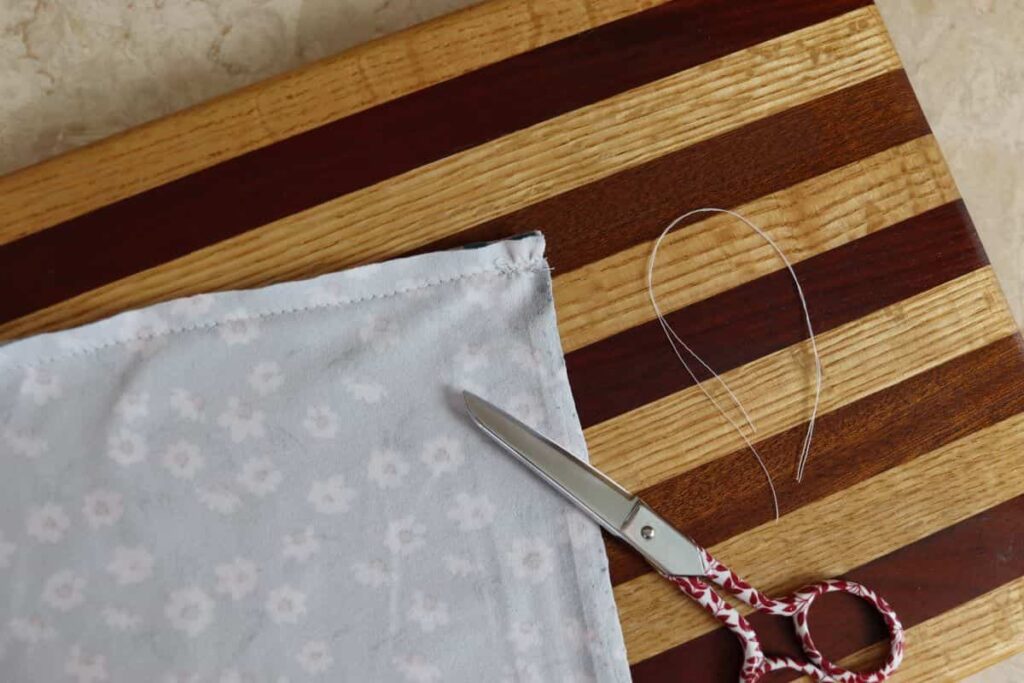
Turn the scarf inside right and you’re done. You are now the proud owner of one functional and stylish head scarf.
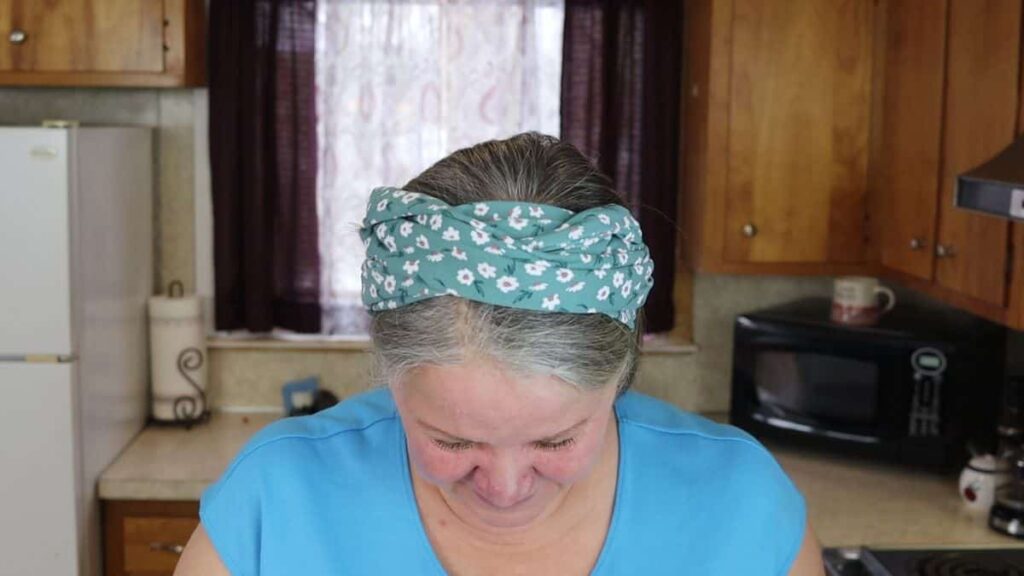
HOW TO WEAR A HEAD SCARF
The only thing that is as great as how easy it is to make this piece is how easy it is to put it on.
Arrange the head scarf so that the seam is going down the center of one of the sides when it’s folded. This will make it so that the seam is not seen when you’re wearing it.
Then find the midpoint of the scarf and place it on the center of the top of your head.
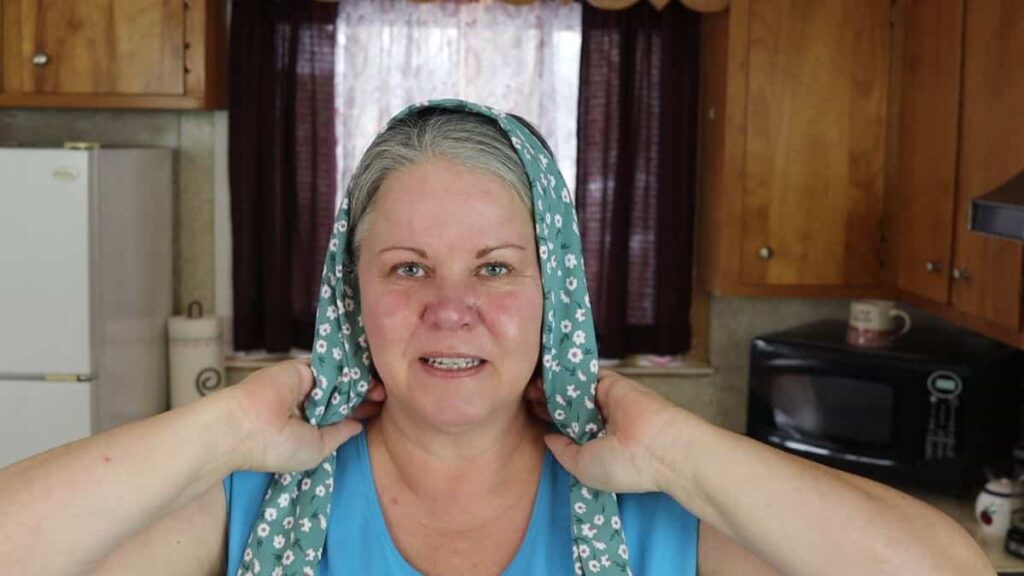
Bring the sides down around your head and cross them at the base of your head.
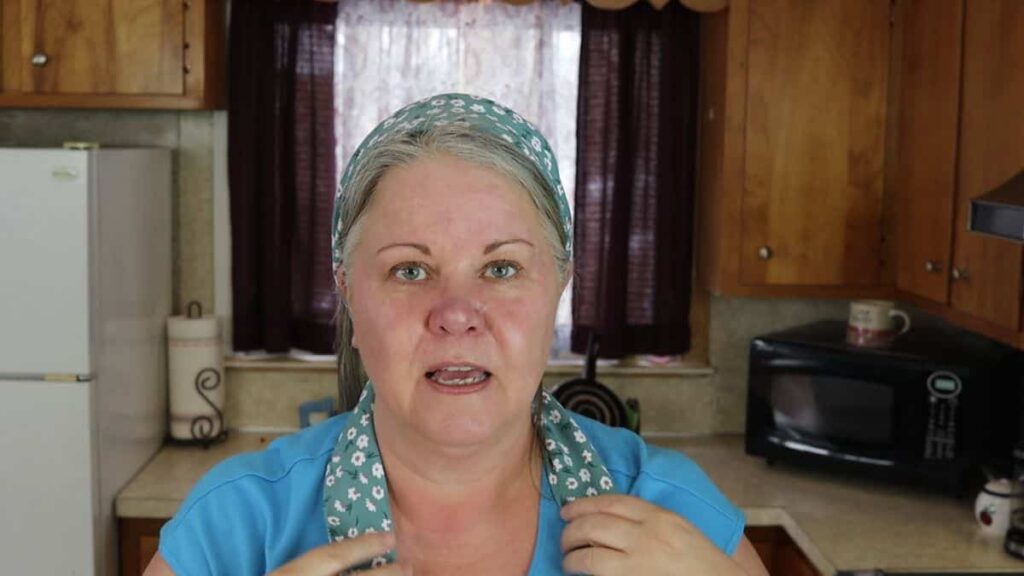
Snuggly bring one side up around your head and tuck it into the back of the scarf on the opposite side.

Then repeat with the other side.
HOW TO CARE FOR YOUR HEAD SCARF
Once you’ve mastered how to make a head scarf, you will want to learn how to take care of your finished piece.

And that is just as easy as the rest of this project. If you are using the jersey knit or knit material that is recommended for this piece, you can simply wash and dry it just as you would one of your t-shirts.
In the event that you decide to use a different fabric. to make your scarf, you will need to follow the laundering recommendations for that material.
Recommended For You
If you try this recipe and love it, please give it 5 stars! It supports my work more than you may realize, and I appreciate that a great deal!
You can also show your support by tagging me on Facebook @sustainableslowliving and/or Instagram @slowlivingbydianegail when you post a pic of your finished dish.

Wrap Style Head Scarf
Equipment
- sewing tape measure
- fabric pen
- Fabric scissors
- Sewing machine
Materials
- 1/2 yard 65" wide knit material
- coordinating thread
Instructions
- Measure and cut fabric: Mark and cut a 12" wide by 65" long rectangle from the knit fabric.
- Fold fabric: Fold the fabric in half lengthwise with right sides facing each other.
- Sew the seam: Stitch along the long raw edge using a ¼"–½" seam allowance. Backstitch at both ends to secure.
- Turn right side out: Flip the fabric tube right side out through one of the open ends.
- Trim excess thread: Neatly trim any loose threads from the edges.
- Ready to wear: Style and tie your head scarf however you like—wrap, twist, or tuck to suit your look.
Video
Notes
- Use stretch fabric: Jersey knit works best for a snug but comfortable fit that stays in place.
- Adjust width as needed: For a slimmer or wider scarf, modify the initial 12″ width based on your preference.
- Double for volume: Layer two scarves in coordinating fabrics for a bolder look.
- Secure with bobby pins: If your hair is slippery, pin in place for extra hold.
- Storage: Roll and store flat in a drawer or on a scarf hanger to prevent stretching.


This wrap-style head scarf is such a simple and stylish way to add a personal touch to your look! The soft jersey knit makes it comfortable to wear while giving you the perfect amount of stretch and drape. If you try making it, I’d love to hear how it turned out or if you added your own unique twist to the design. Drop a comment below to share or ask any questions — I’m always here to help!